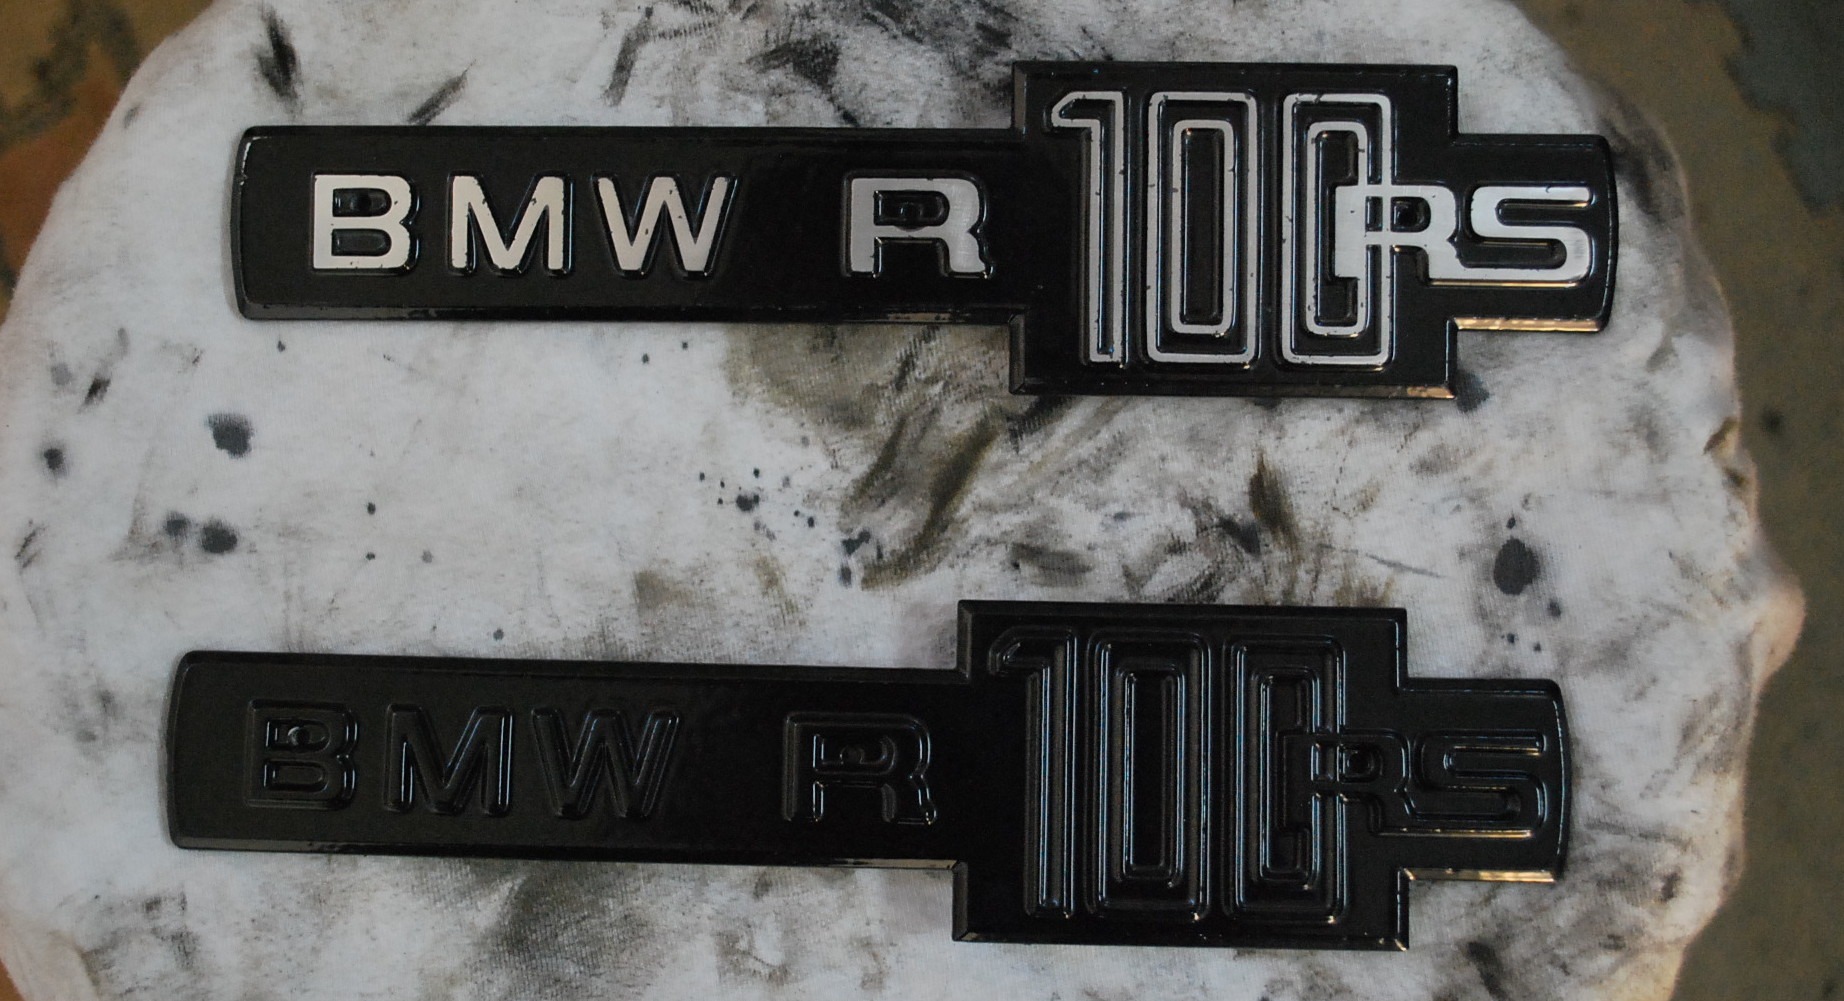
BMW R100 RS Cafe Racer by Troydon at Oshmo
BMW R100 RS by Troydon at Oshmo
My love of motorcycles and actually anything with 2 wheels started from a pretty early age going for long breakfast run rides with my grandfather (William Billson). I still remember he use to strap me to him with a belt of some sorts. He lived in Port Elizabeth, South Africa so I only got to spend time with him when our family went to visit for holidays as we lived in Johannesburg. I always looked forward to heading off on new adventures on one of his many bikes. Bill was a member of the kickstart club and he had fully restored vintage bikes ranging from a KS 350 Velocette, two BSA’s, a Royal Enfield Bullet, a Norton Commando, Matchless Silver Hawk, BMW R60/2 and an Ariel. He stuck to mainly British motorcycles with the exception of his BMW 🙂 One of his favorites was his Velocette KS which I was blessed to receive as a gift when my grandfather passed. It is still in original restored condition as Bill left it and I will do my best to keep it that way indefinitely. Veloce Ltd, was a small, family-run company based in the forth most visitied city in the UK, Birmingham. They somehow managed to compete with the British motorcycle giants such as Norton and Triumph and proudly produced this Velocette KS 350 pictured below.
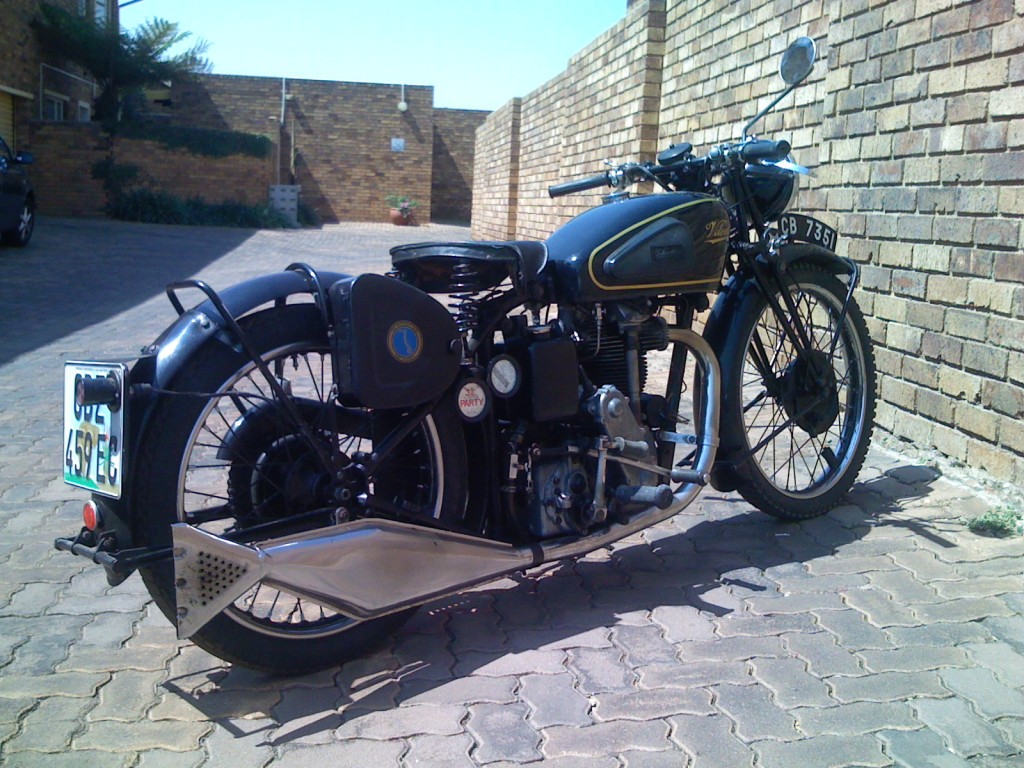
William Bilson’s immaculate 1936 KS 350 Velocette
Somehow even after being blessed to spend endless hours around some amazing motorcycles I feel like I was a bit too young to really appreciate it. By the time I got to my early teens I had pretty much forgotten about motorcycles and was on to various other things from any sport I could possibly compete in at school to some more out of the box things like BMX, DH mountain biking racing, snowboarding and skateboarding.
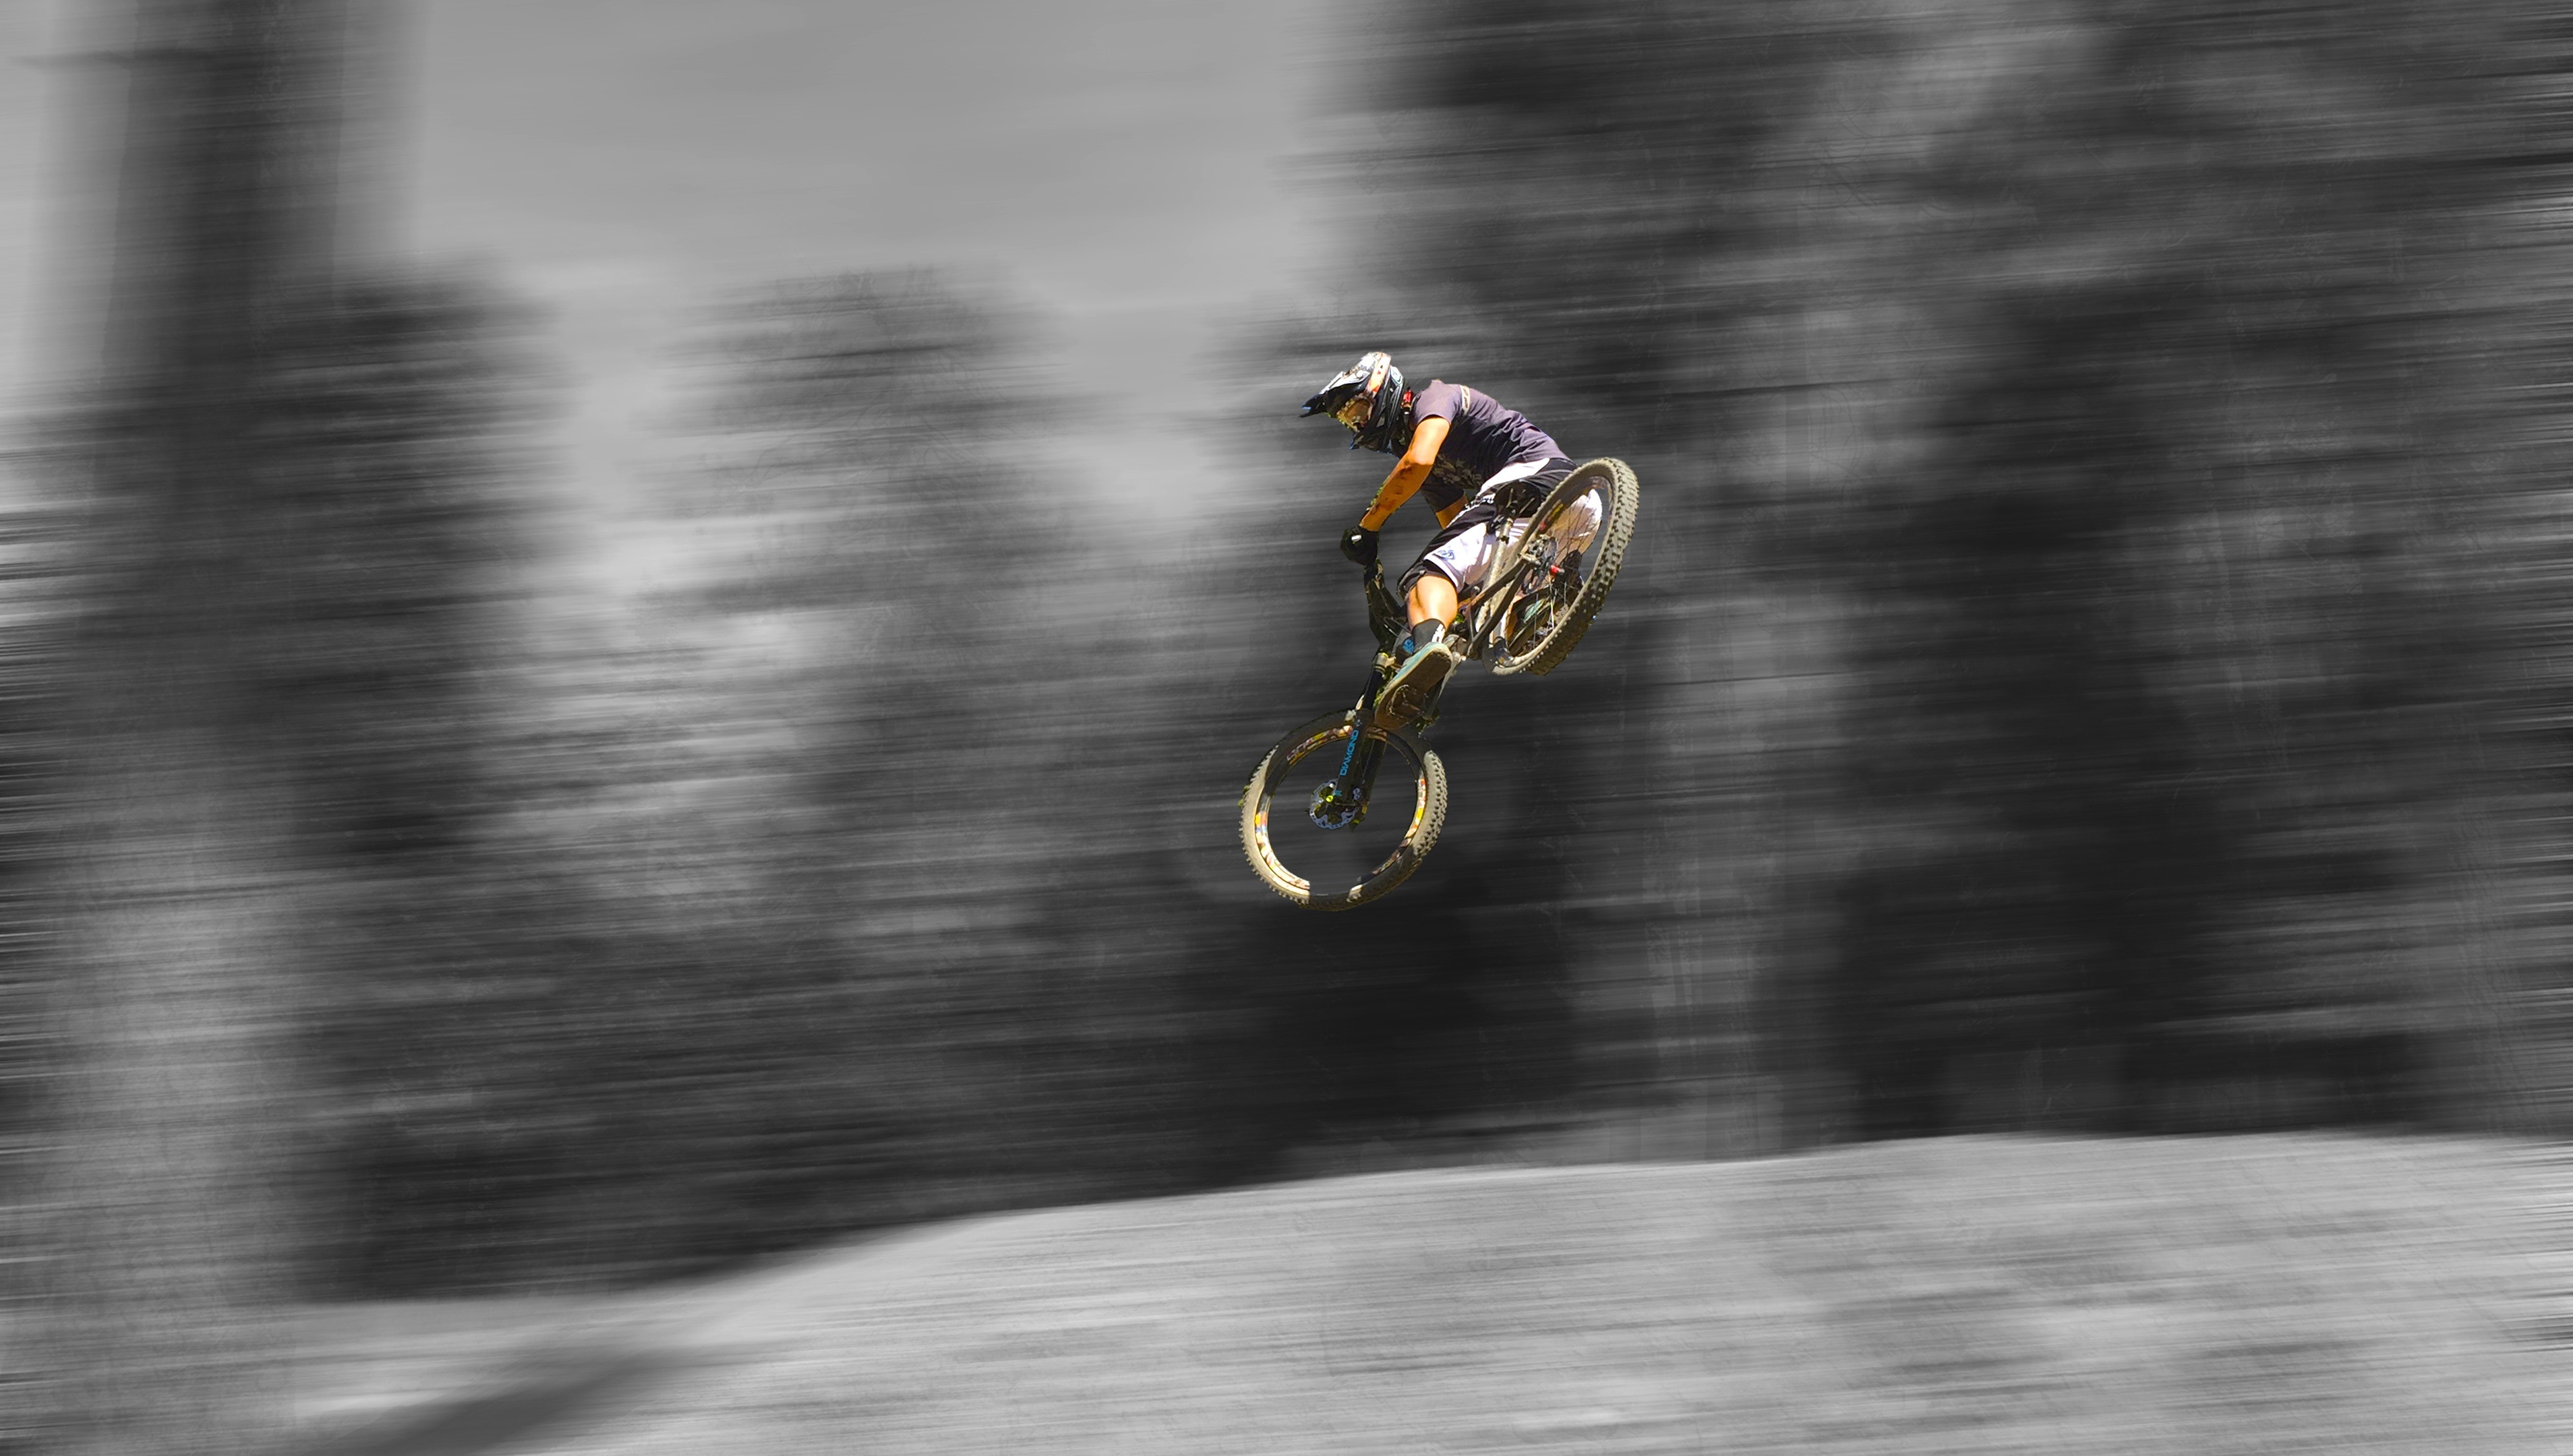
Troydon, whipping his mountain bike at Snow Summit bike park, California
I have recently re-kindled this motorcycle passion much later in my life at the age of 37 when I got my hands on a 1975 BMW R75/6. It was in pretty good running condition but I had seen a bobber style R90 that I really liked so I thought i’d give that a go. I kept things pretty simple mainly cleaning it up with some black powder coating of various parts, cutting the frame and shortening the seat, changing the handlebars and speedometer setup and also shortening the pipes by replacing the stock mufflers with some after market ones.
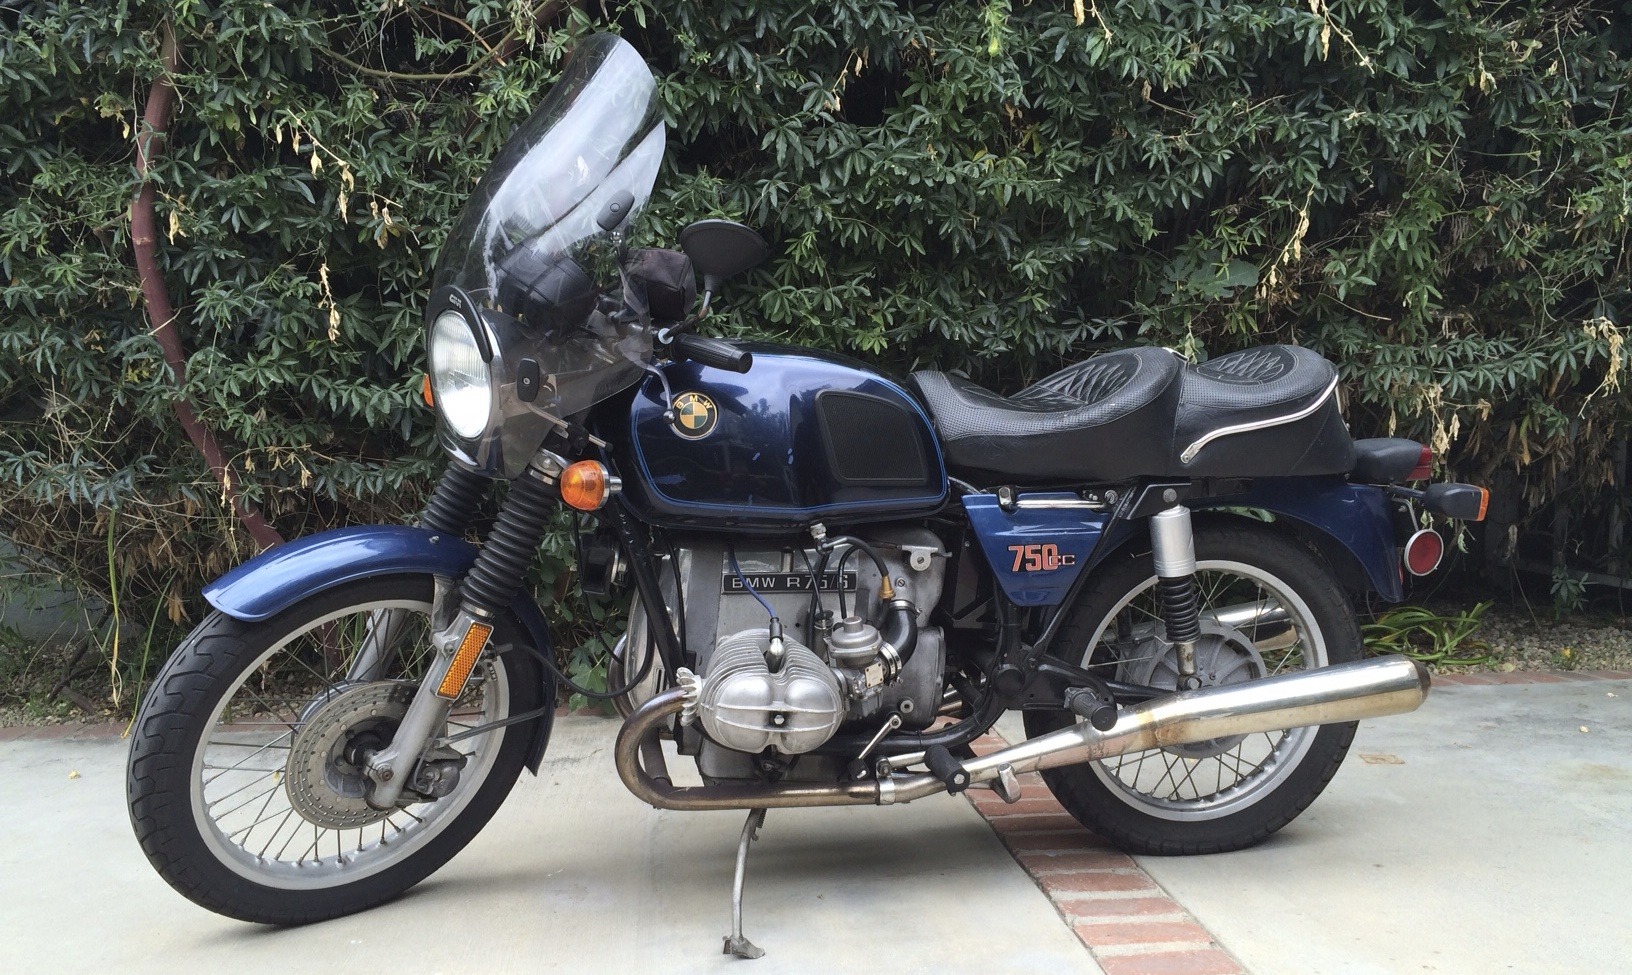
1975 BMW R75/6 Before
I wish I had a better side on picture of the end result but this is the best one I can find. I ended up letting this one go in order to fund the new one which I am working on with Osh and is the real reason for this blog will I get to pretty soon.
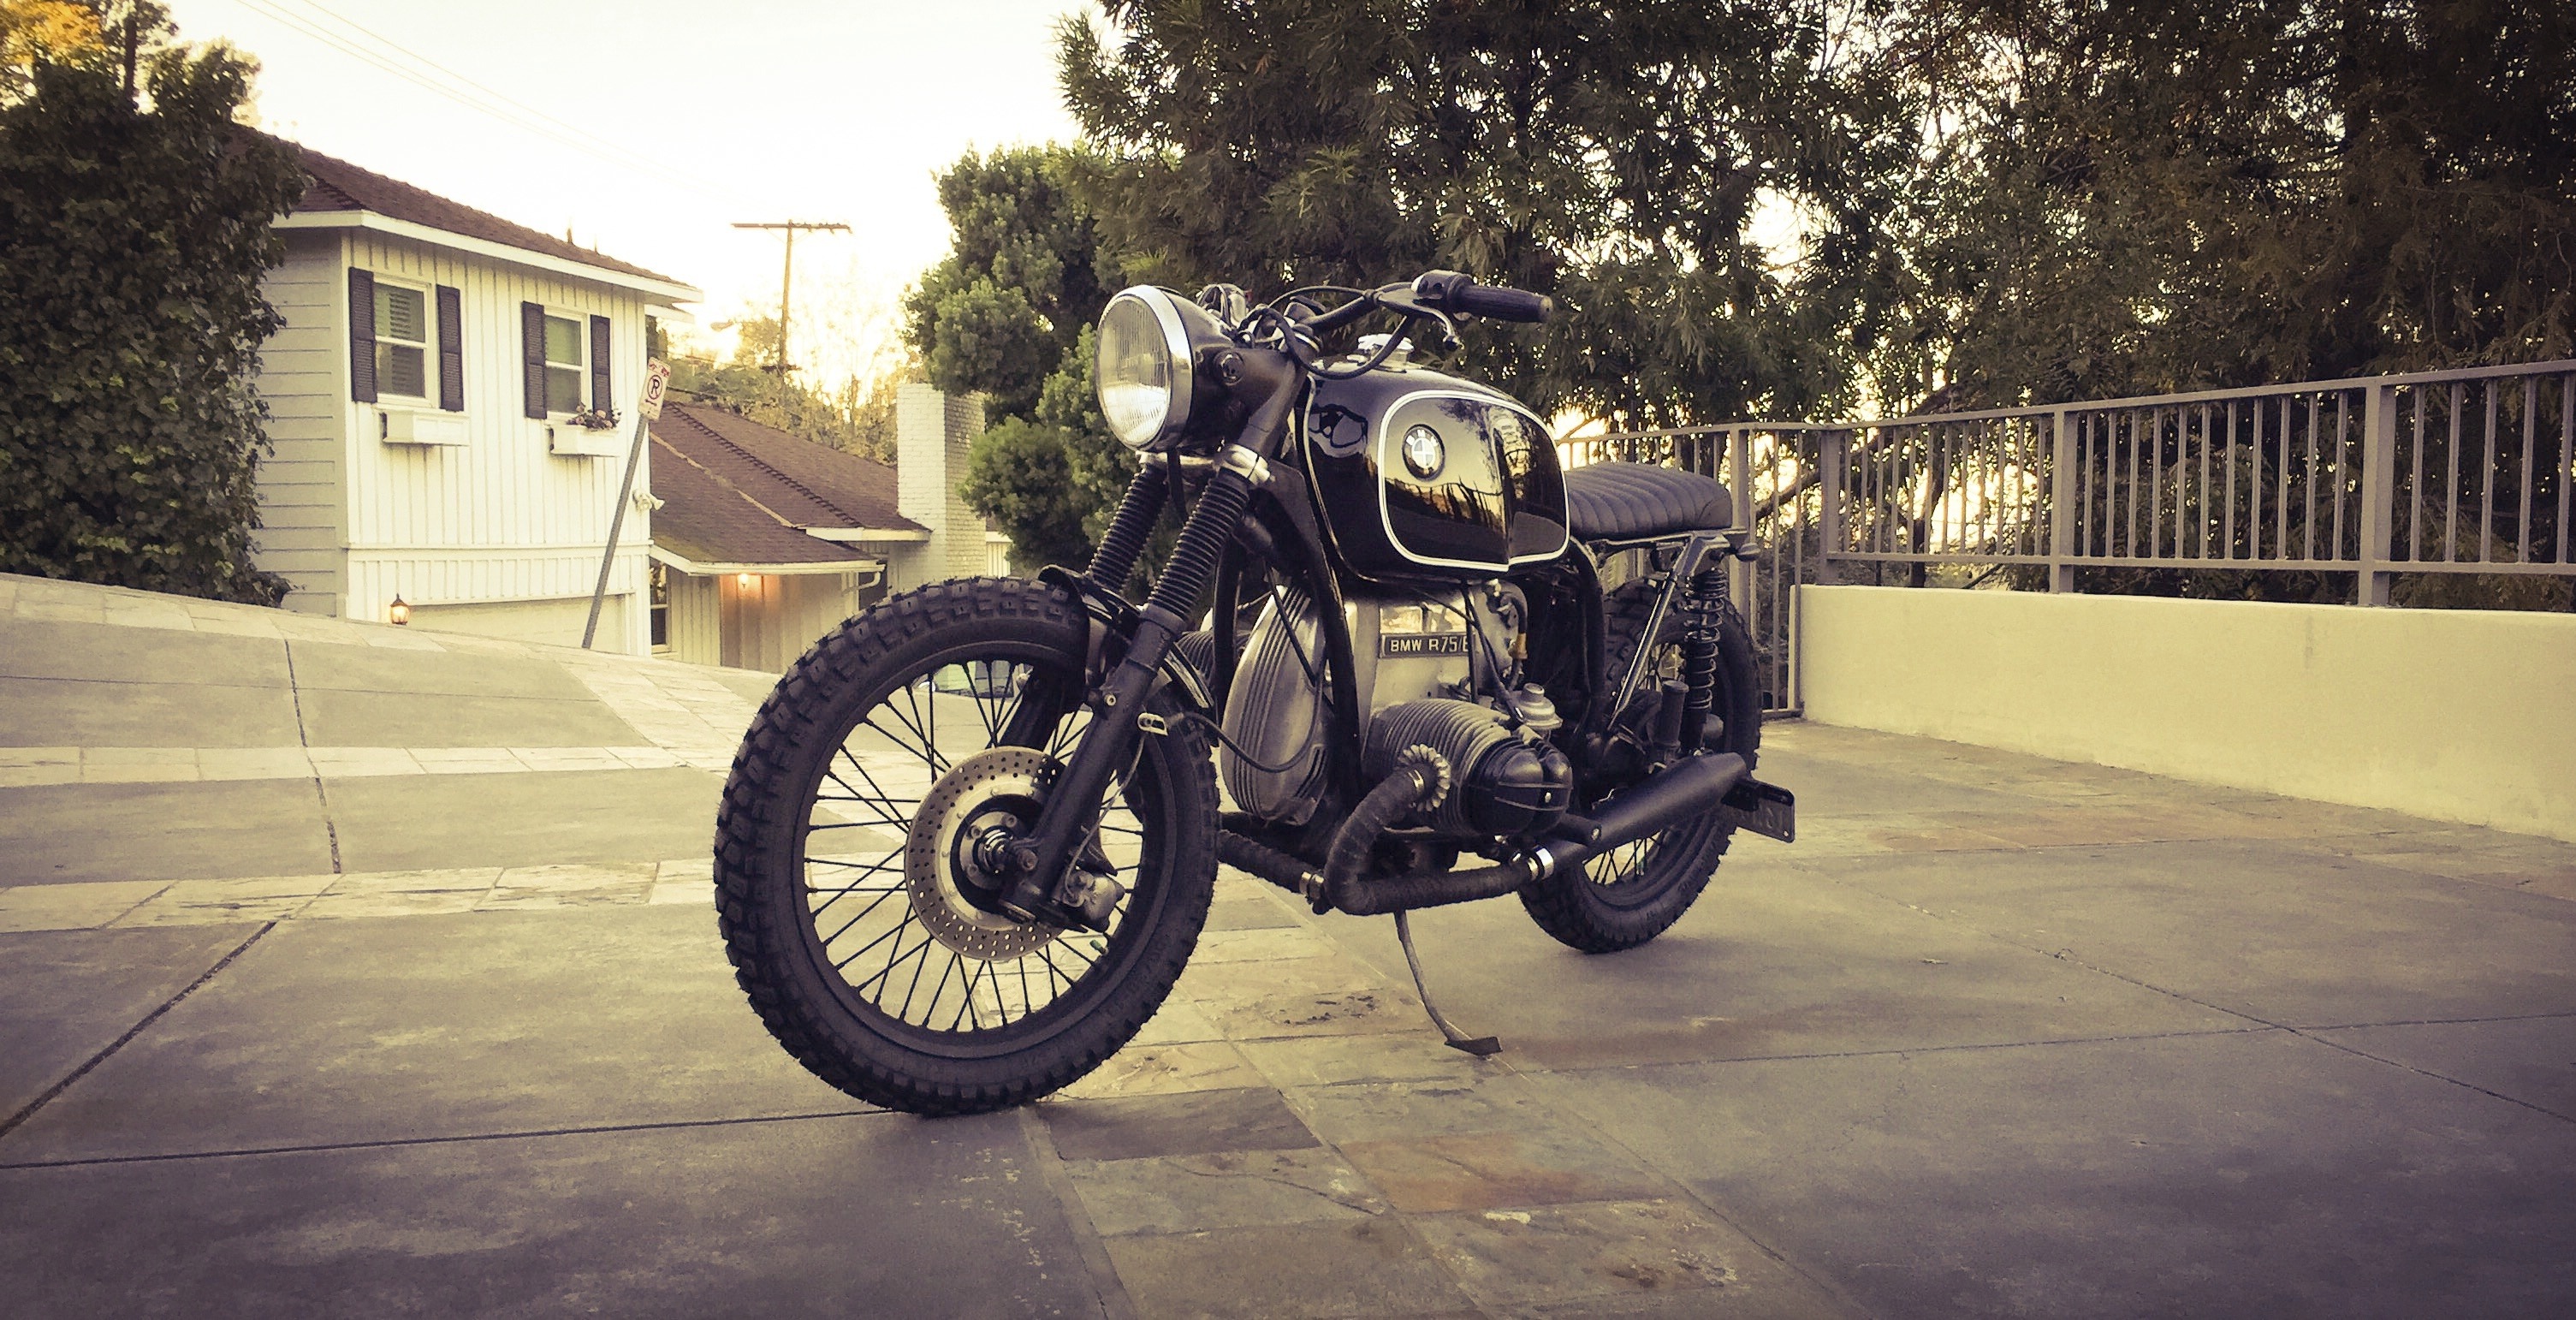
1975 BMW R75/6 After
Osh has been so gracious, and after only a short visit to his shop he very kindly offered to help me and even offered for me to bring my bike down to the shop to work on it there with him. I am very excited about this next project and am so thankful to be able to do it with the help of someone who is extremely well versed in manufacturing custom parts. Osh has some amazing ideas and I am super excited about what we are going to be able to do on the BMW R100 RS which I would not be able to do without Osh’s help.
On to the BMW R100 RS being built at Oshmo
Ok, so on to the 1988 BMW R100 RS which is the real reason for this blog. I chose this model year and trim partly due to what I could find on craigslist but I also had a few other reasons. I realized after working on the 1975 R75/6 that it would be a huge pain to change up the headlight due to the fact that all the wiring for that bike sits inside the front headlight housing bucket. On the R100 RS it does not so that makes it much simpler to change out the headlight for something more suitable for the look of the build. After doing a bobber style build on my first bike I have decided to go with more of a cafe racer feel for this next one. A few other things that I like about this bike is the dual front brakes with brembo calipers and handlebar master cylinder and also the mono lever shock which should really help in allowing the rear of the bike to feel nice and open once we are done. The bike I managed to find as a donor bike for this project is pictured below. This is partially stripped down but unfortunately I do not have any pictures prior to this one of the bike.
Donar Bike
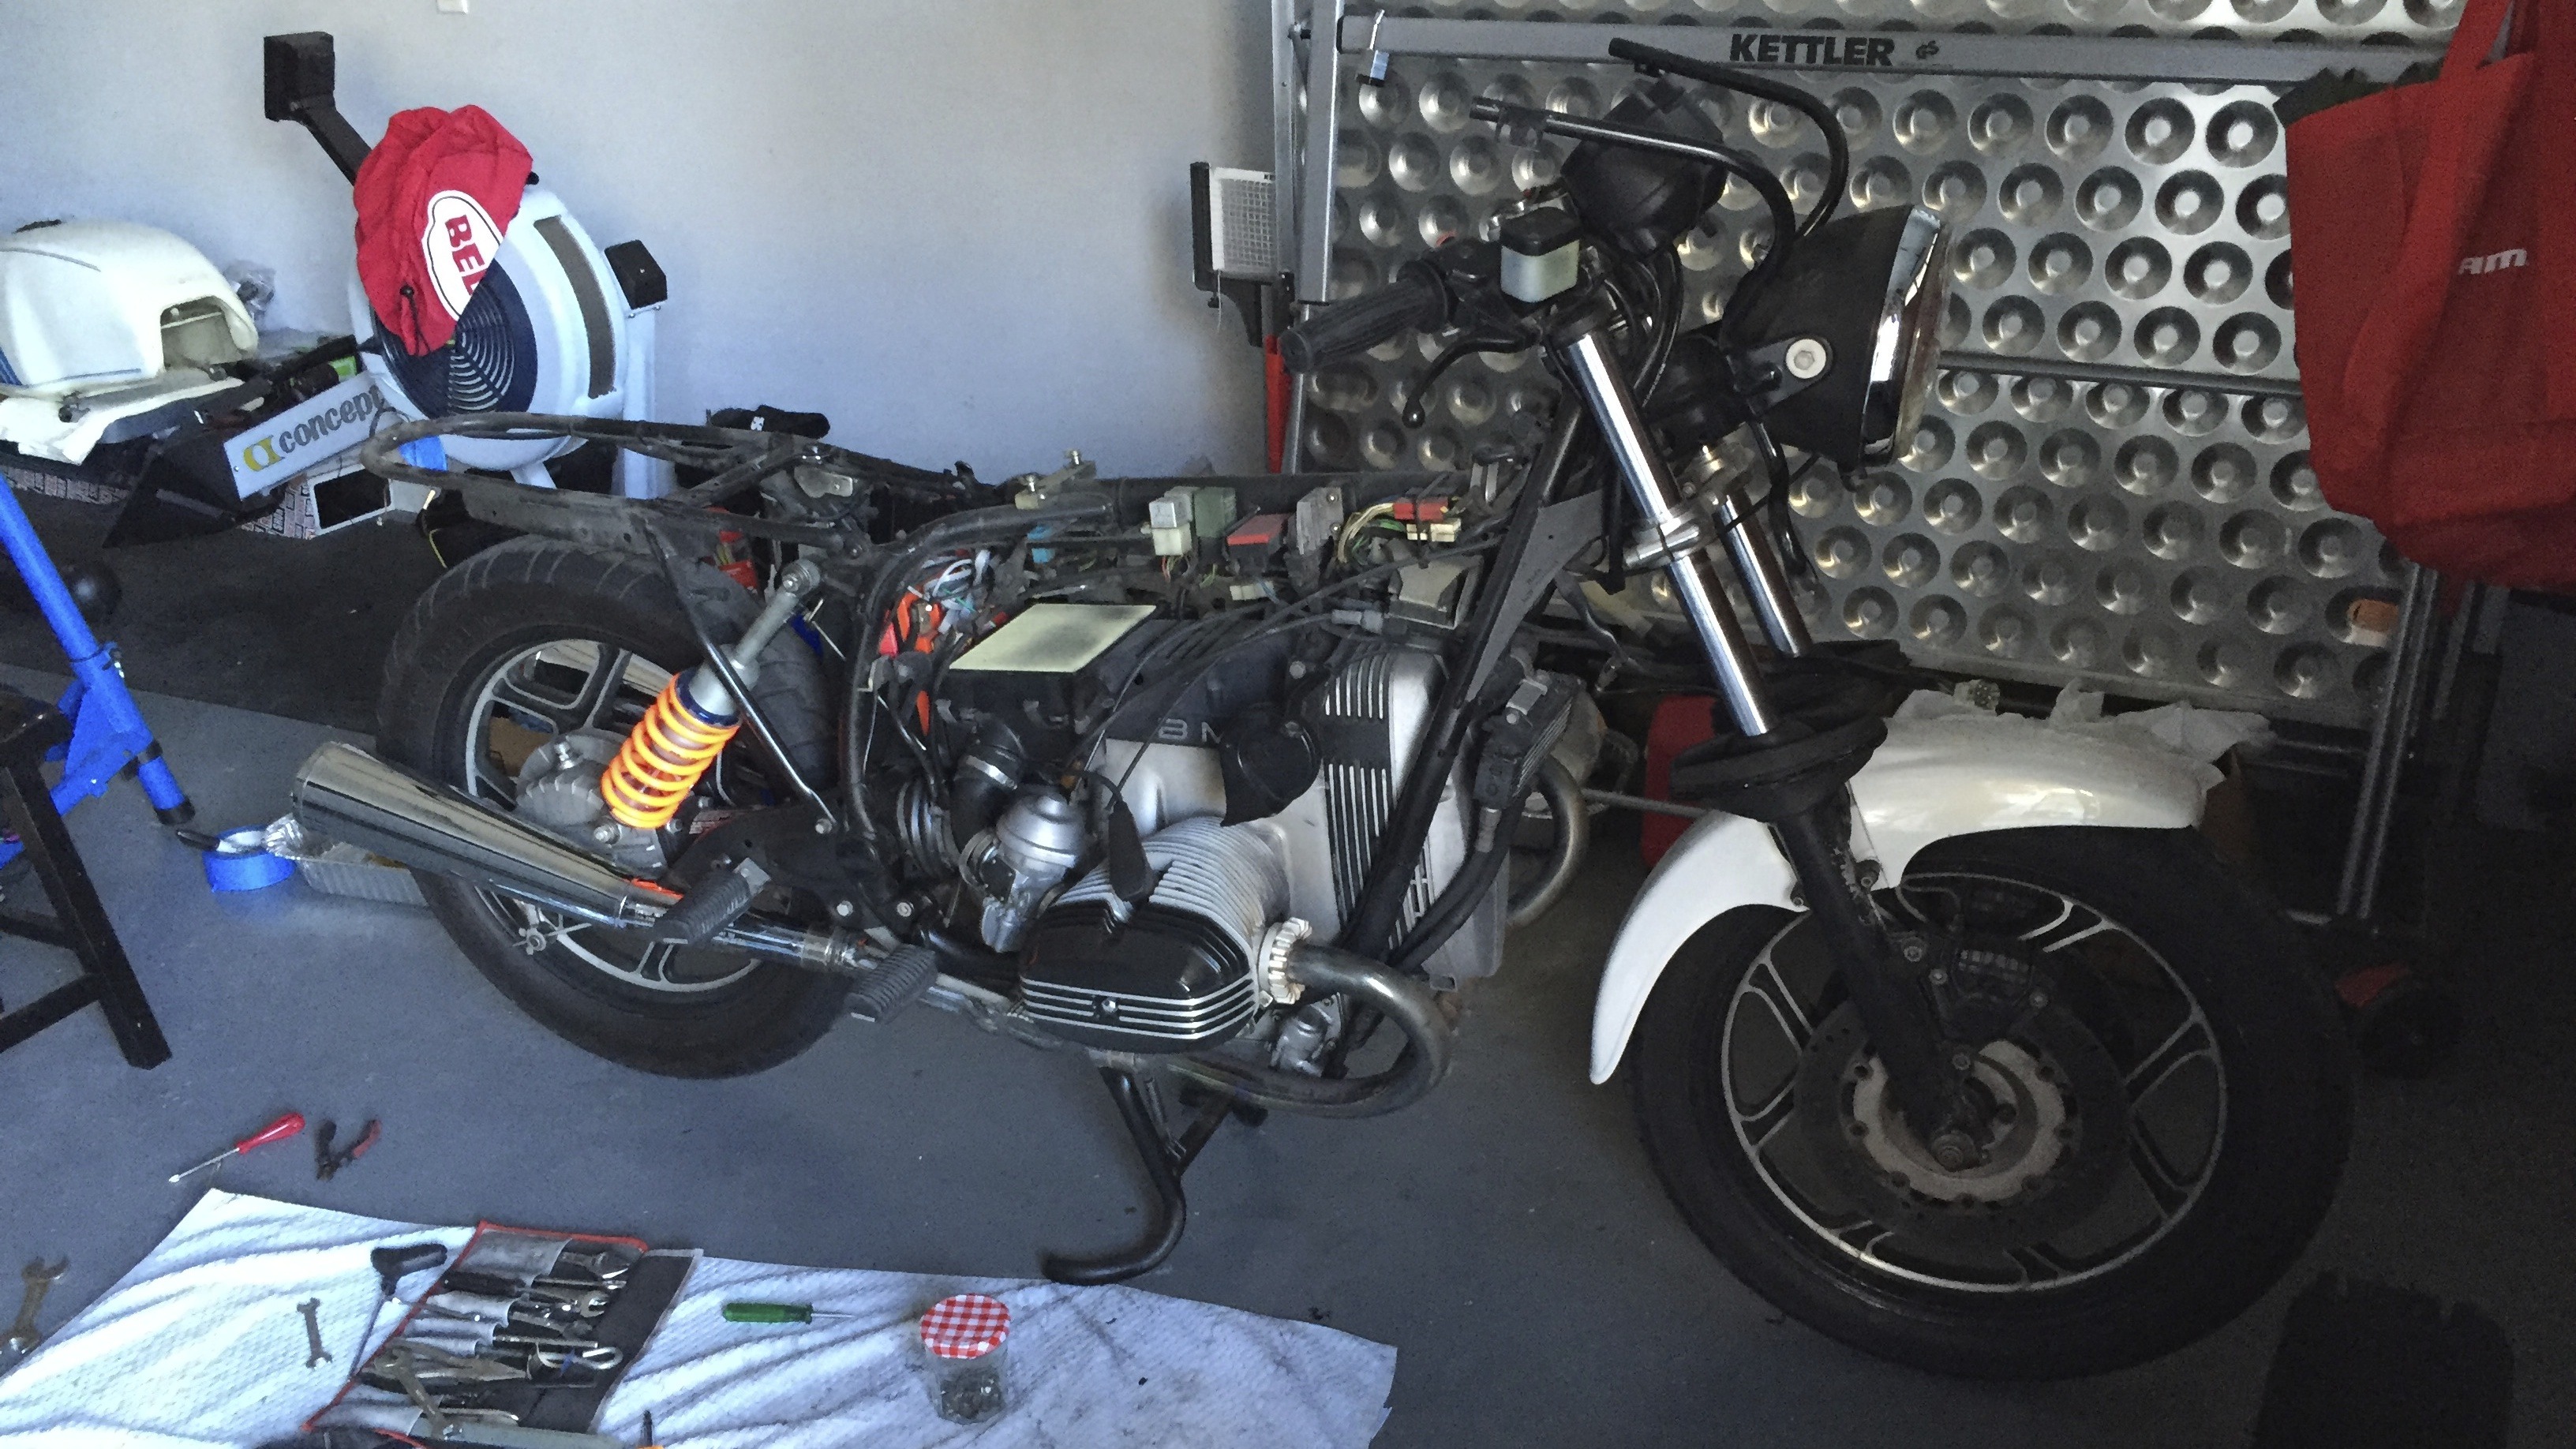
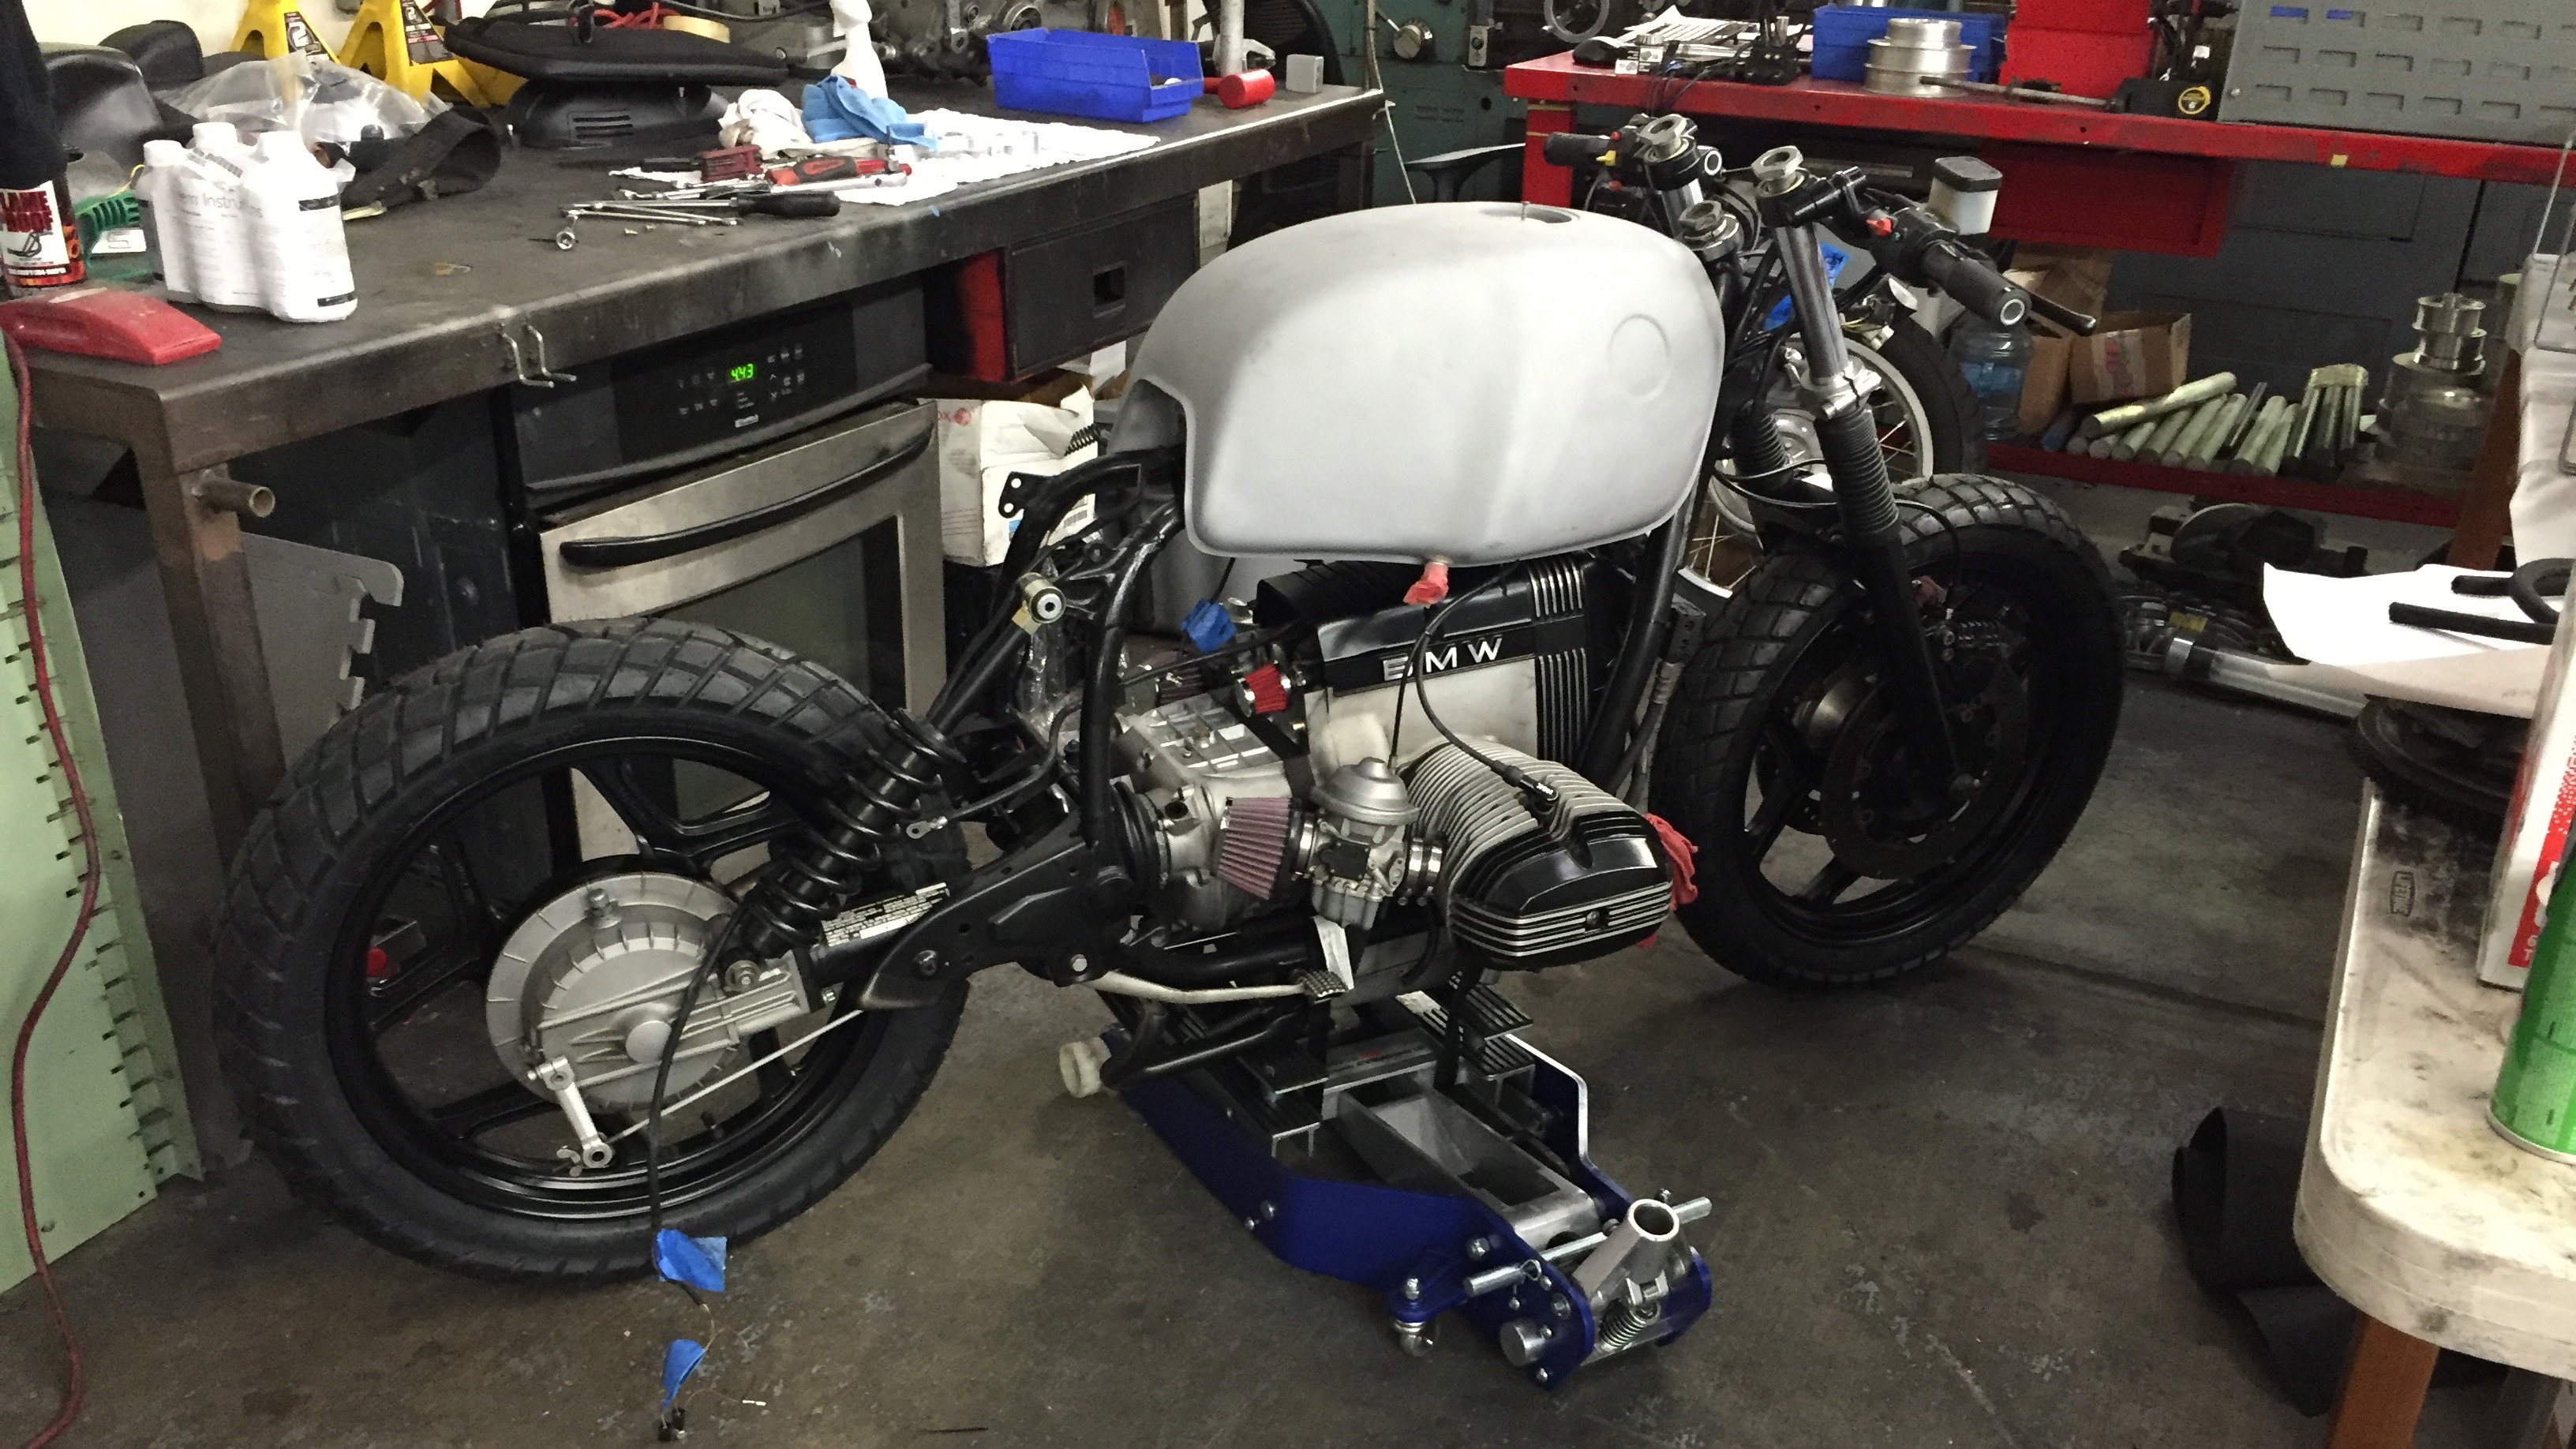
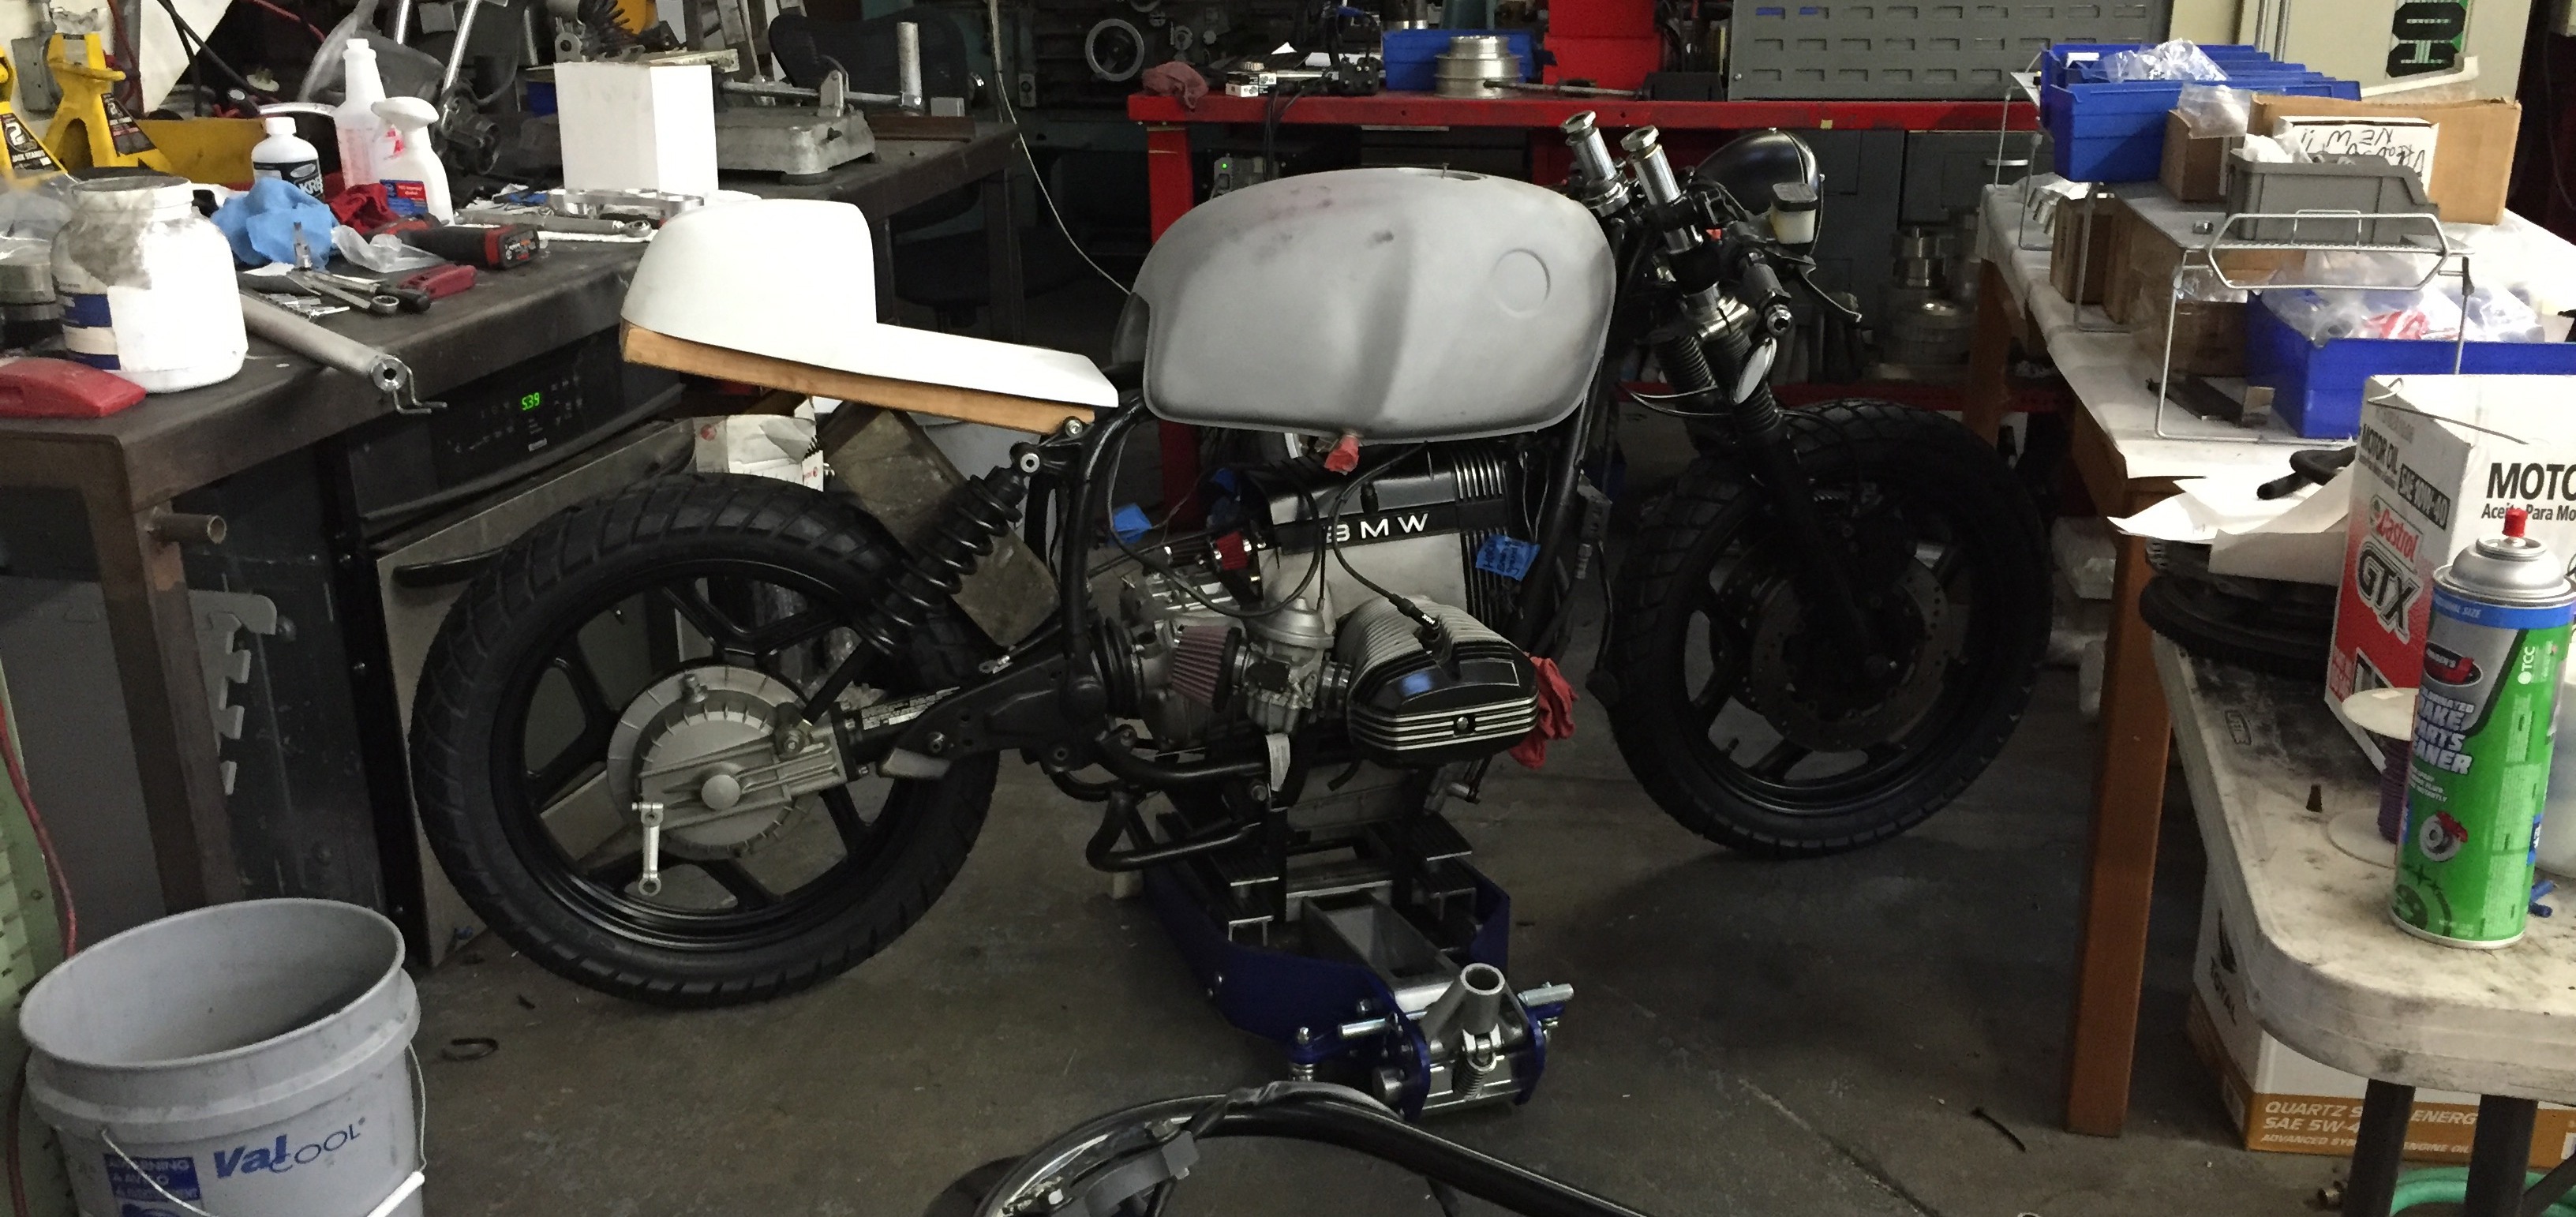
This next picture was the state of the BMW R100 RS when I met Osh. I had stripped it down and removed pretty much everything except the engine and drive shaft in order to get some parts powder coated and get the process of turning this baby into a cafe going. These bikes are pretty simple to strip down as far as I did in the following picture and it was done with very few tools. You could honestly do it with just the tool kit that comes with the bike under the seat. I even managed to switch out the tires on the R75 I spoke about earlier with some tire levers that I found in the tool kit. I am however not sure if those were standard issue or simply something the person that I purchased the bike from had added to his tool kit.
The 1988 BMW R100RS stripped down in my garage with the BMW included tool kit.
Ok, so as I mentioned in my first post, Osh very kindly offered to help out on the bike while also allowing me to do work on it myself at his shop. My next step was how to get the bike down there in this state. I rented a U-haul truck and got my neighbor (who is actually a close friend) to help me pick it up and throw it in the back of the van and off I went down to the oshmo bike shop located in LA. I had already gotten a few parts back from powder coating back so I threw them in the u-haul and took them down too.

Fresh tires on newly powder coated wheels plus additional parts that needed some love
So I got the bike down to Osh’s shop and the real work was about to begin. I threw the wheels on because I had to see what she was going to look like with her newly powder coated rims and fresh tires. I also put the fork back on after first replacing the seals. It still needs fresh oil but I will do that closer to the end of the build. I wanted to get the fork and front wheel back on the bike because I knew that It would be necessary in order to figure out what I was going to do with the front end. I had an idea to lower the front of the bike and initially I was going to look into modifying the fork internally to reduce the travel. But after a little bit of thought and seeing a few pictures online I had an idea of potentially inserting the fork tubes about 45mm through the top triple tree. This would allow the bike to drop 45mm lower in the front. To make sure this was safe I had to measure the mount of travel the fork has which was 6″. I then made sure that even once the fork tubes were inserted 45mm past stock setup that the front tire would not get too close or even hit the lower triple tree on full bottom out compression of the front fork. It worked out that we have about an inch and a half between top of fork brace which sits just above the tire to play with at full compression so technically we could have gone even lower but I was happy with this amount. This will all still be finalized once the triple tree fork clamp that Osh is making for me is done.
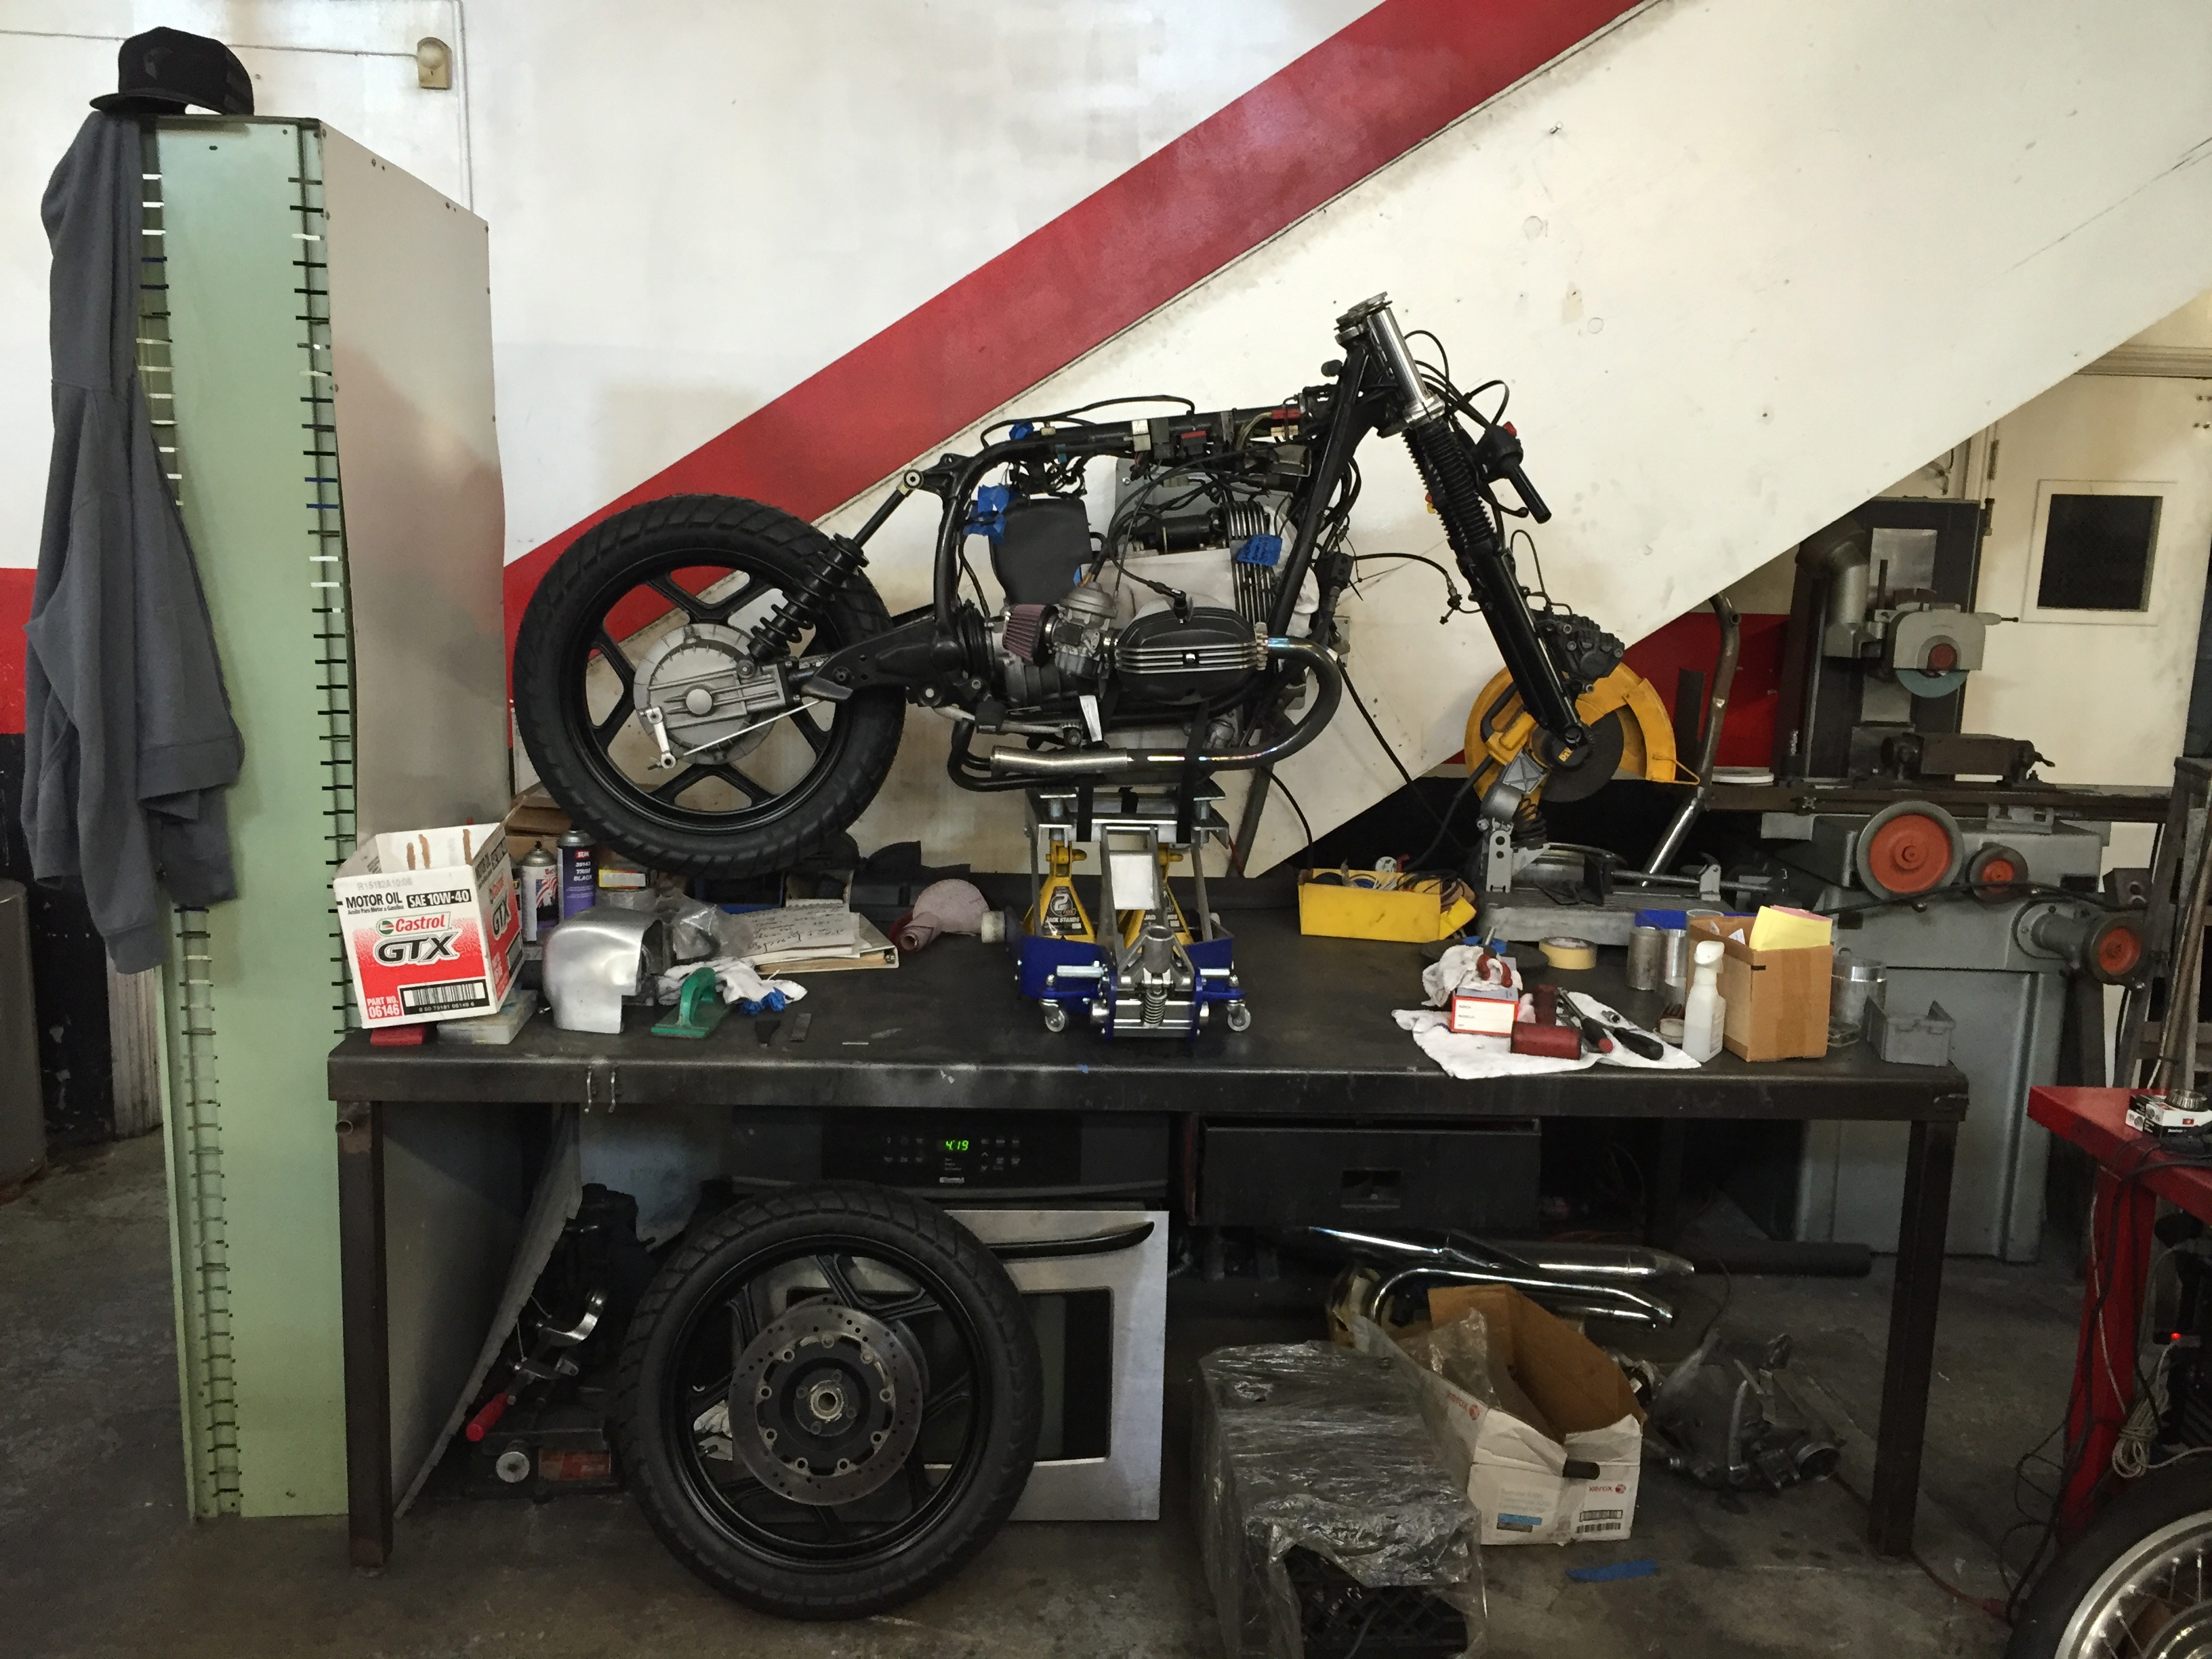
BMW R100RS down at Osh’s shop
Next thing that needs some tweaking are the clip on bars that I purchased for the bike. This year model comes with 38.5mm stanchion tubes which doesn’t seem to be a very common size. Most of if not all of the older models had 36mm stanchions which are a much easier size to buy clip ons for. With a little advice from Osh it was decided that I should purchase 38mm bars and we would bore them out the extra 0.5mm in order to have a snug fit. I got a set of paolo tarozzi clip ons which I chose because I had seen them on another bike in the shop and I really like the flexibility on how many setup options you have with there design.
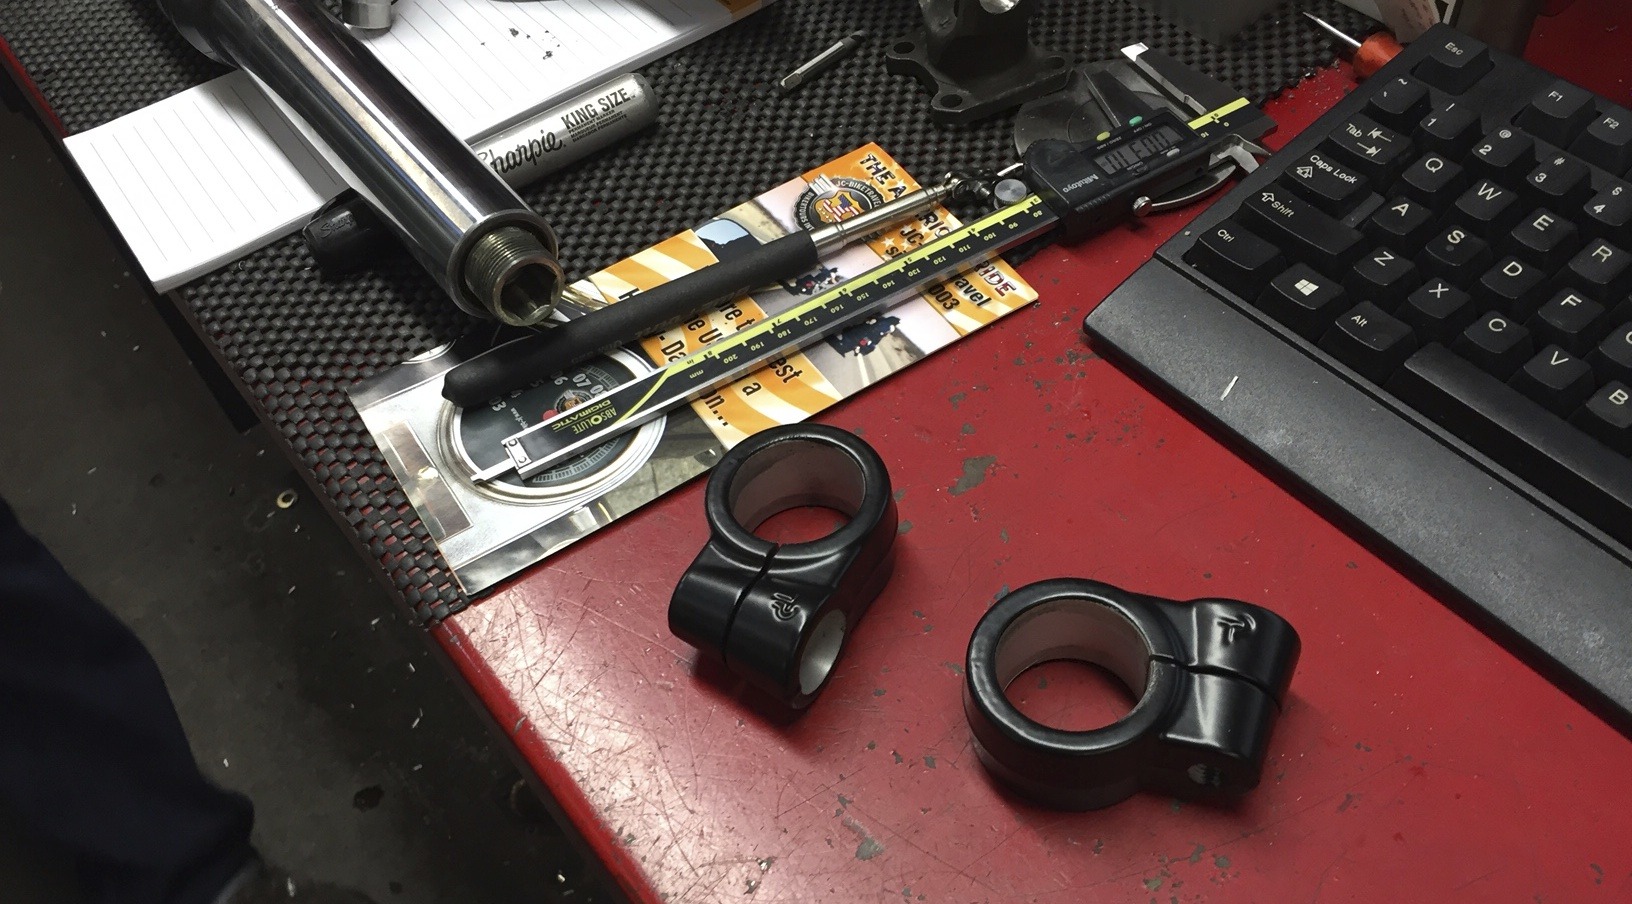
Paolo Tarozzi clip on clamps that need to be bored out to 38.5mm
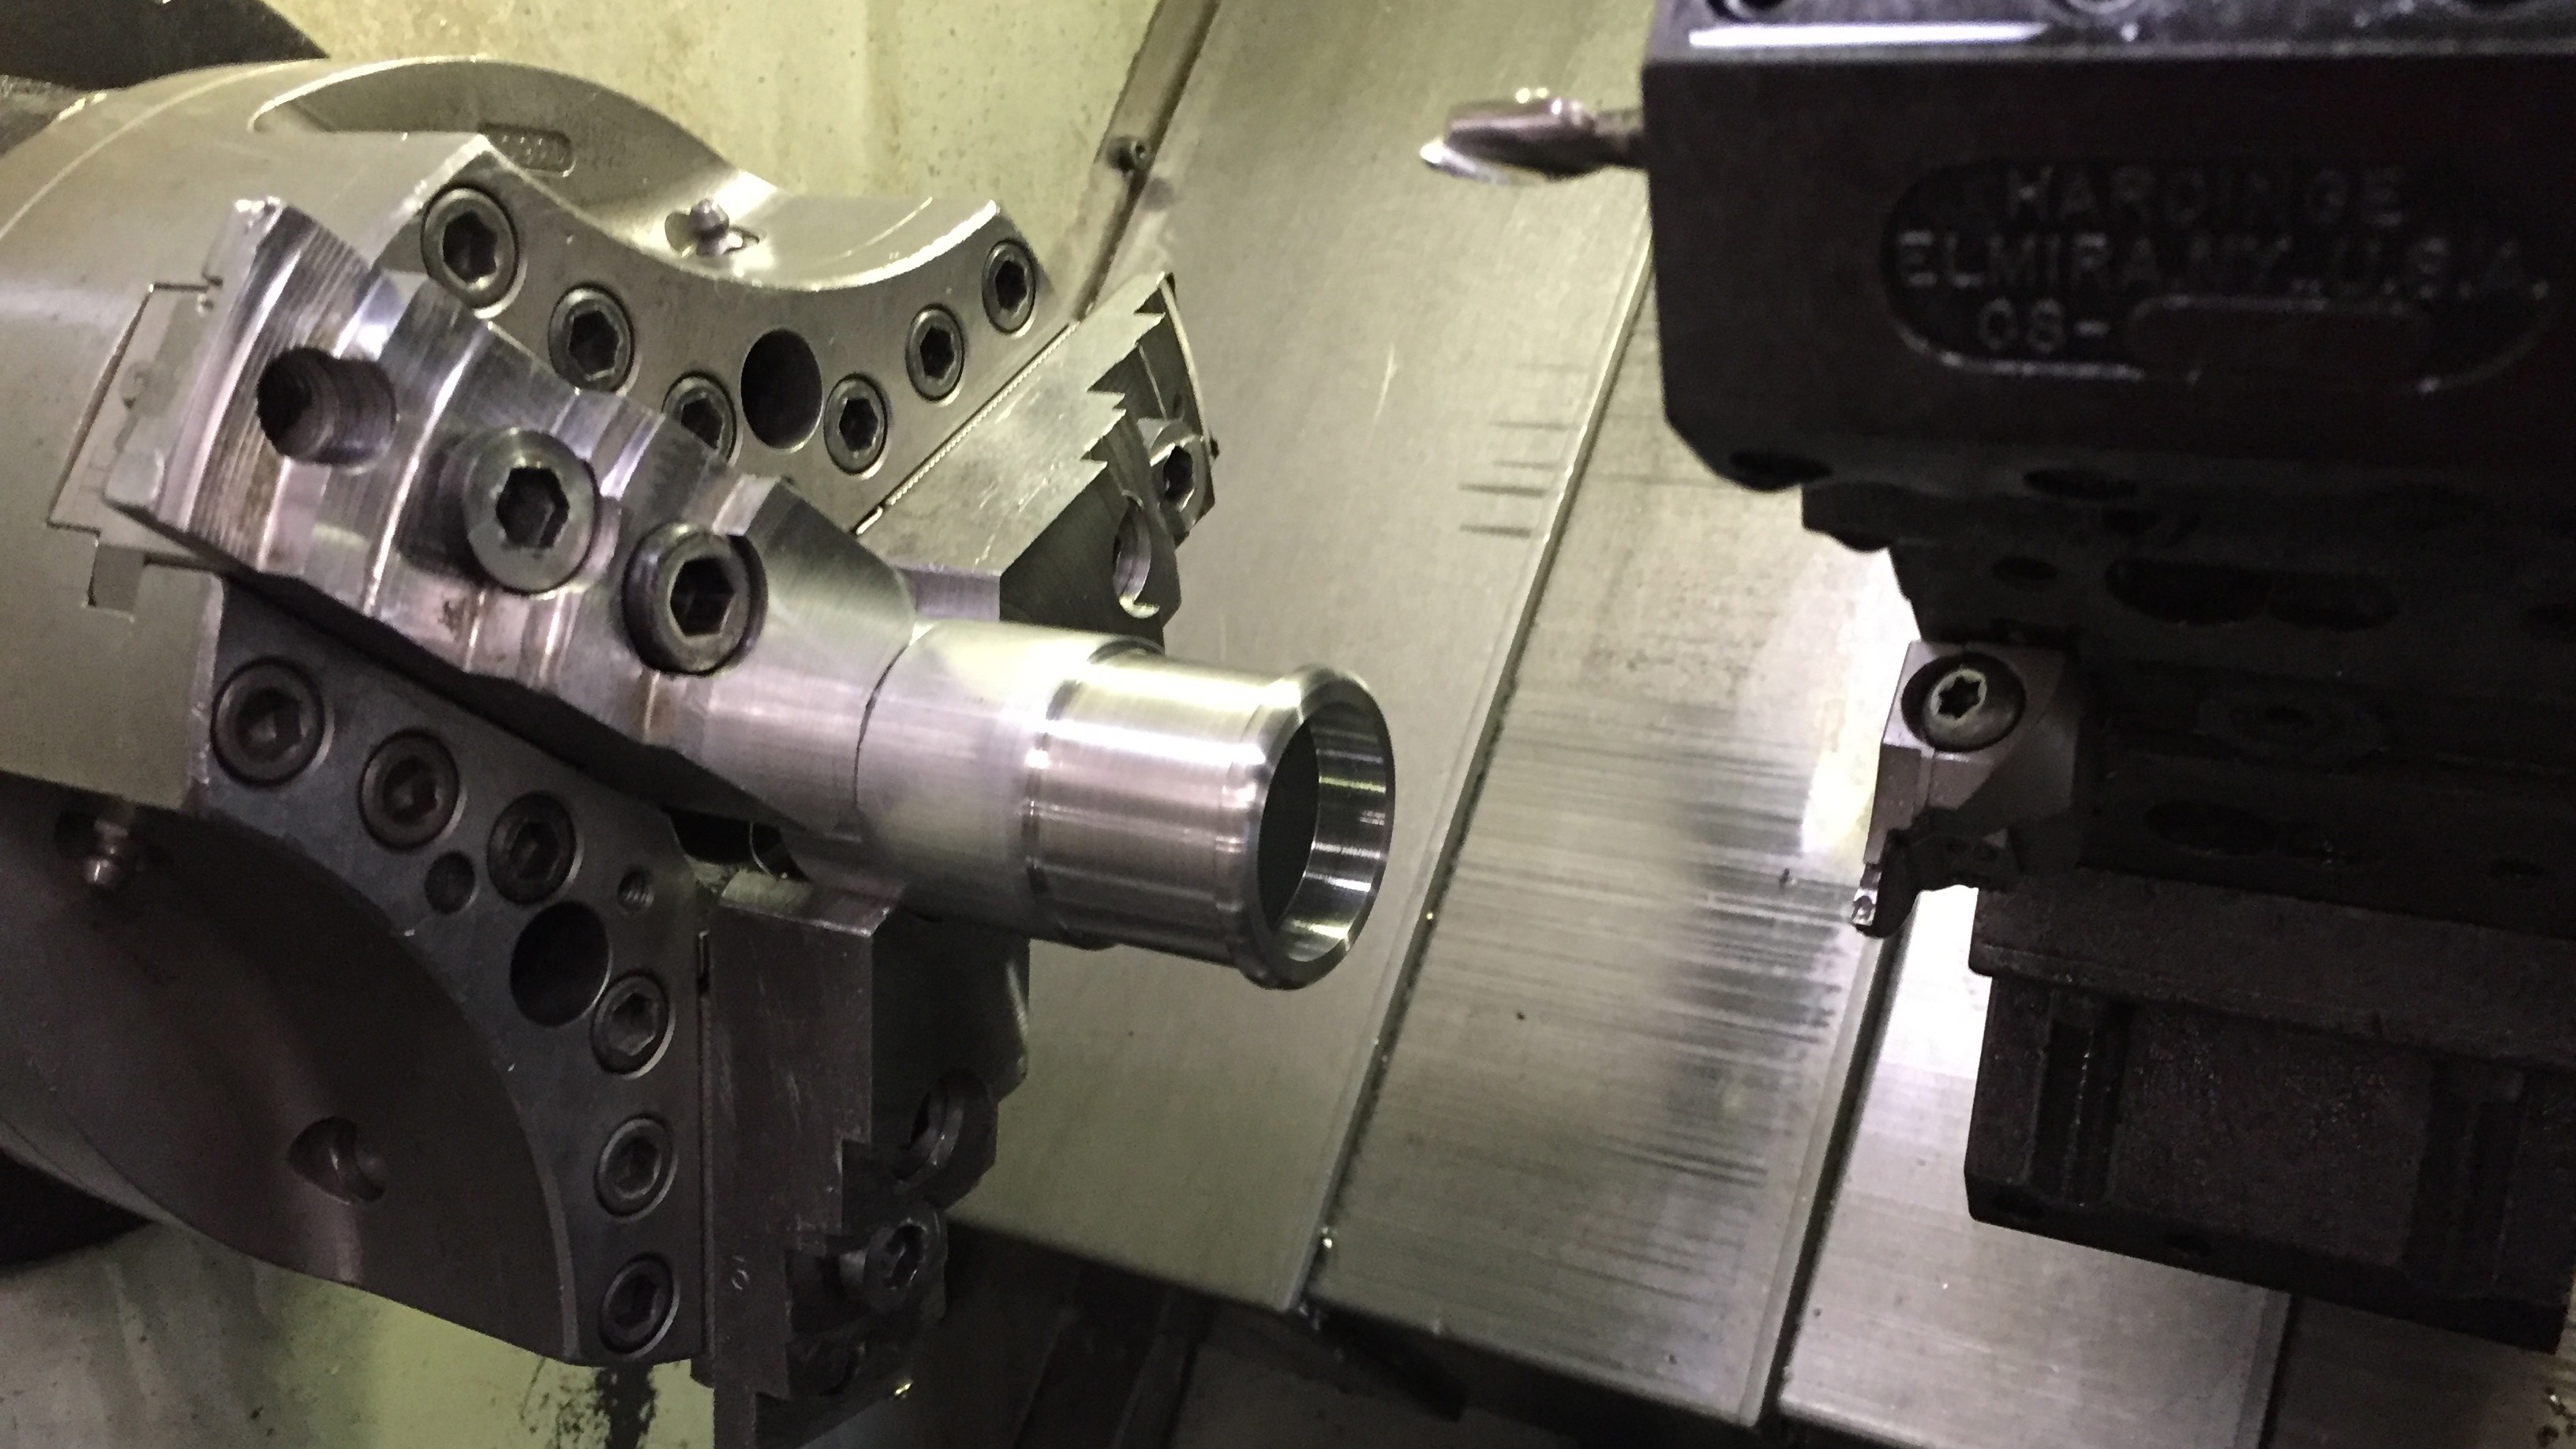
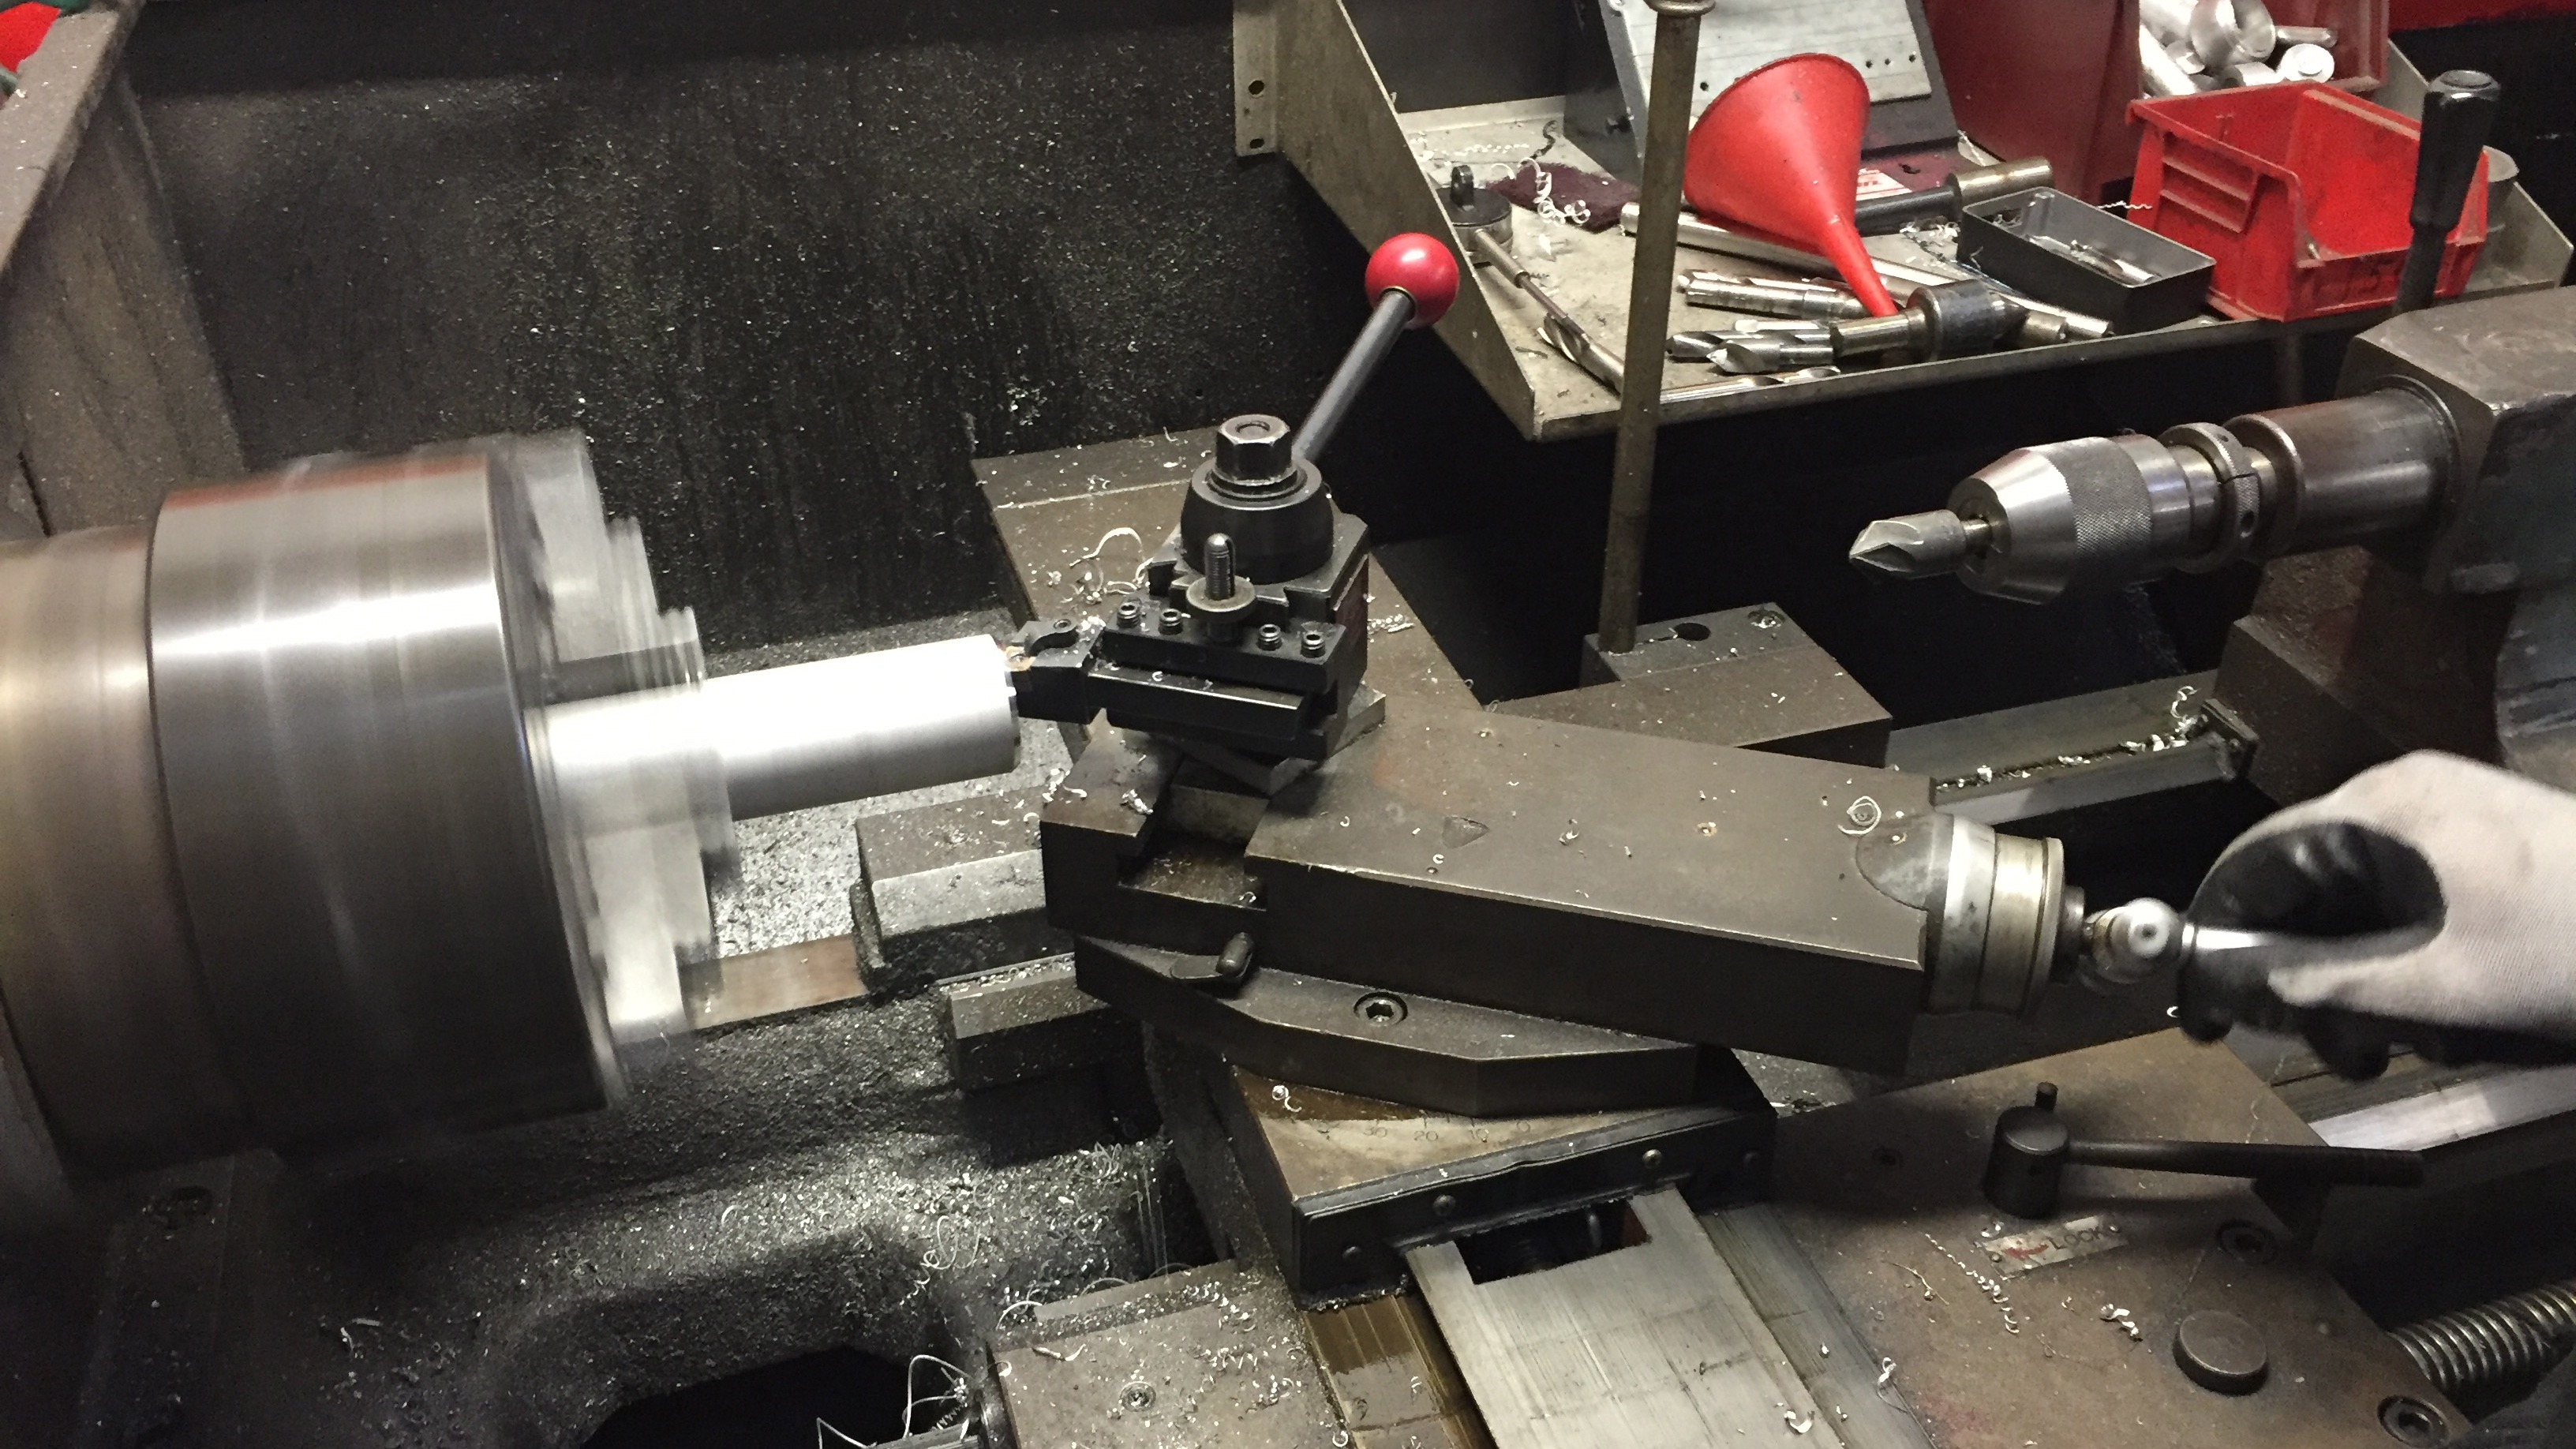
Osh helped me by boring out the clamps to an internal dia of 38.5mm and they now fit perfectly on the stanchions. He ended up doing this on the lathe because I was silly enough to powder coat them before doing this step. Osh therefore had to make sure that he did not damage the clamps by holding them with something. Osh machined a piece of aluminum to fit inside the original dia. That way he did not need to grab the actual clamp with anything.

Tarozzi clip on clamps being bored out by Osh
This positioning of the clip ons is my first idea. I have yet to decide for sure if this is the way I will run them. The plan in the have the fork stanchion protrude through the crown by about 45mm which is the thickness of the clamp. The top triple tree with sit just below the clamp and this will help to get the desired lowering of the front end without having to do anything internal to the front fork. The picture is simply the clamp on the stanchion. Once the upper triple tree is on the top of the bar clamp should sit flush with the top of the stanchion.
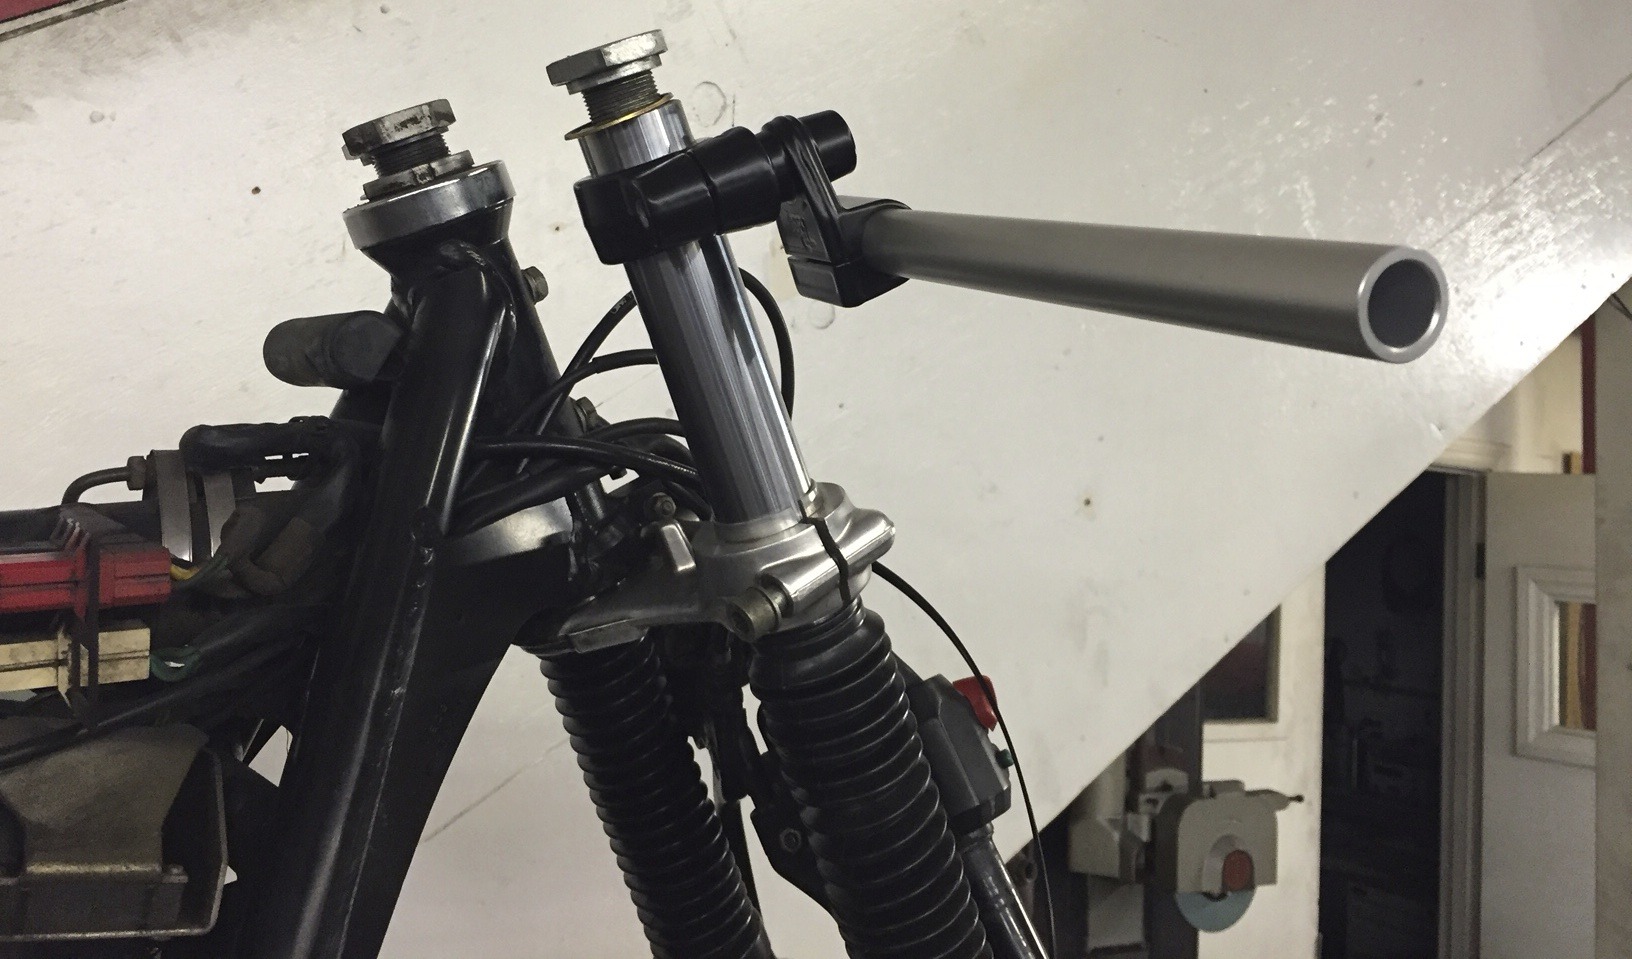
Tarozzi clip ons on the bike
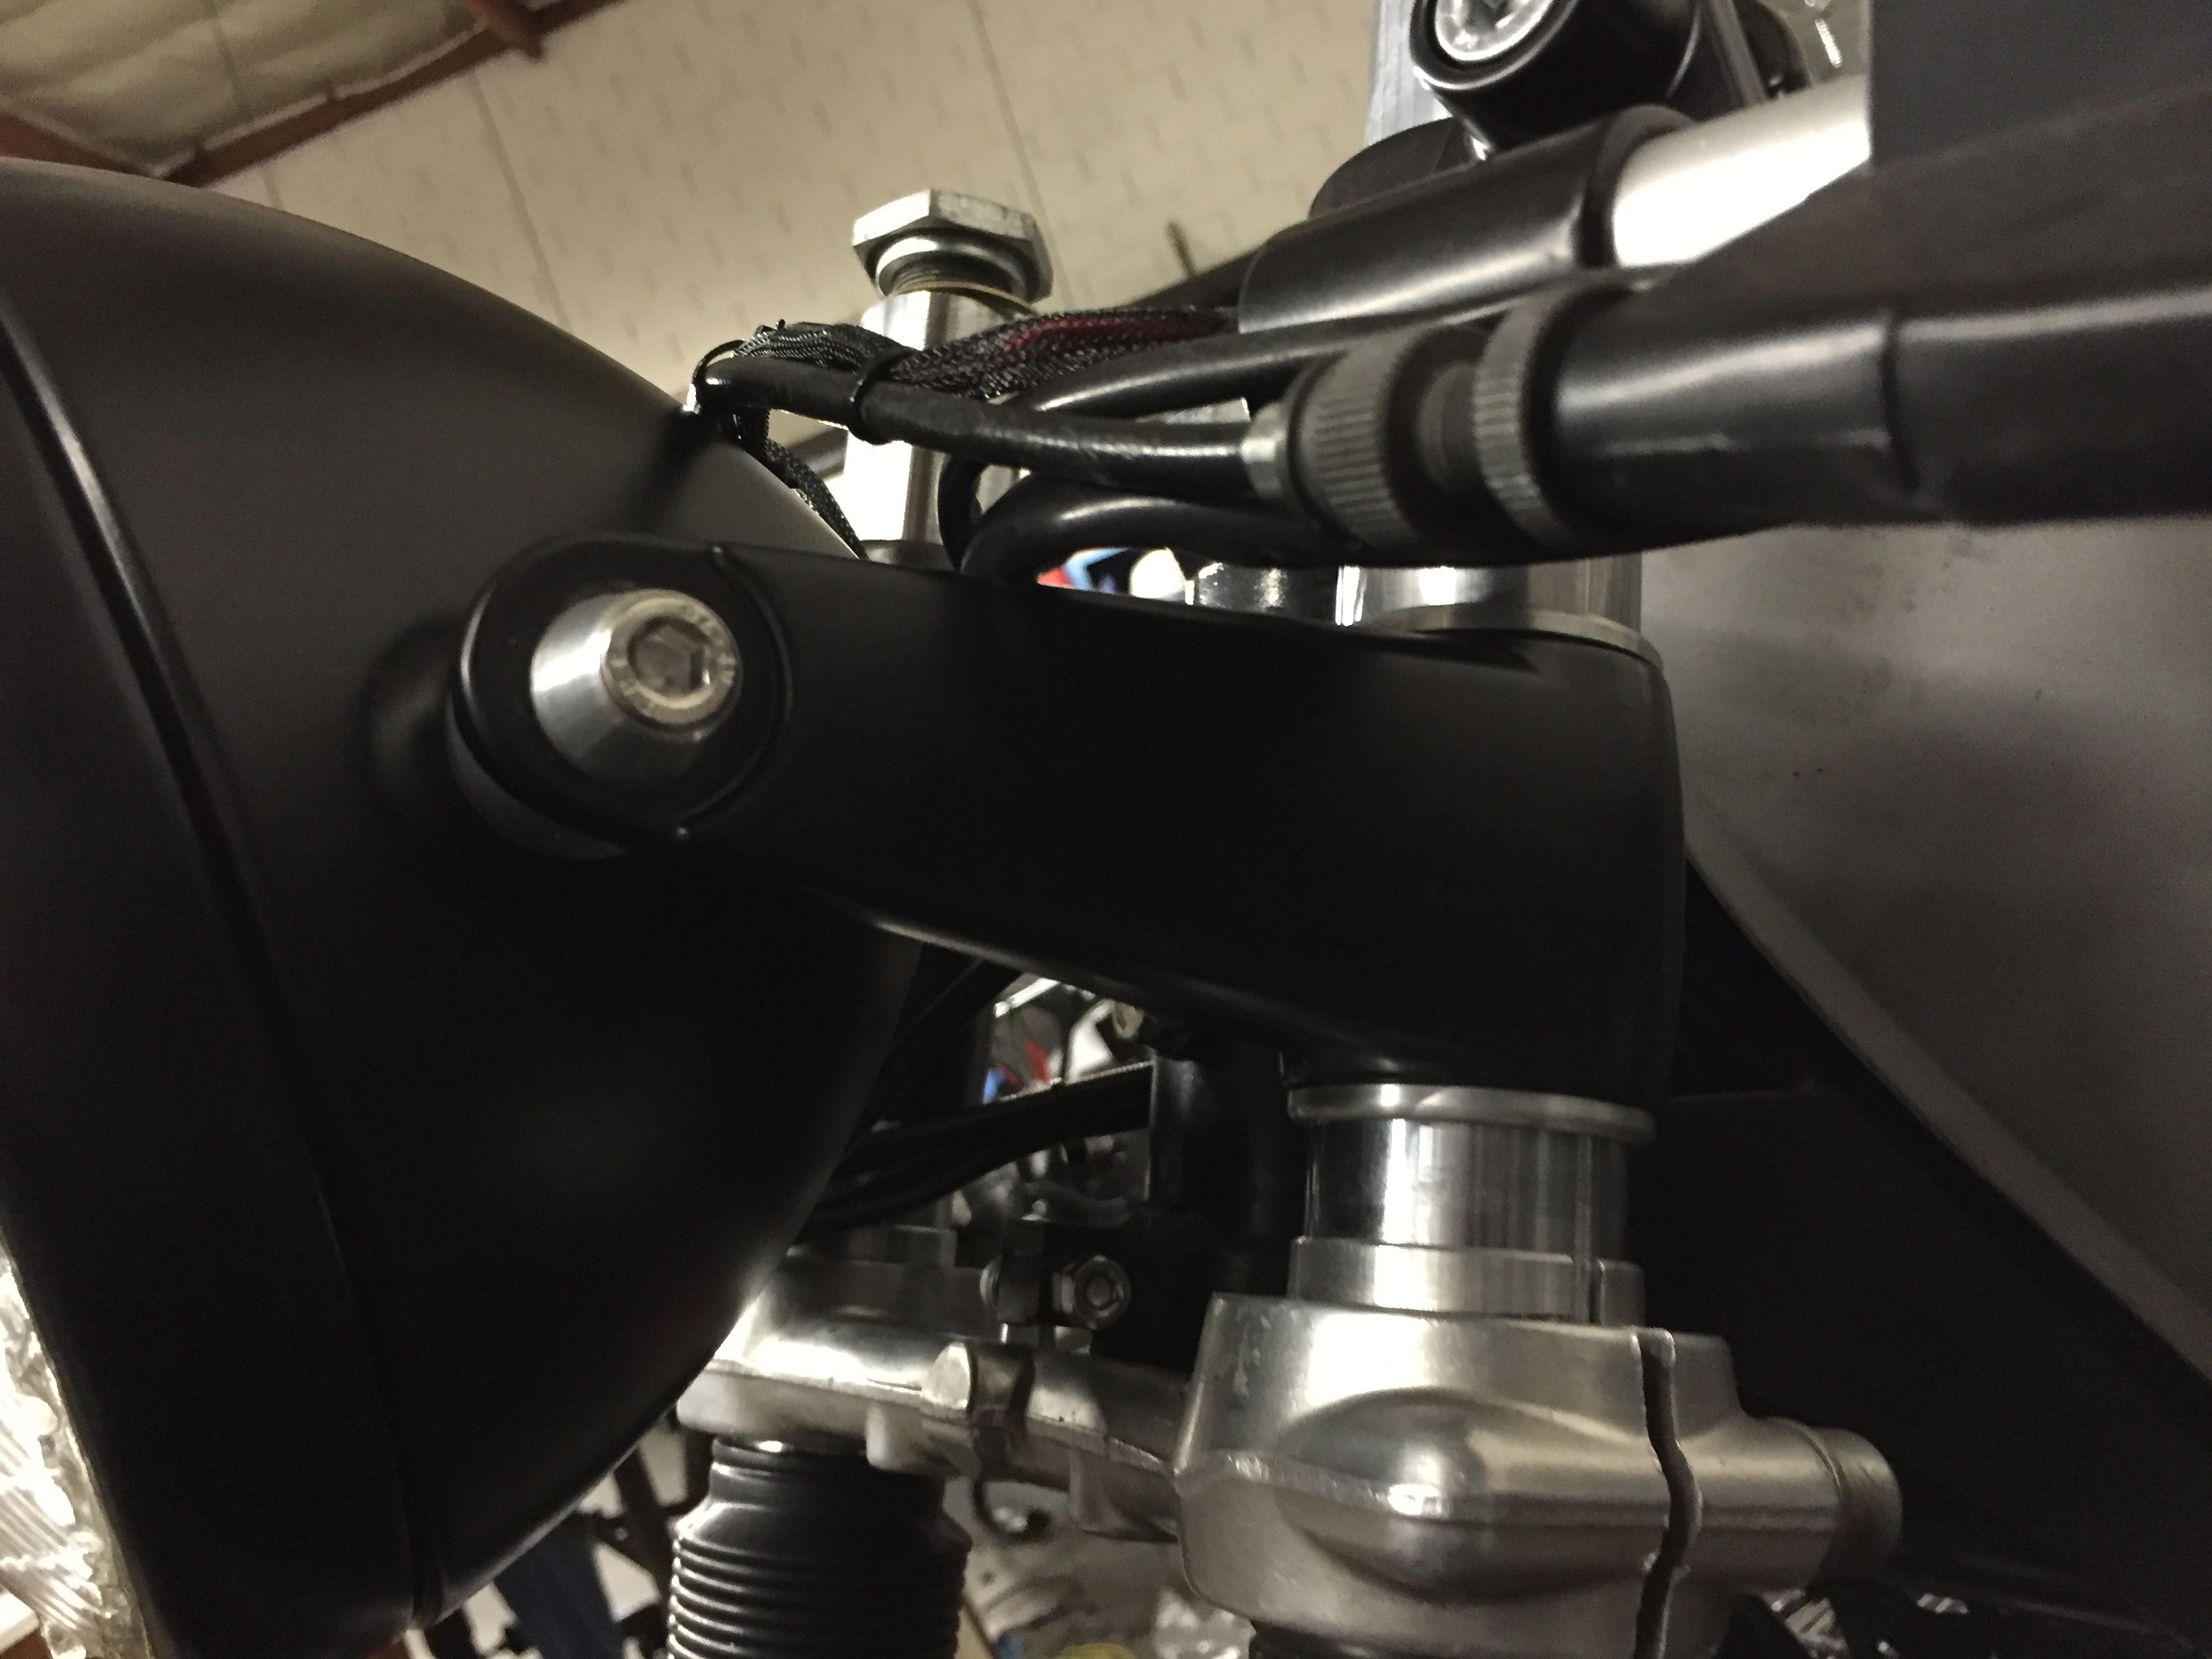
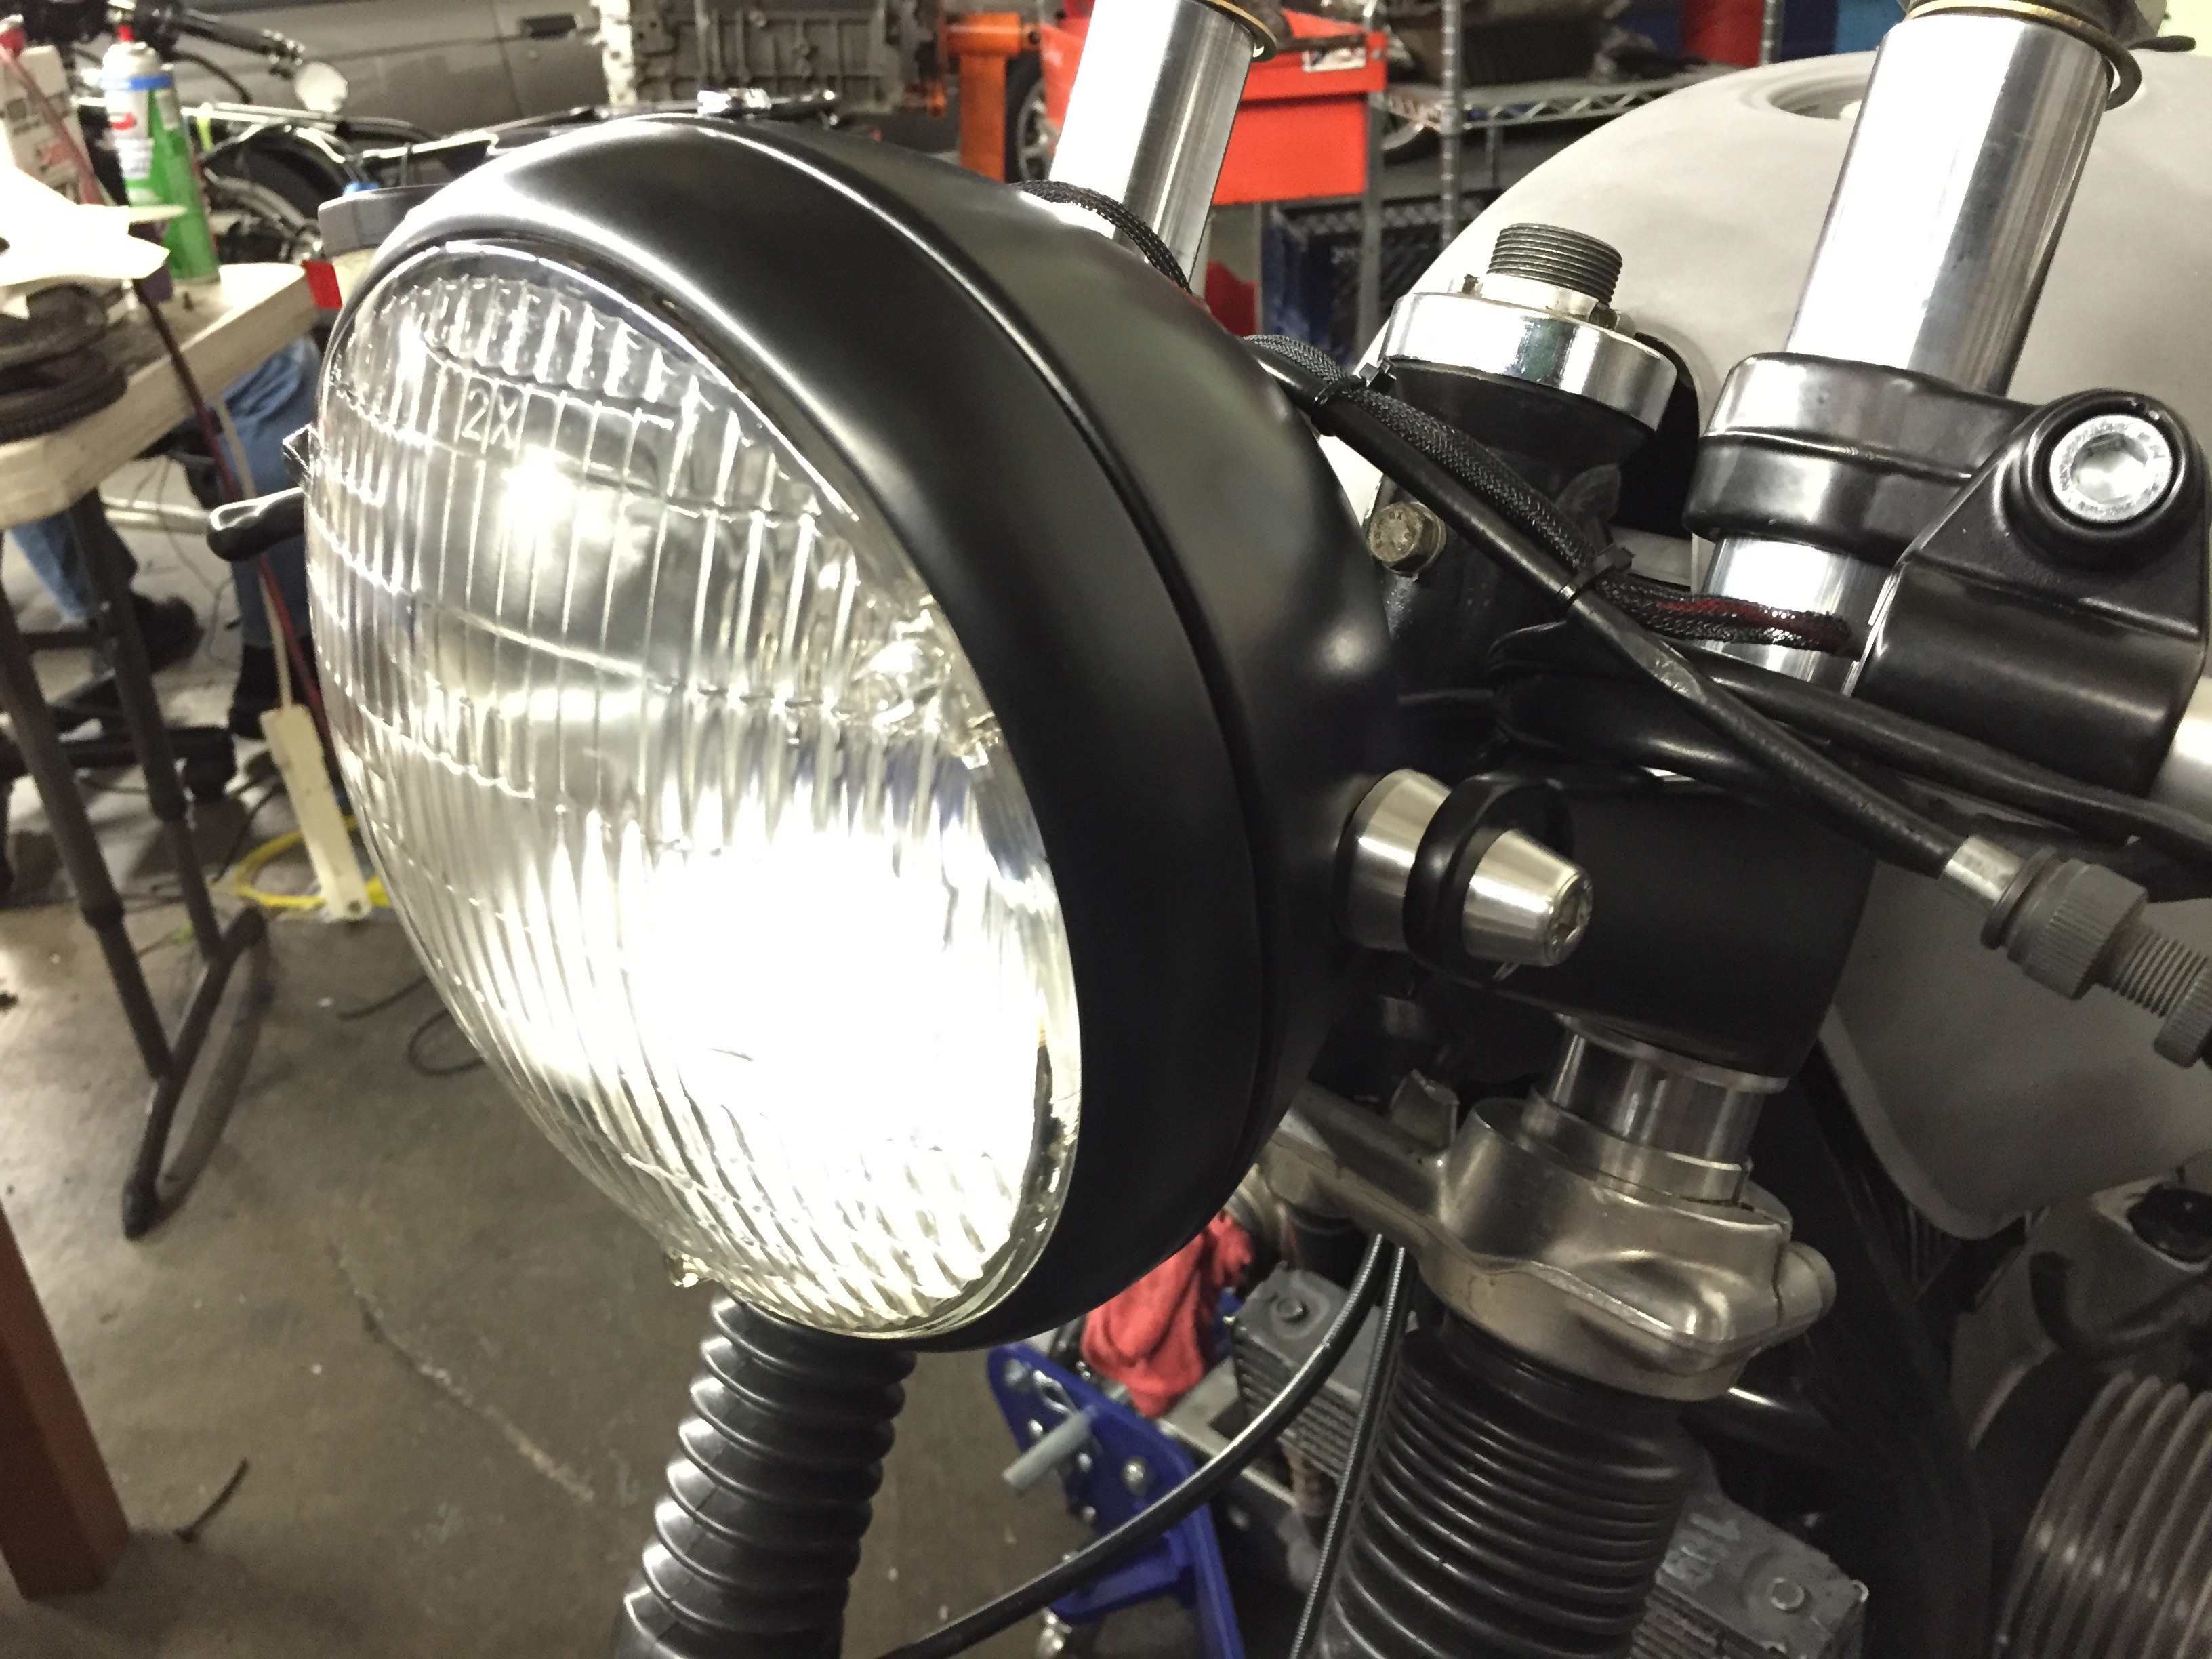
Next Osh kindly made some very nice little fork ear sleeves to make sure the fork ears fitted nice and snug on the fork tubes in order to mount the headlight. He also machined some spacers in order to allow the headlight bucket to fit perfectly between the ears. The headlight I chose to use still has a vintage feel but is slightly smaller than the stock bucket. Thus the need for the spacer made at oshmo.
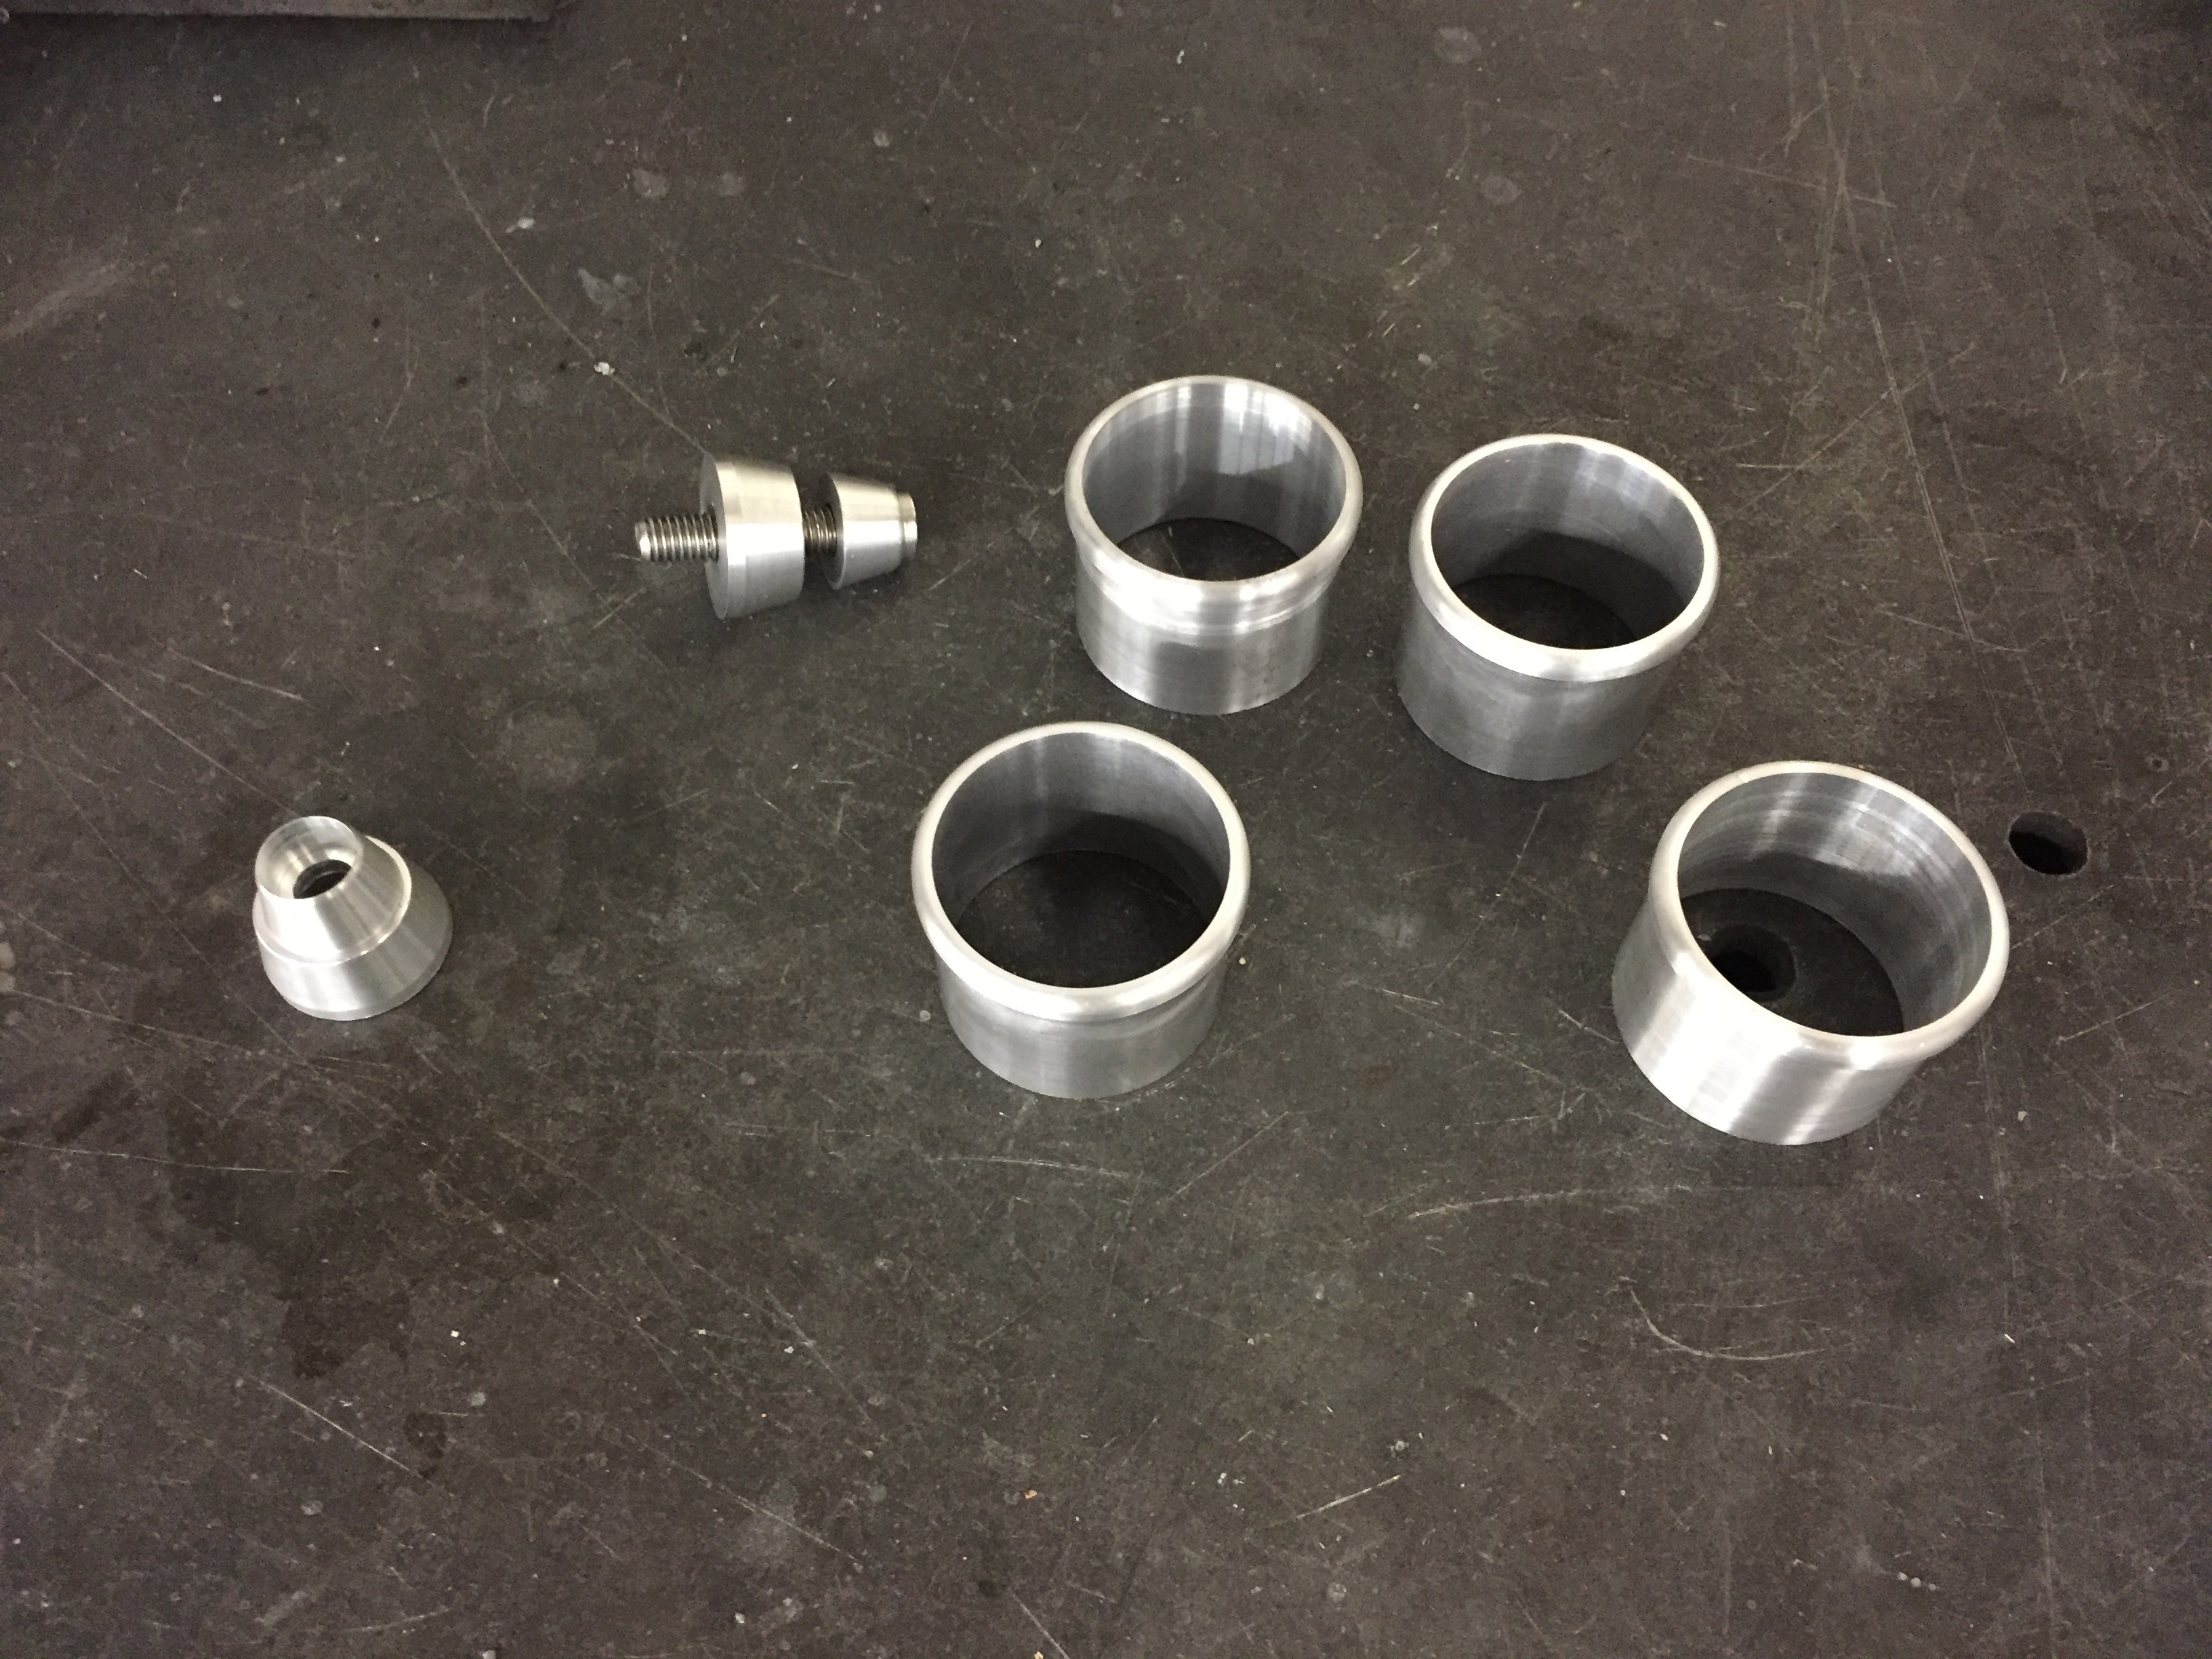
Oshmo fork ear sleeves and headlight bucket spacers
Lathe cutting of custom Oshmo fork ear spacers
Oshmo fork ear sleeves
Oshmo headlight bucket spacers
Next Osh started to work on the top triple tree clamp. This also needed some customizing from what is available on his website due to the fact that the stanchions are 38.5mm and not 36mm like the older airheads. Pretty cool to get a little insight into how these amazing machines get programmed and told to do what they need to do when cutting. From what I picked up they go through a rough cut process where most of the unused aluminum is cut away prior to the more precise cut processes that happen after that. There were at least 5 steps to cutting the top triple tree. Especially with the cutting of the triple tree that houses the moto gadget speedometer.
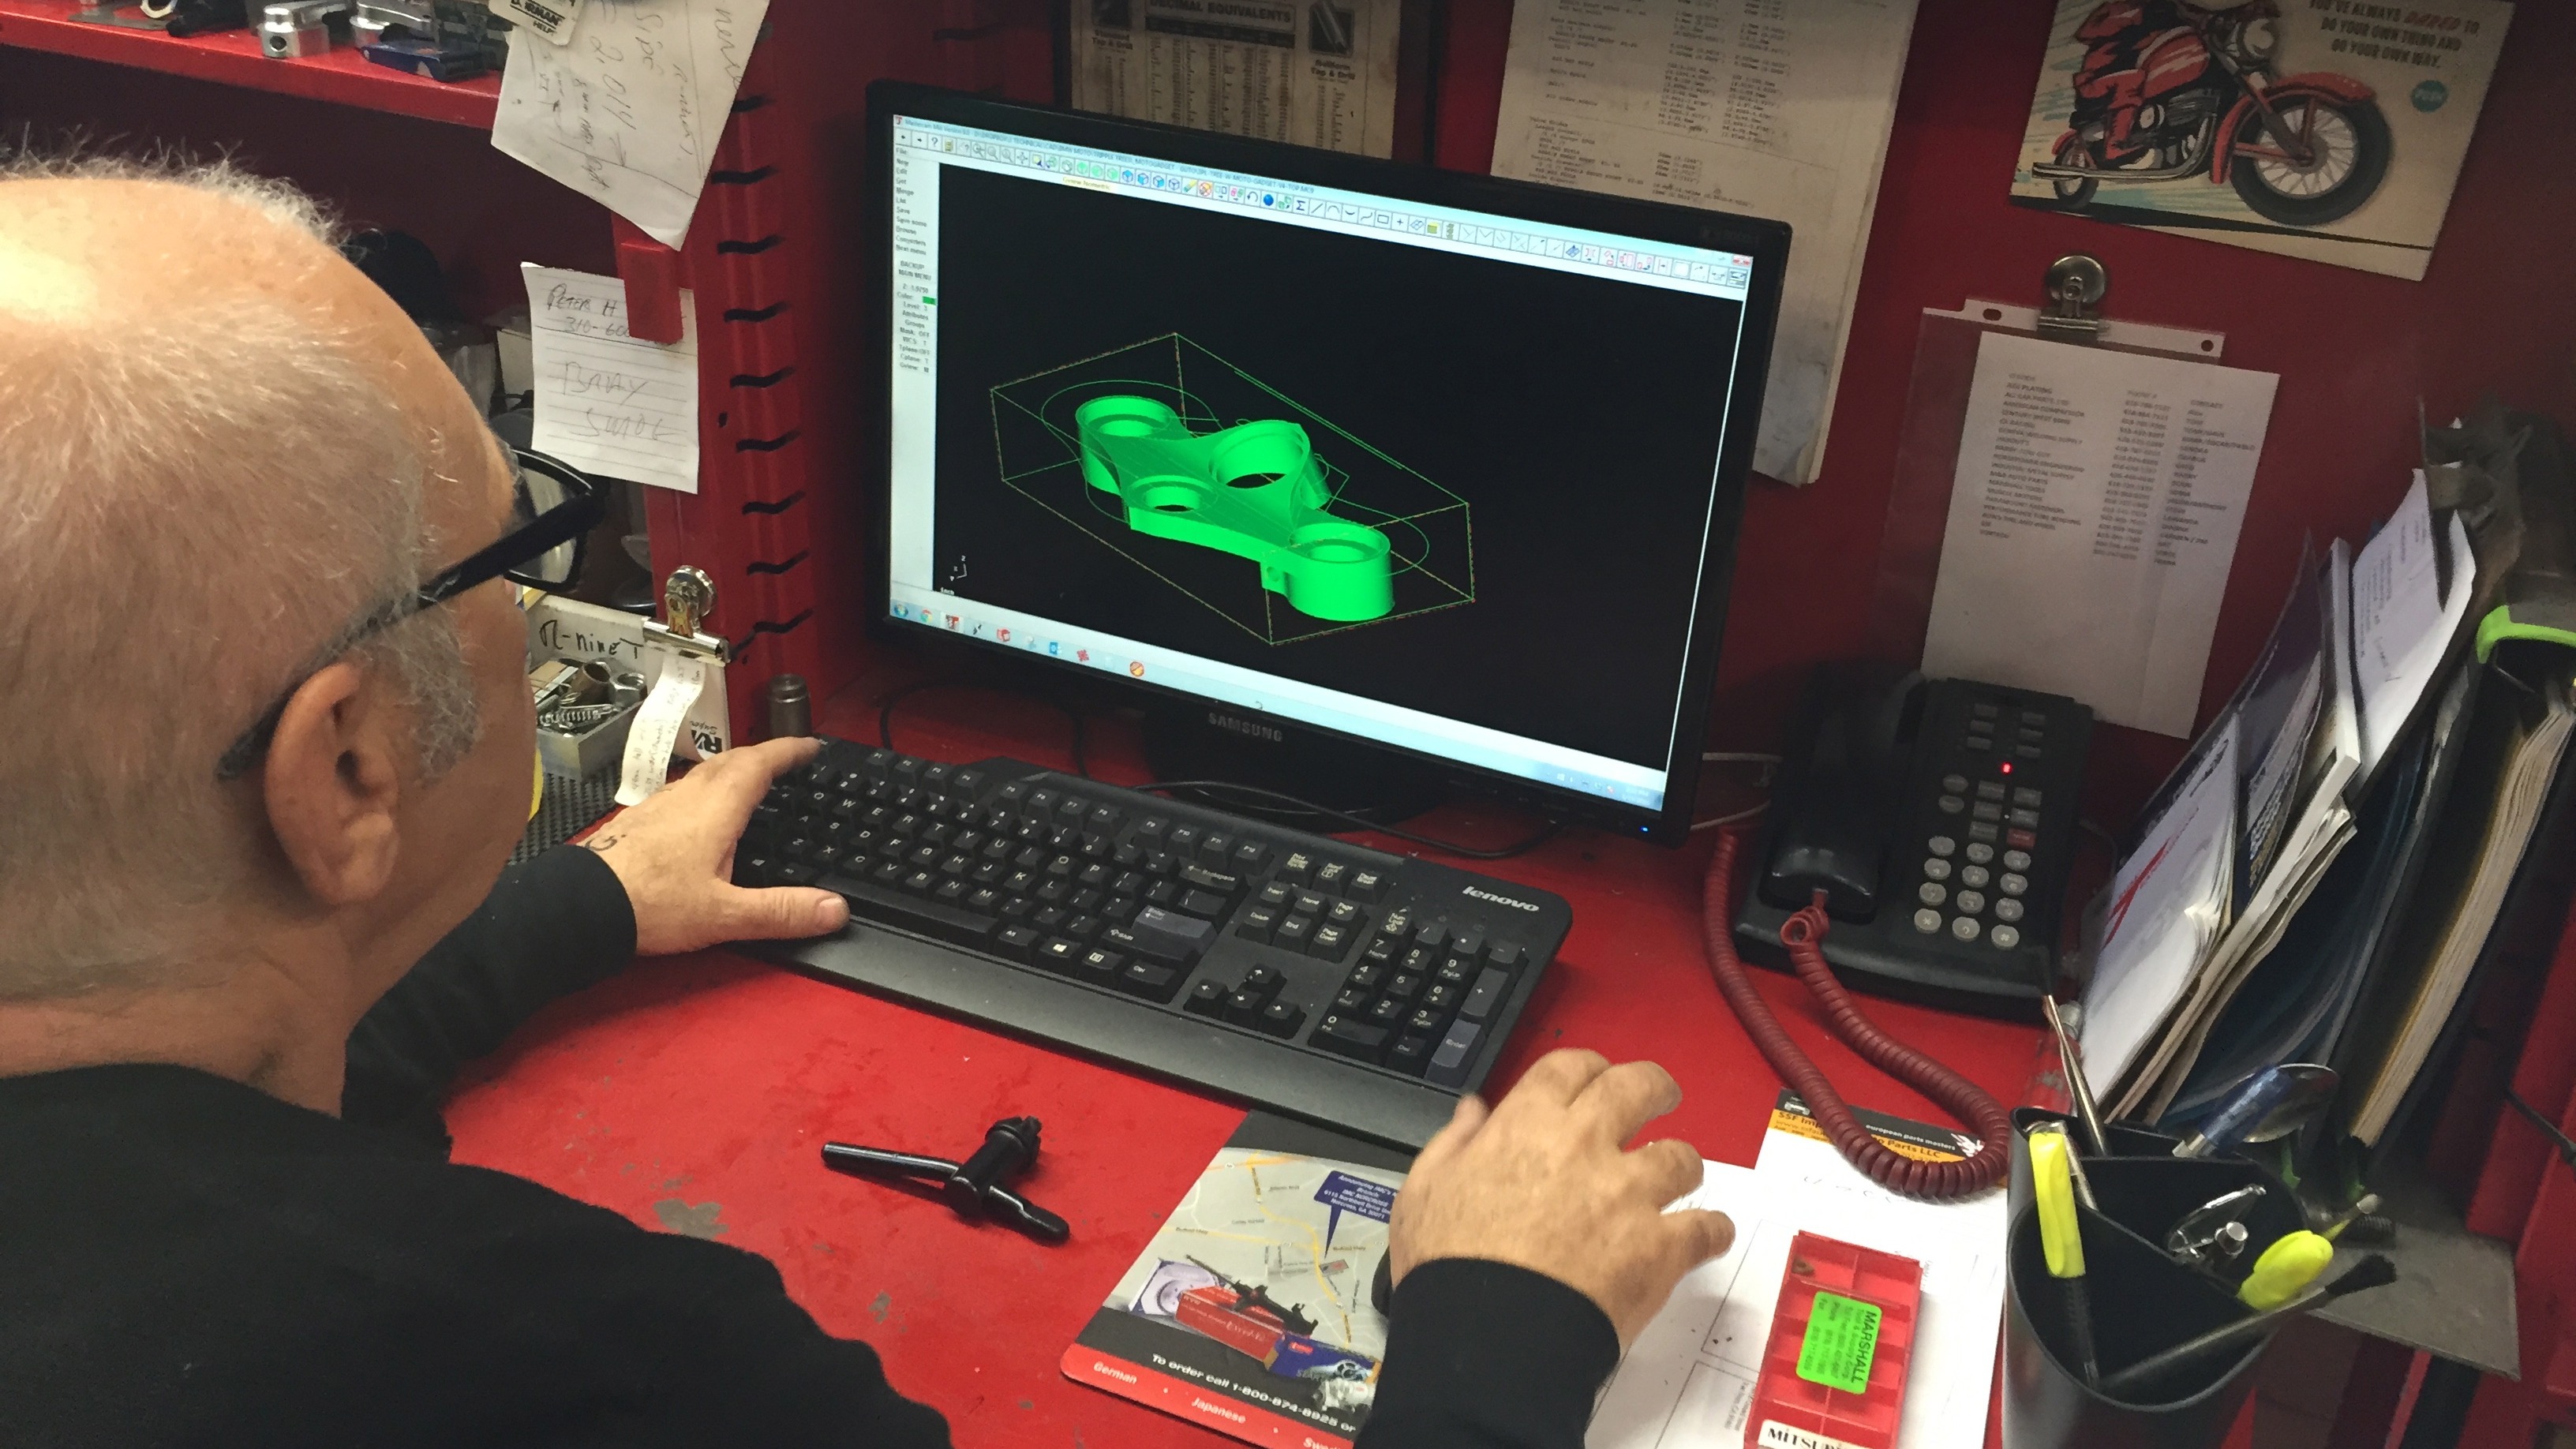
Osh making some tweaks to the drawing of oshmo BMW triple tree clamp
After the adjustments were made to accommodate the 38.5mm stanchions it was off to the CNC machine where Osh started work on milling the top clamp for me. There are a few steps where alot of rough cuts are made to clear away all the un needed material from the solid piece of billet aluminum that gets used to make the clamps.
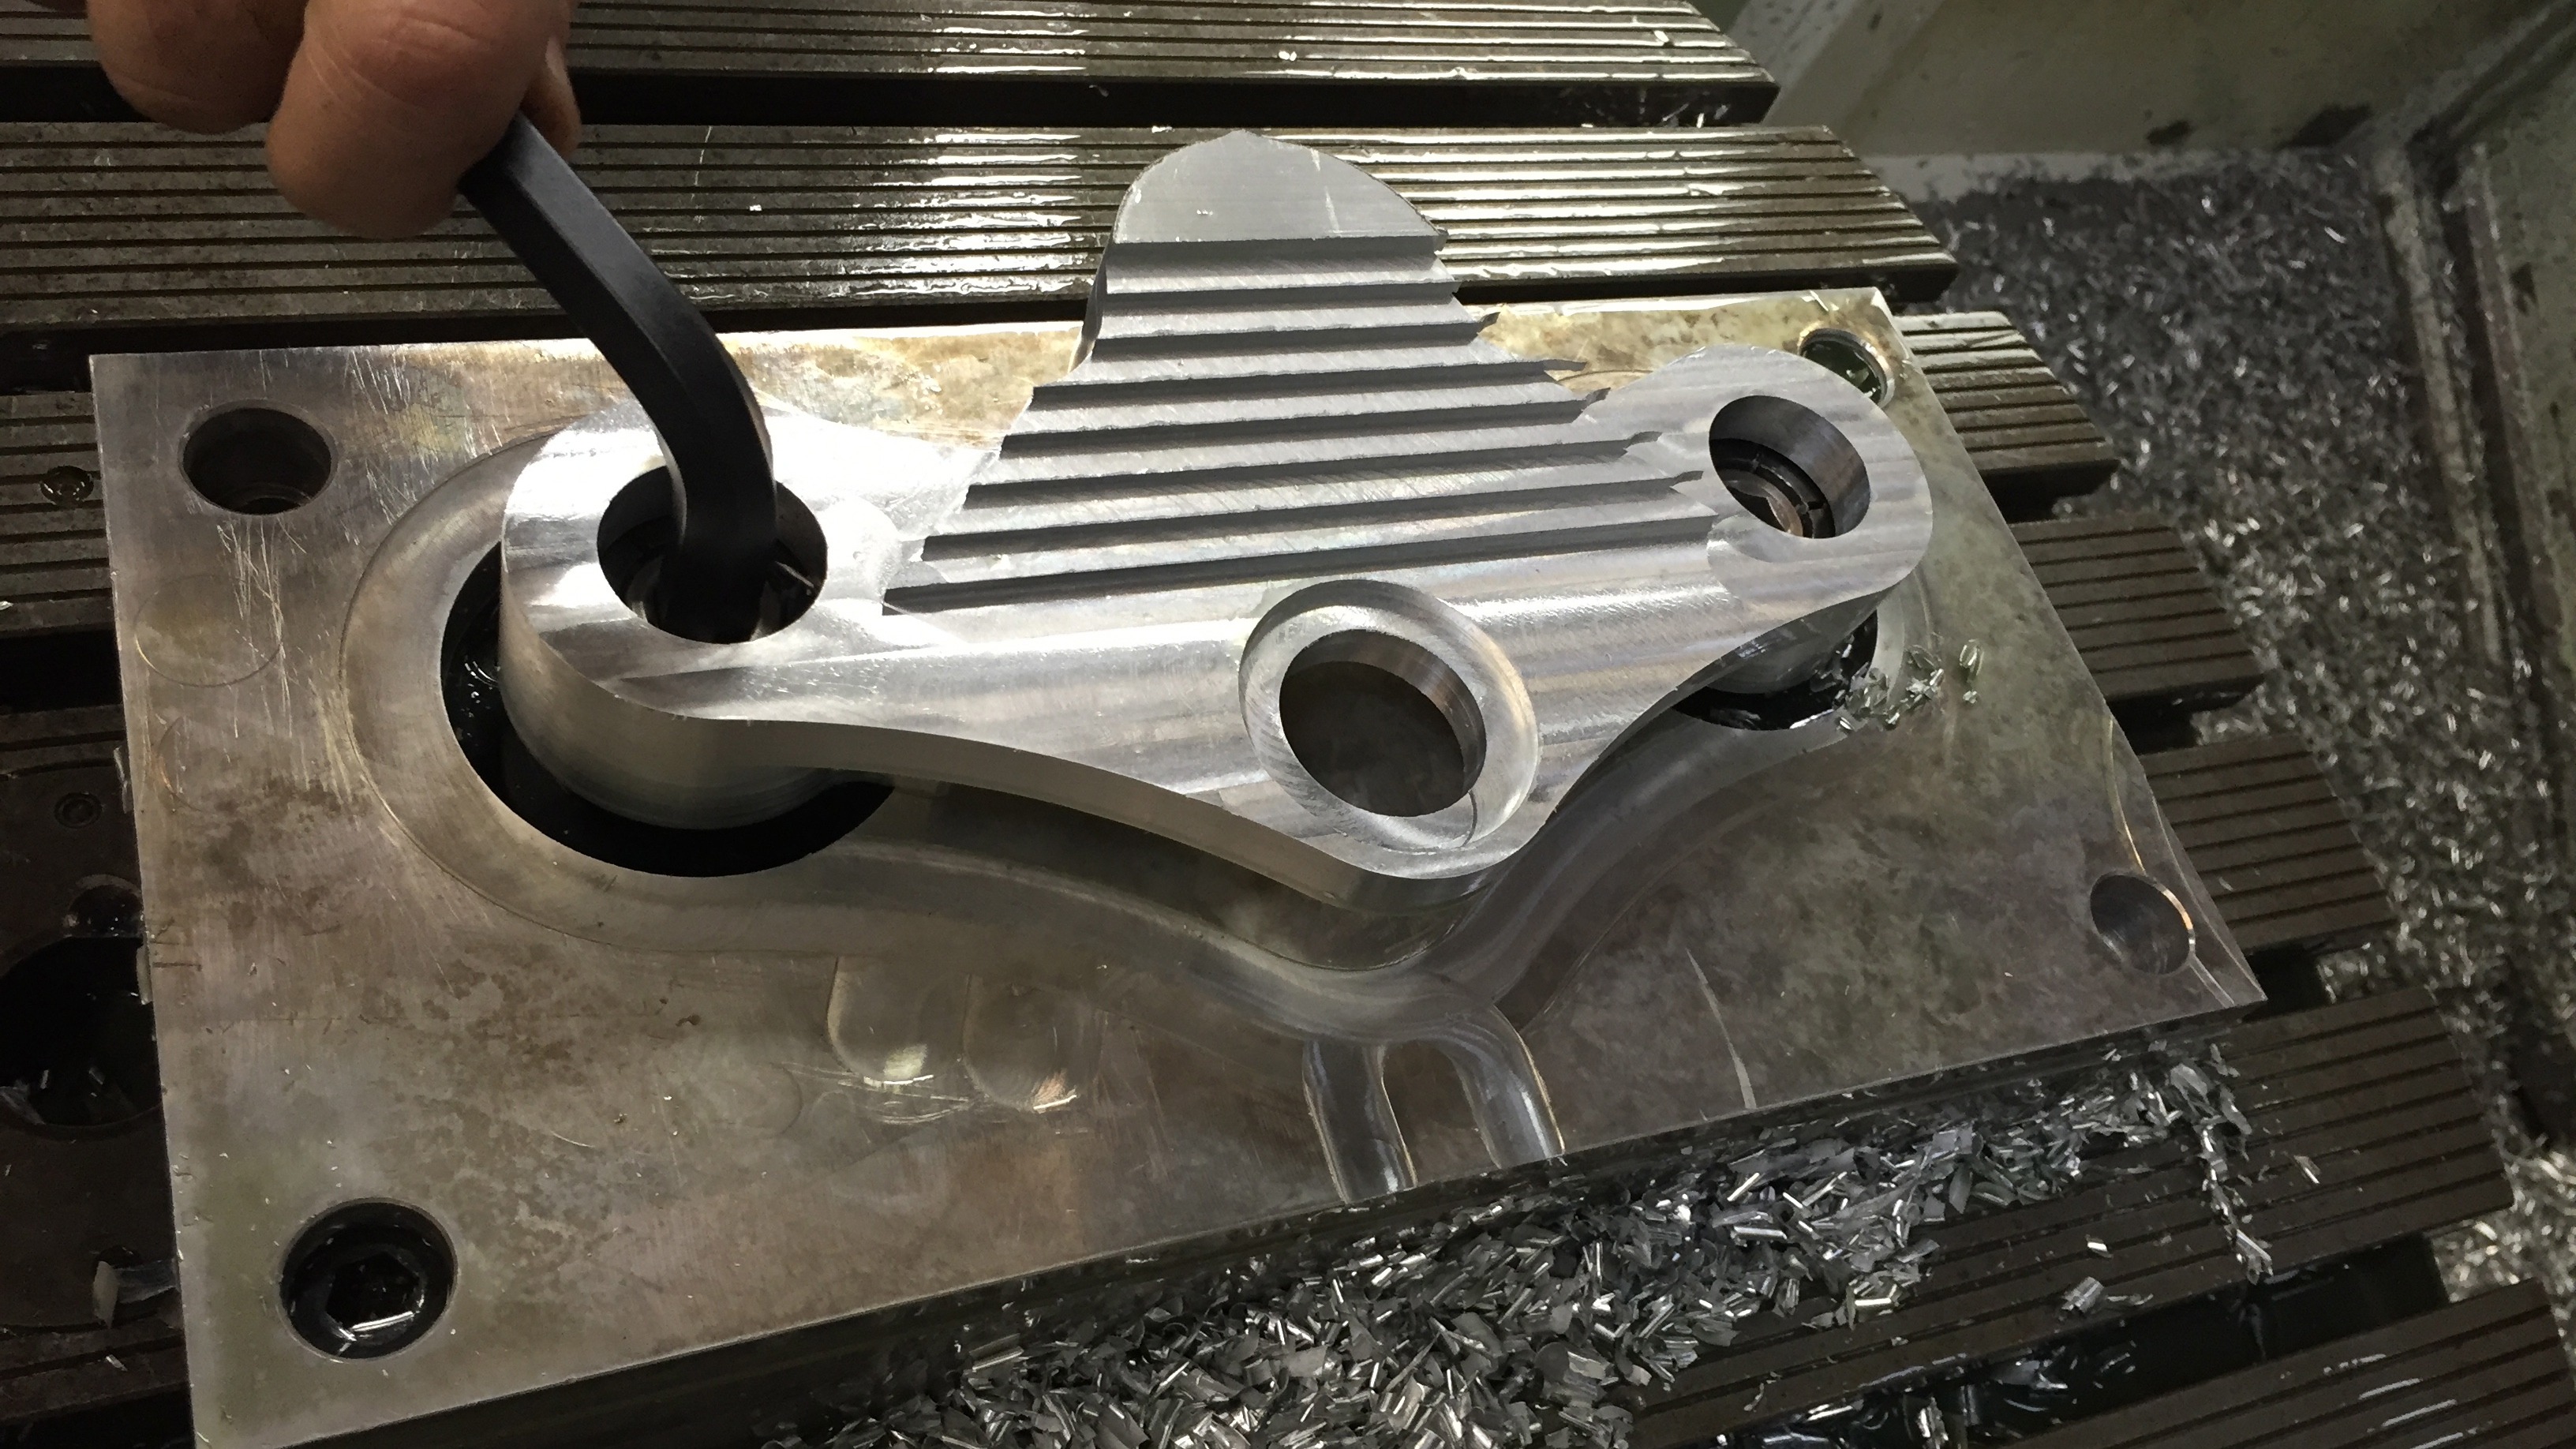
Custom Oshmo top triple tree being machined
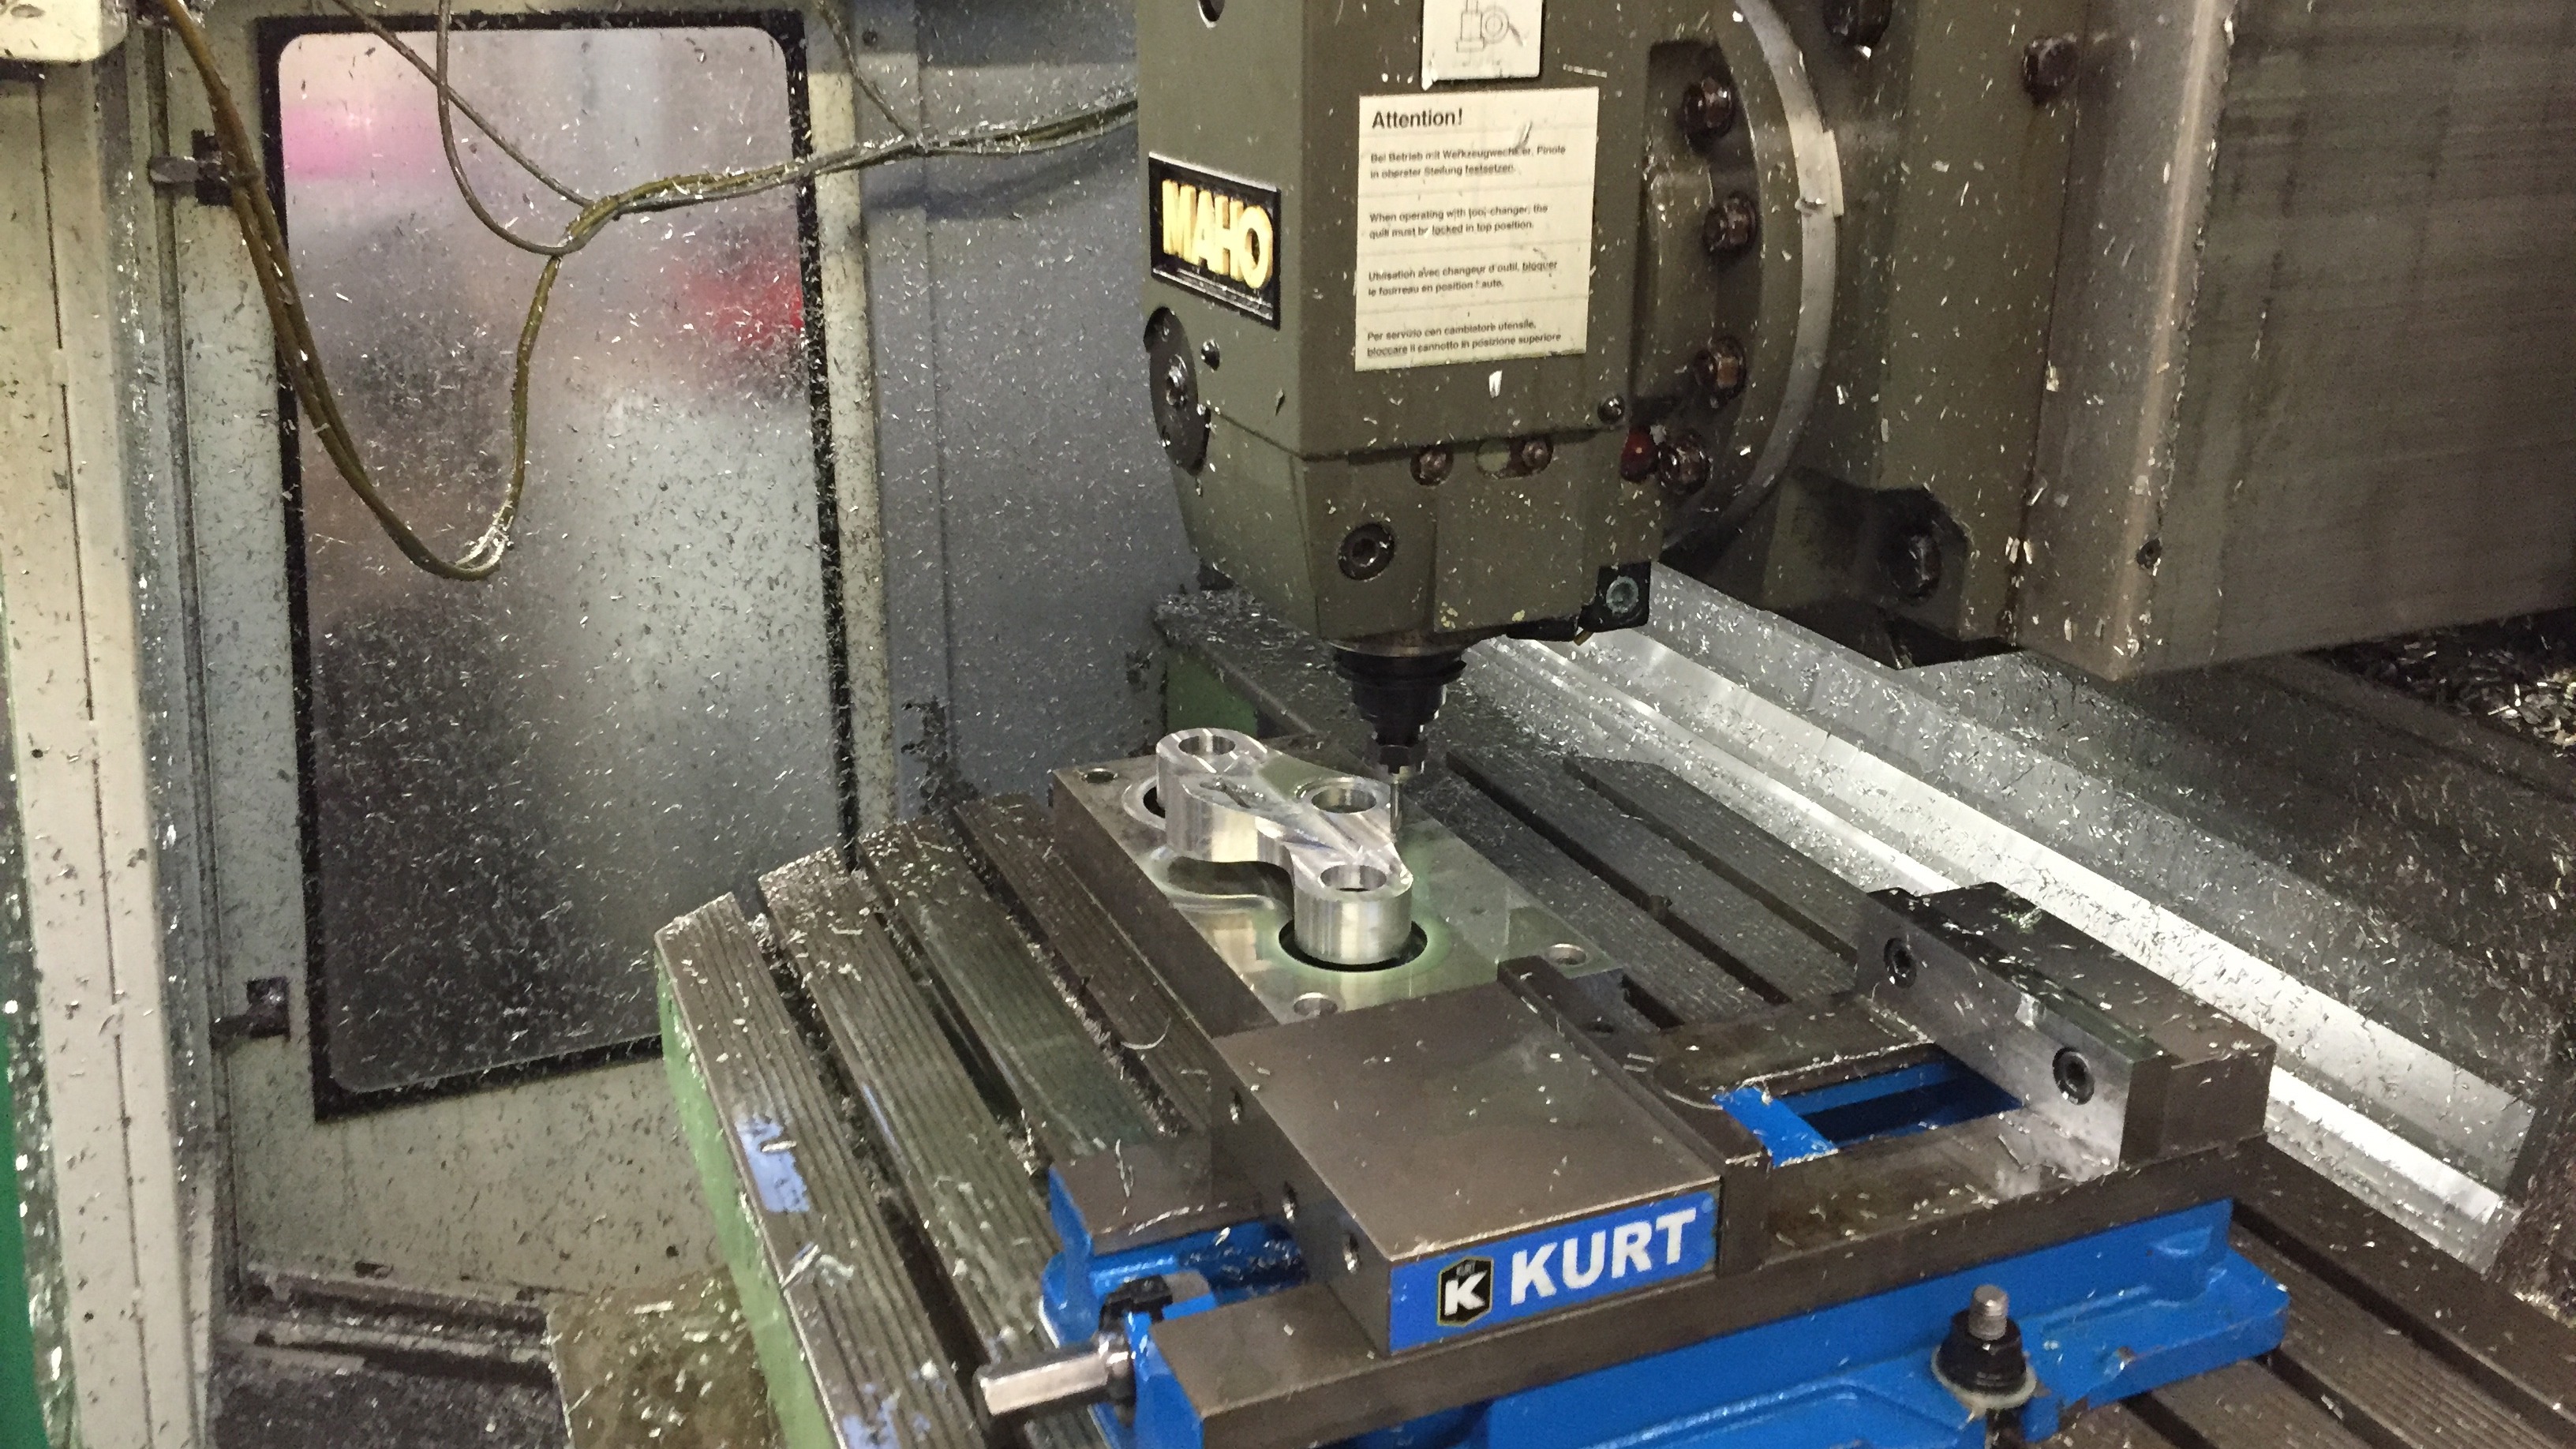
Custom Oshmo top triple tree further along in CNC process
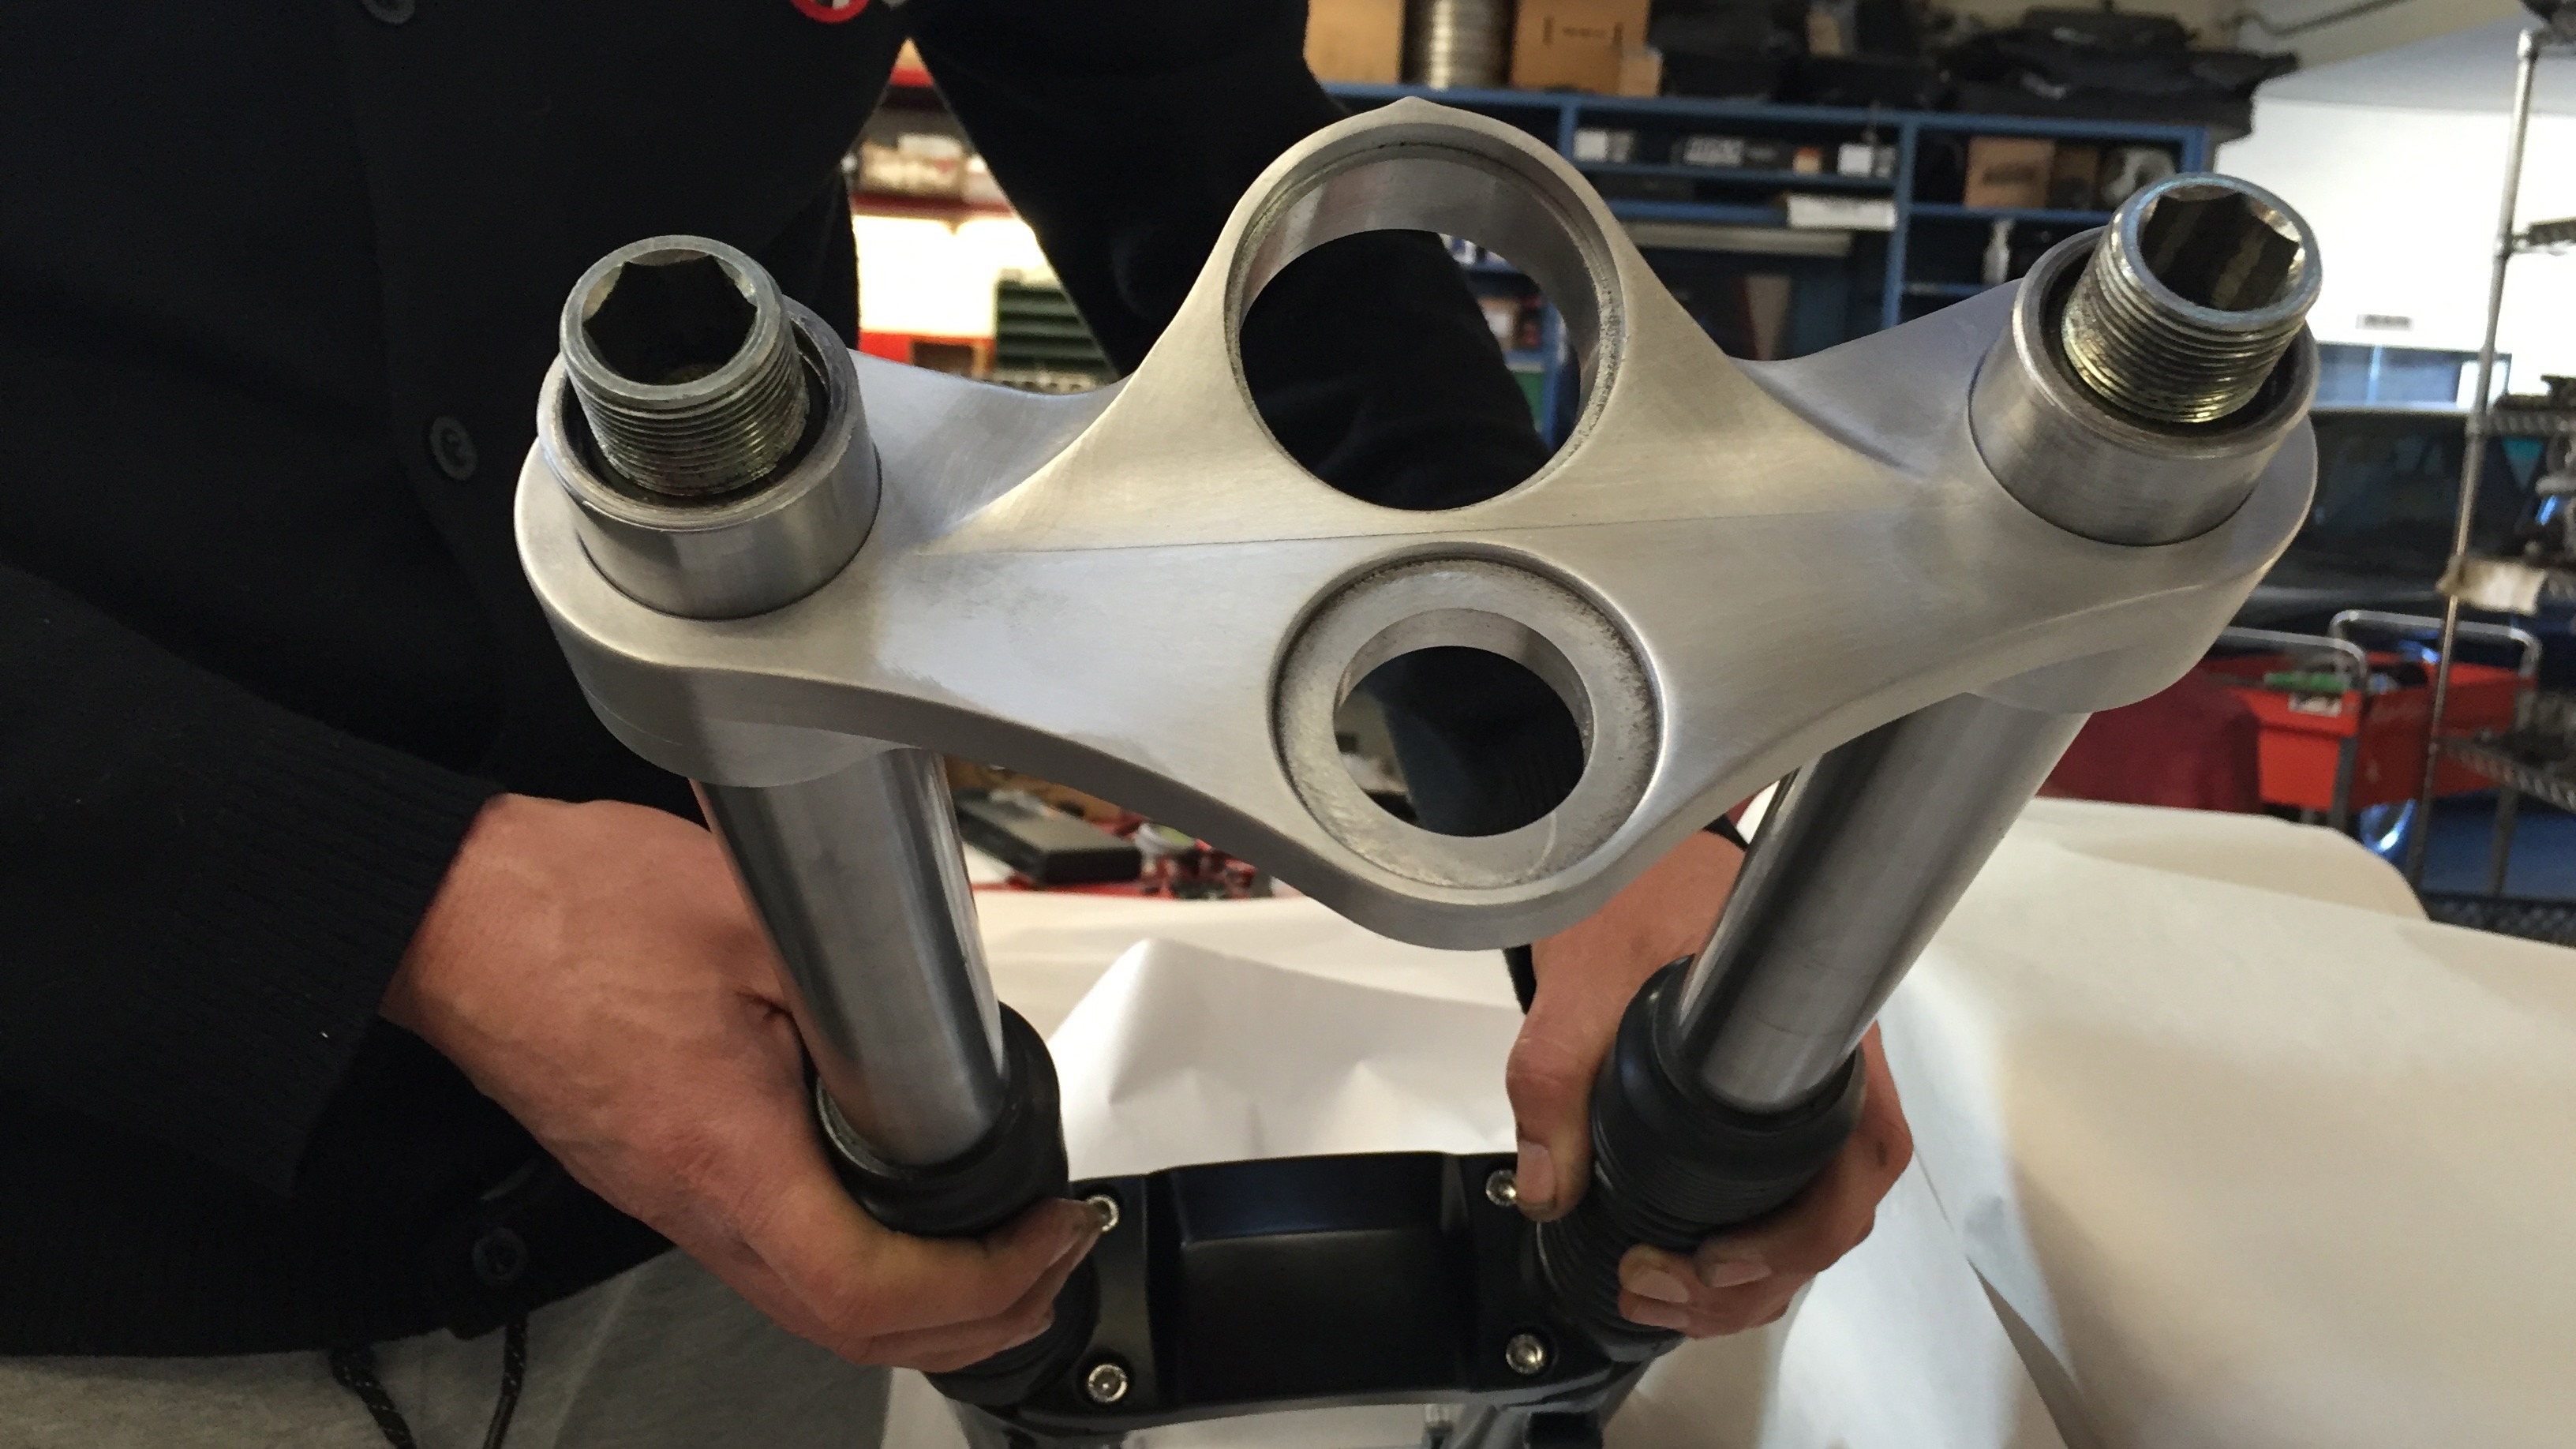
Oshmo BMW top triple tree being test fitted onto the fork. Looking wicked!
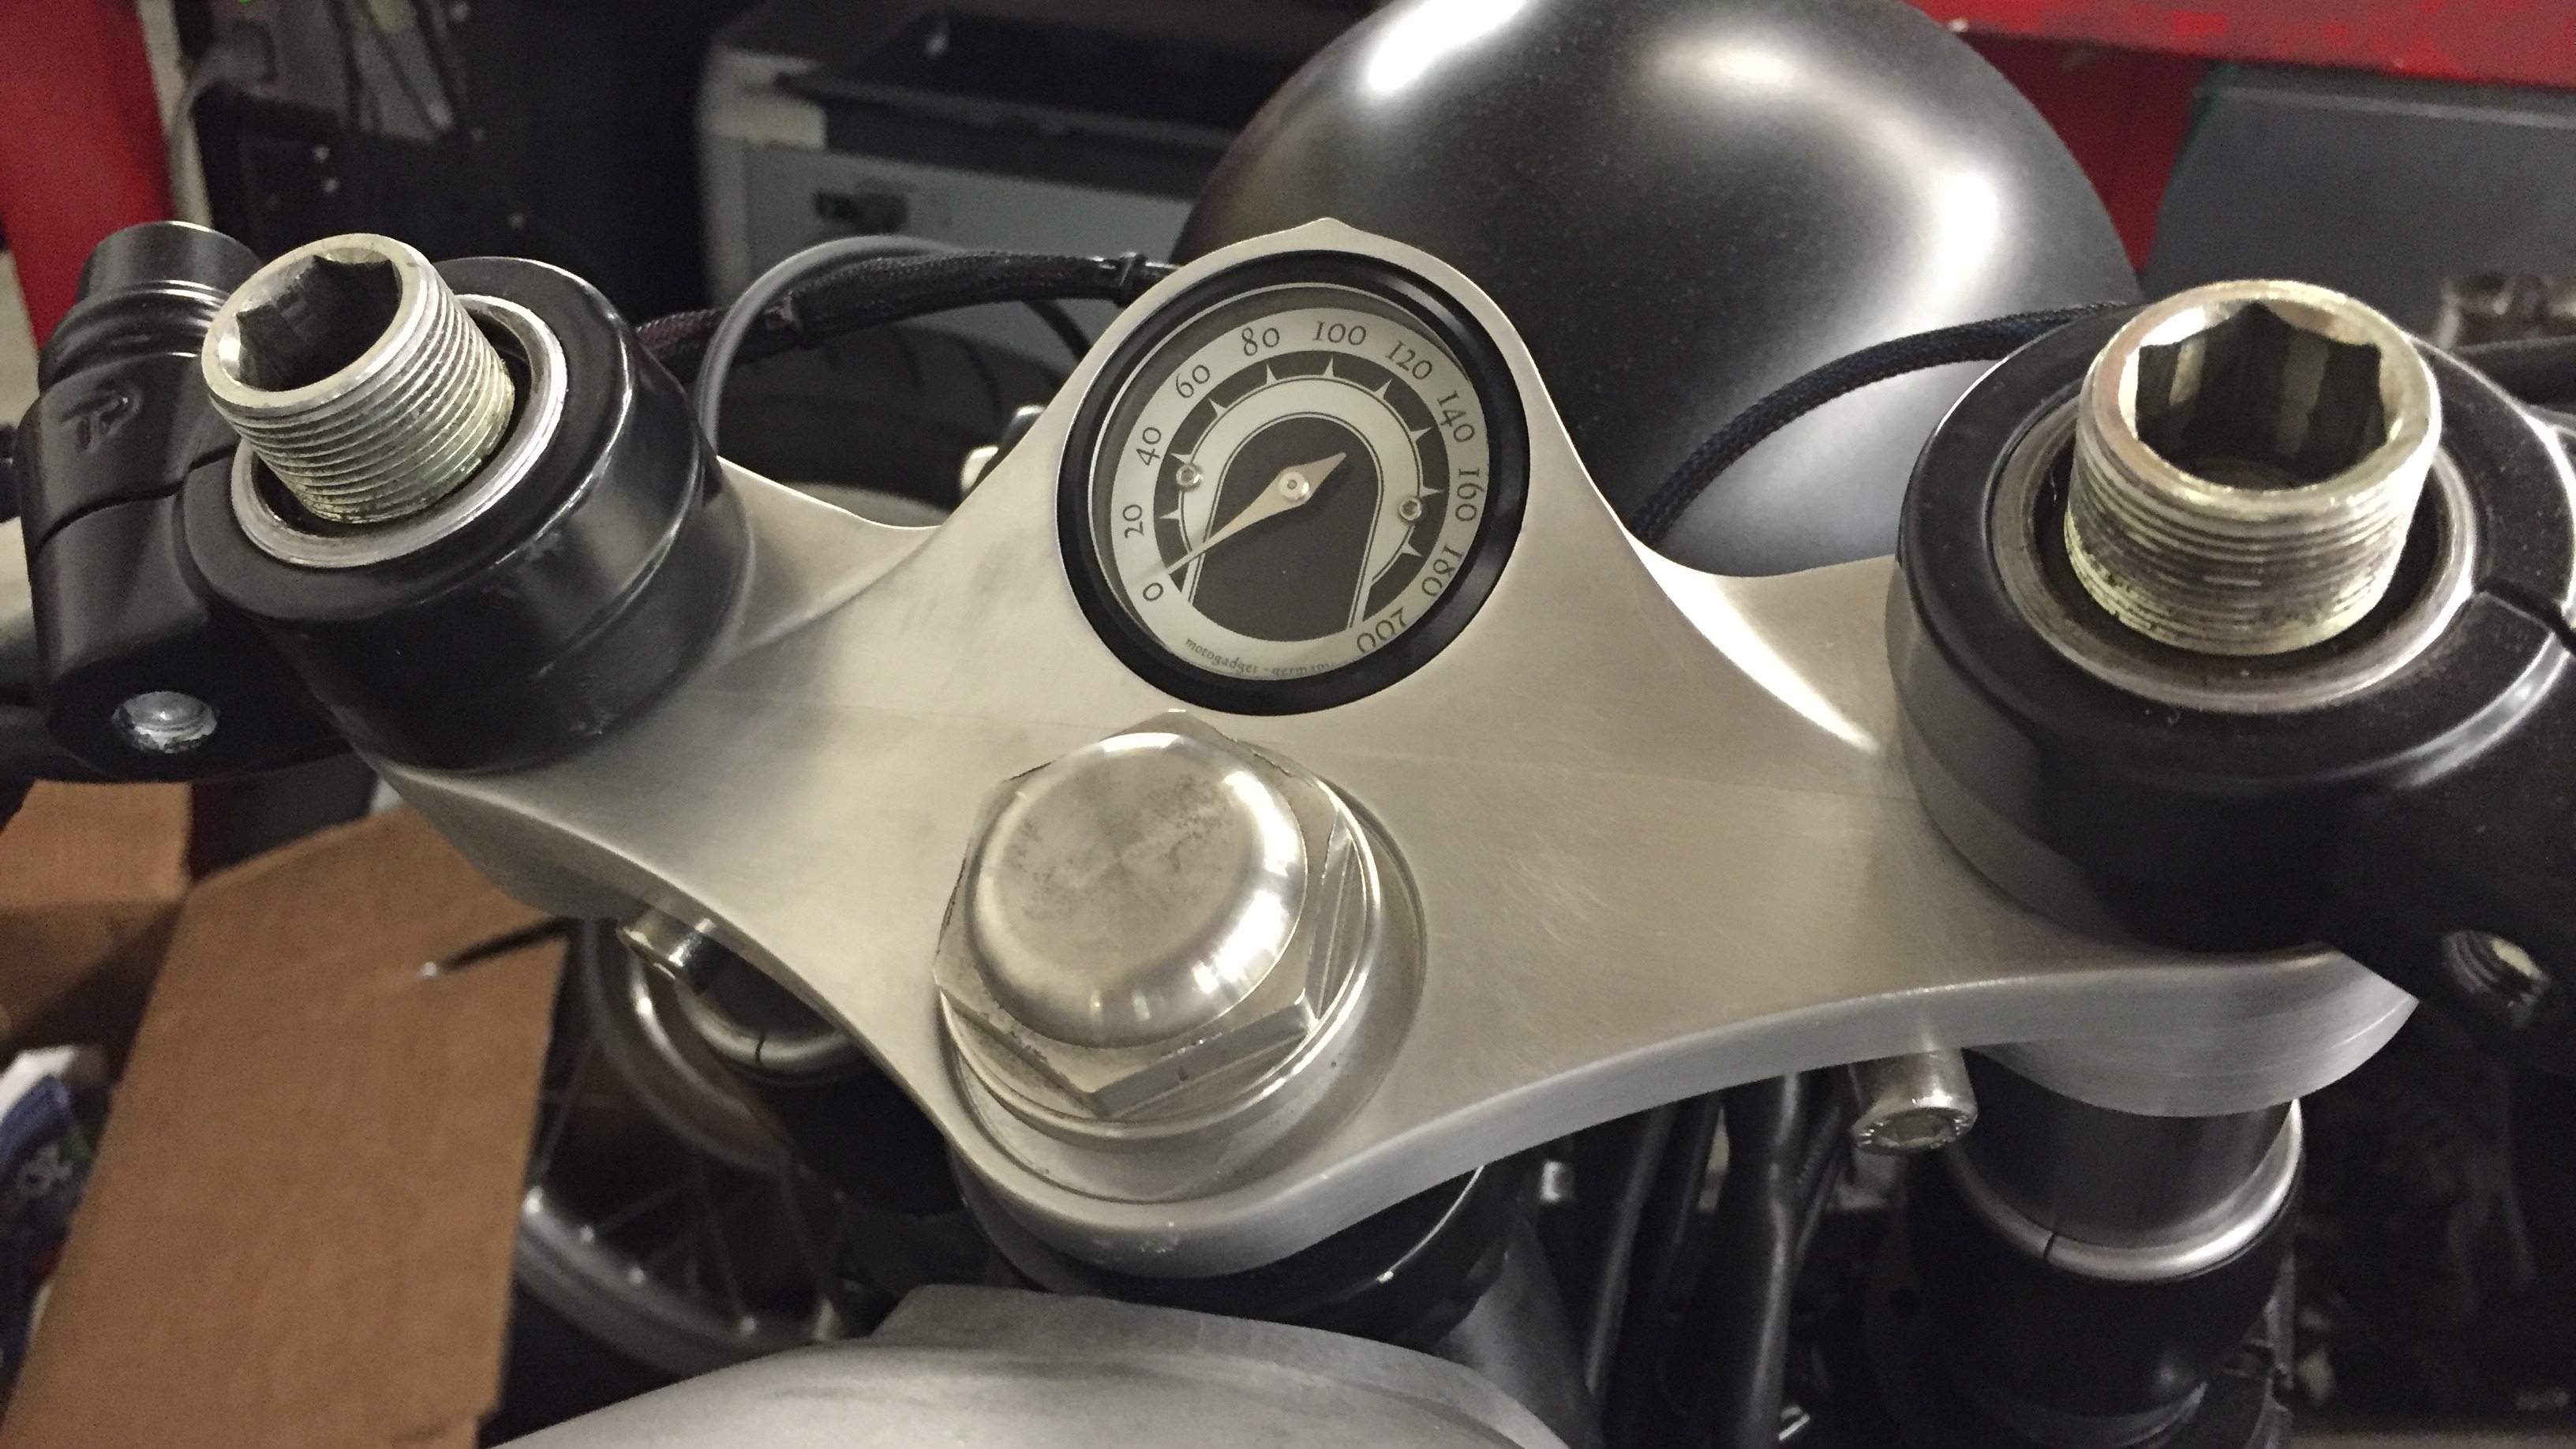
Oshmo top clamp with Moto Gadget mini
We still need to decide exactly what will be done to cover the top threaded parts that protrude from the fork tubes but I have no doubt that Osh will dress those up nicely too! I think this top crown will end up black, either anodized or powder coated. Anodizing would be best but we will have to send it out for that whereas if we decide to powder coat that is something we can do in house at Osh’s shop. I do love the way the the triple tree looks in the raw satin finish but the lower clamp on the bike is black as well as the clip on clamps so I feel we need to stick with that for this build but I guess we can throw it on and have a look and then decide.
I had decide to put the old style valve covers on the bike but I really liked the machined look on the raised sections of the new style ones so I had a new set of old style valve covers powder coated black and then was going to look at machining them a bit to keep some of the original look and feel of the stock BMW R100RS. I’ll ad some pictures below. The process was pretty simple and all I did was use a dremmel tool with a sanding pad on it to simply remove the powder coating from raised parts of the cover. I also had to do this on the original BMW engine starter motor cover. I’m not sure if I have a picture of that but if I do I will include that too.

Old style BMW twin valve cover powder coated satin black
Old style BMW twin valve cover machined
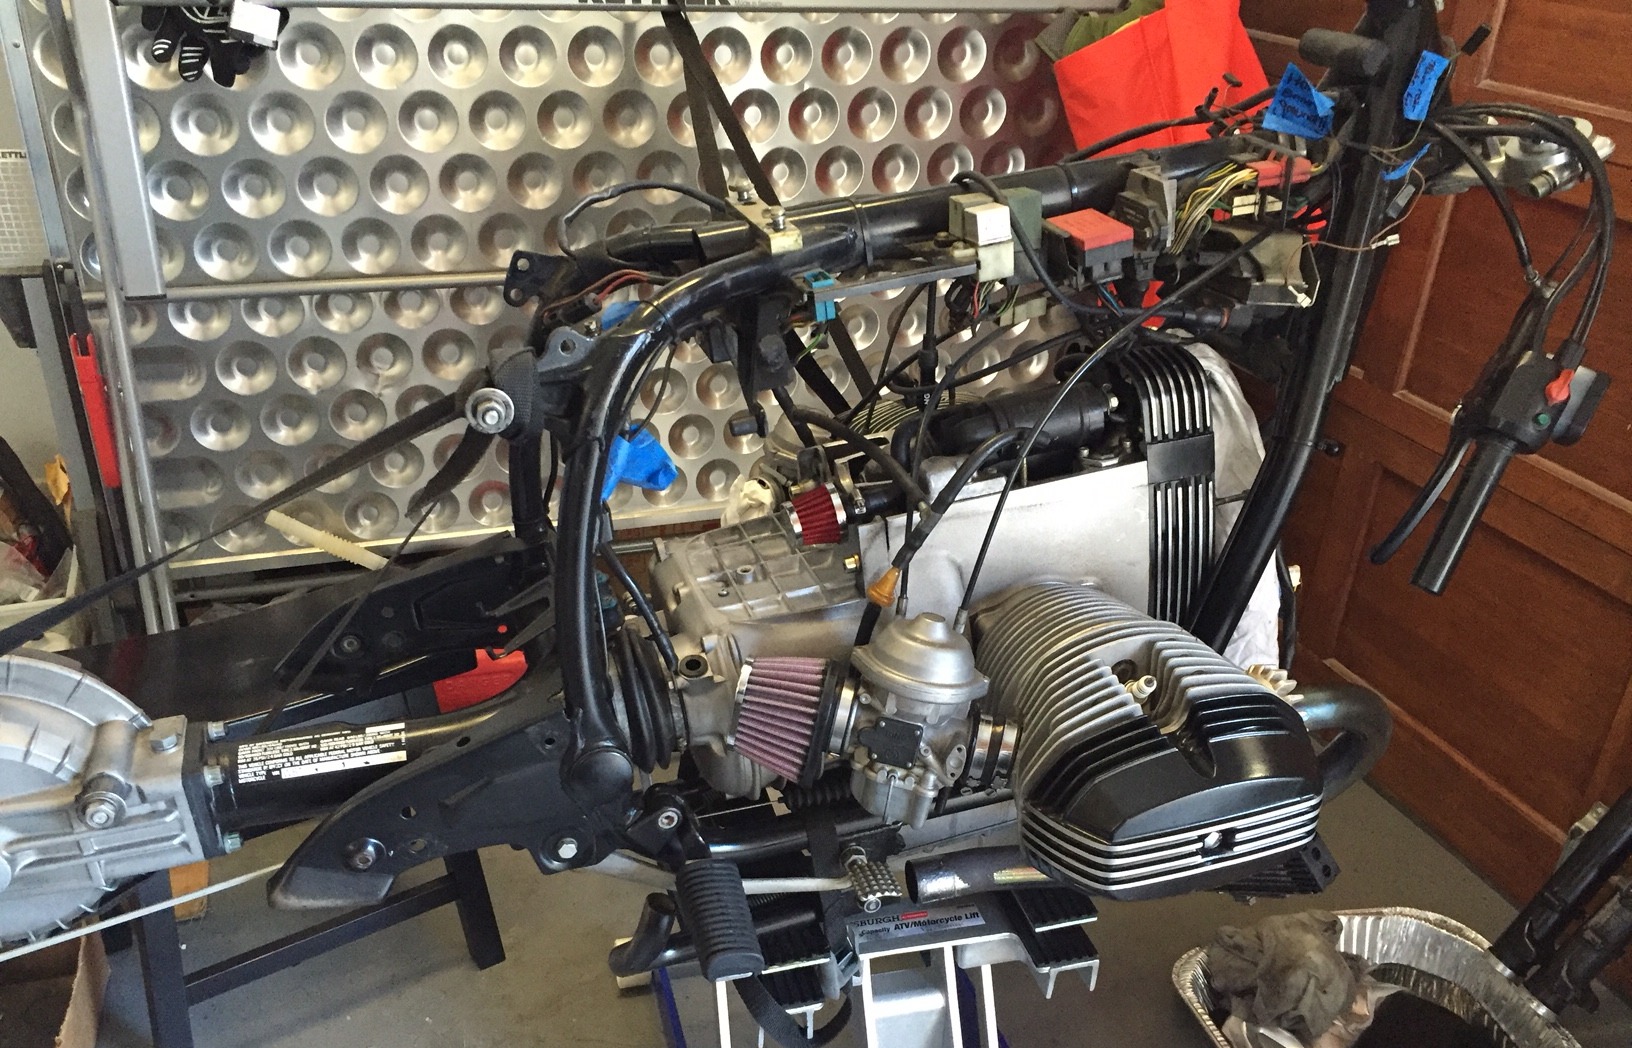
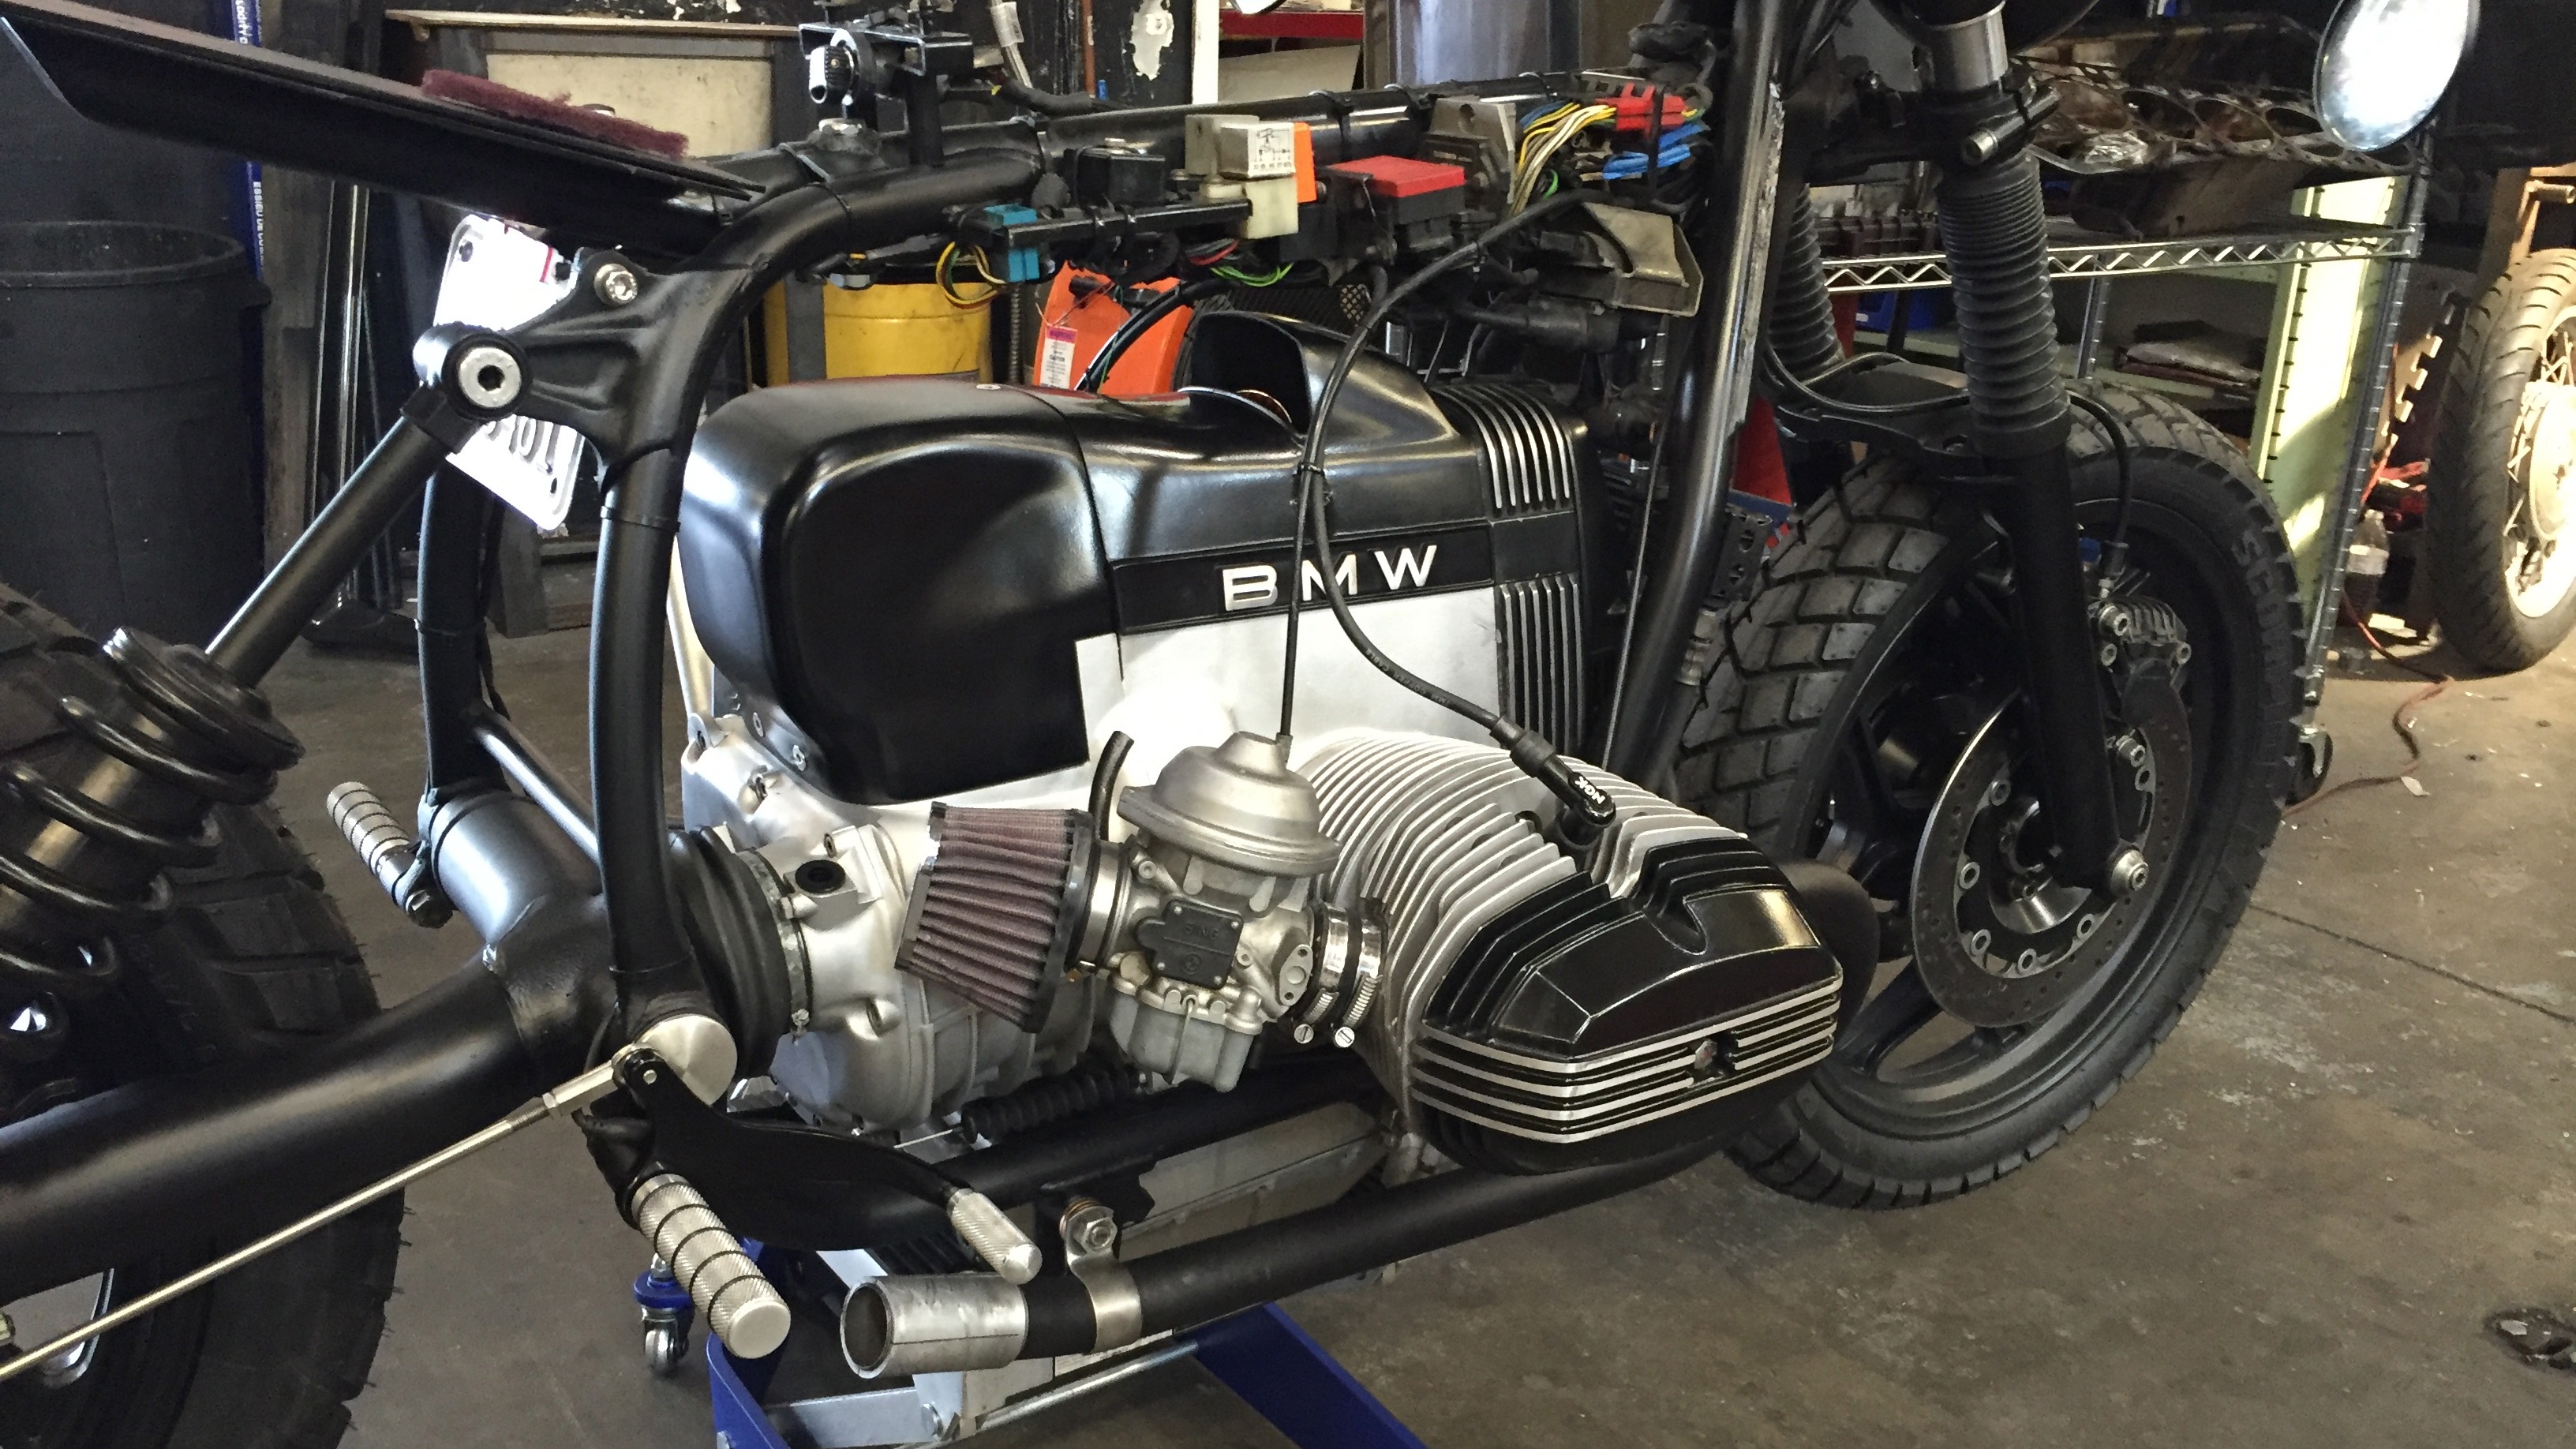
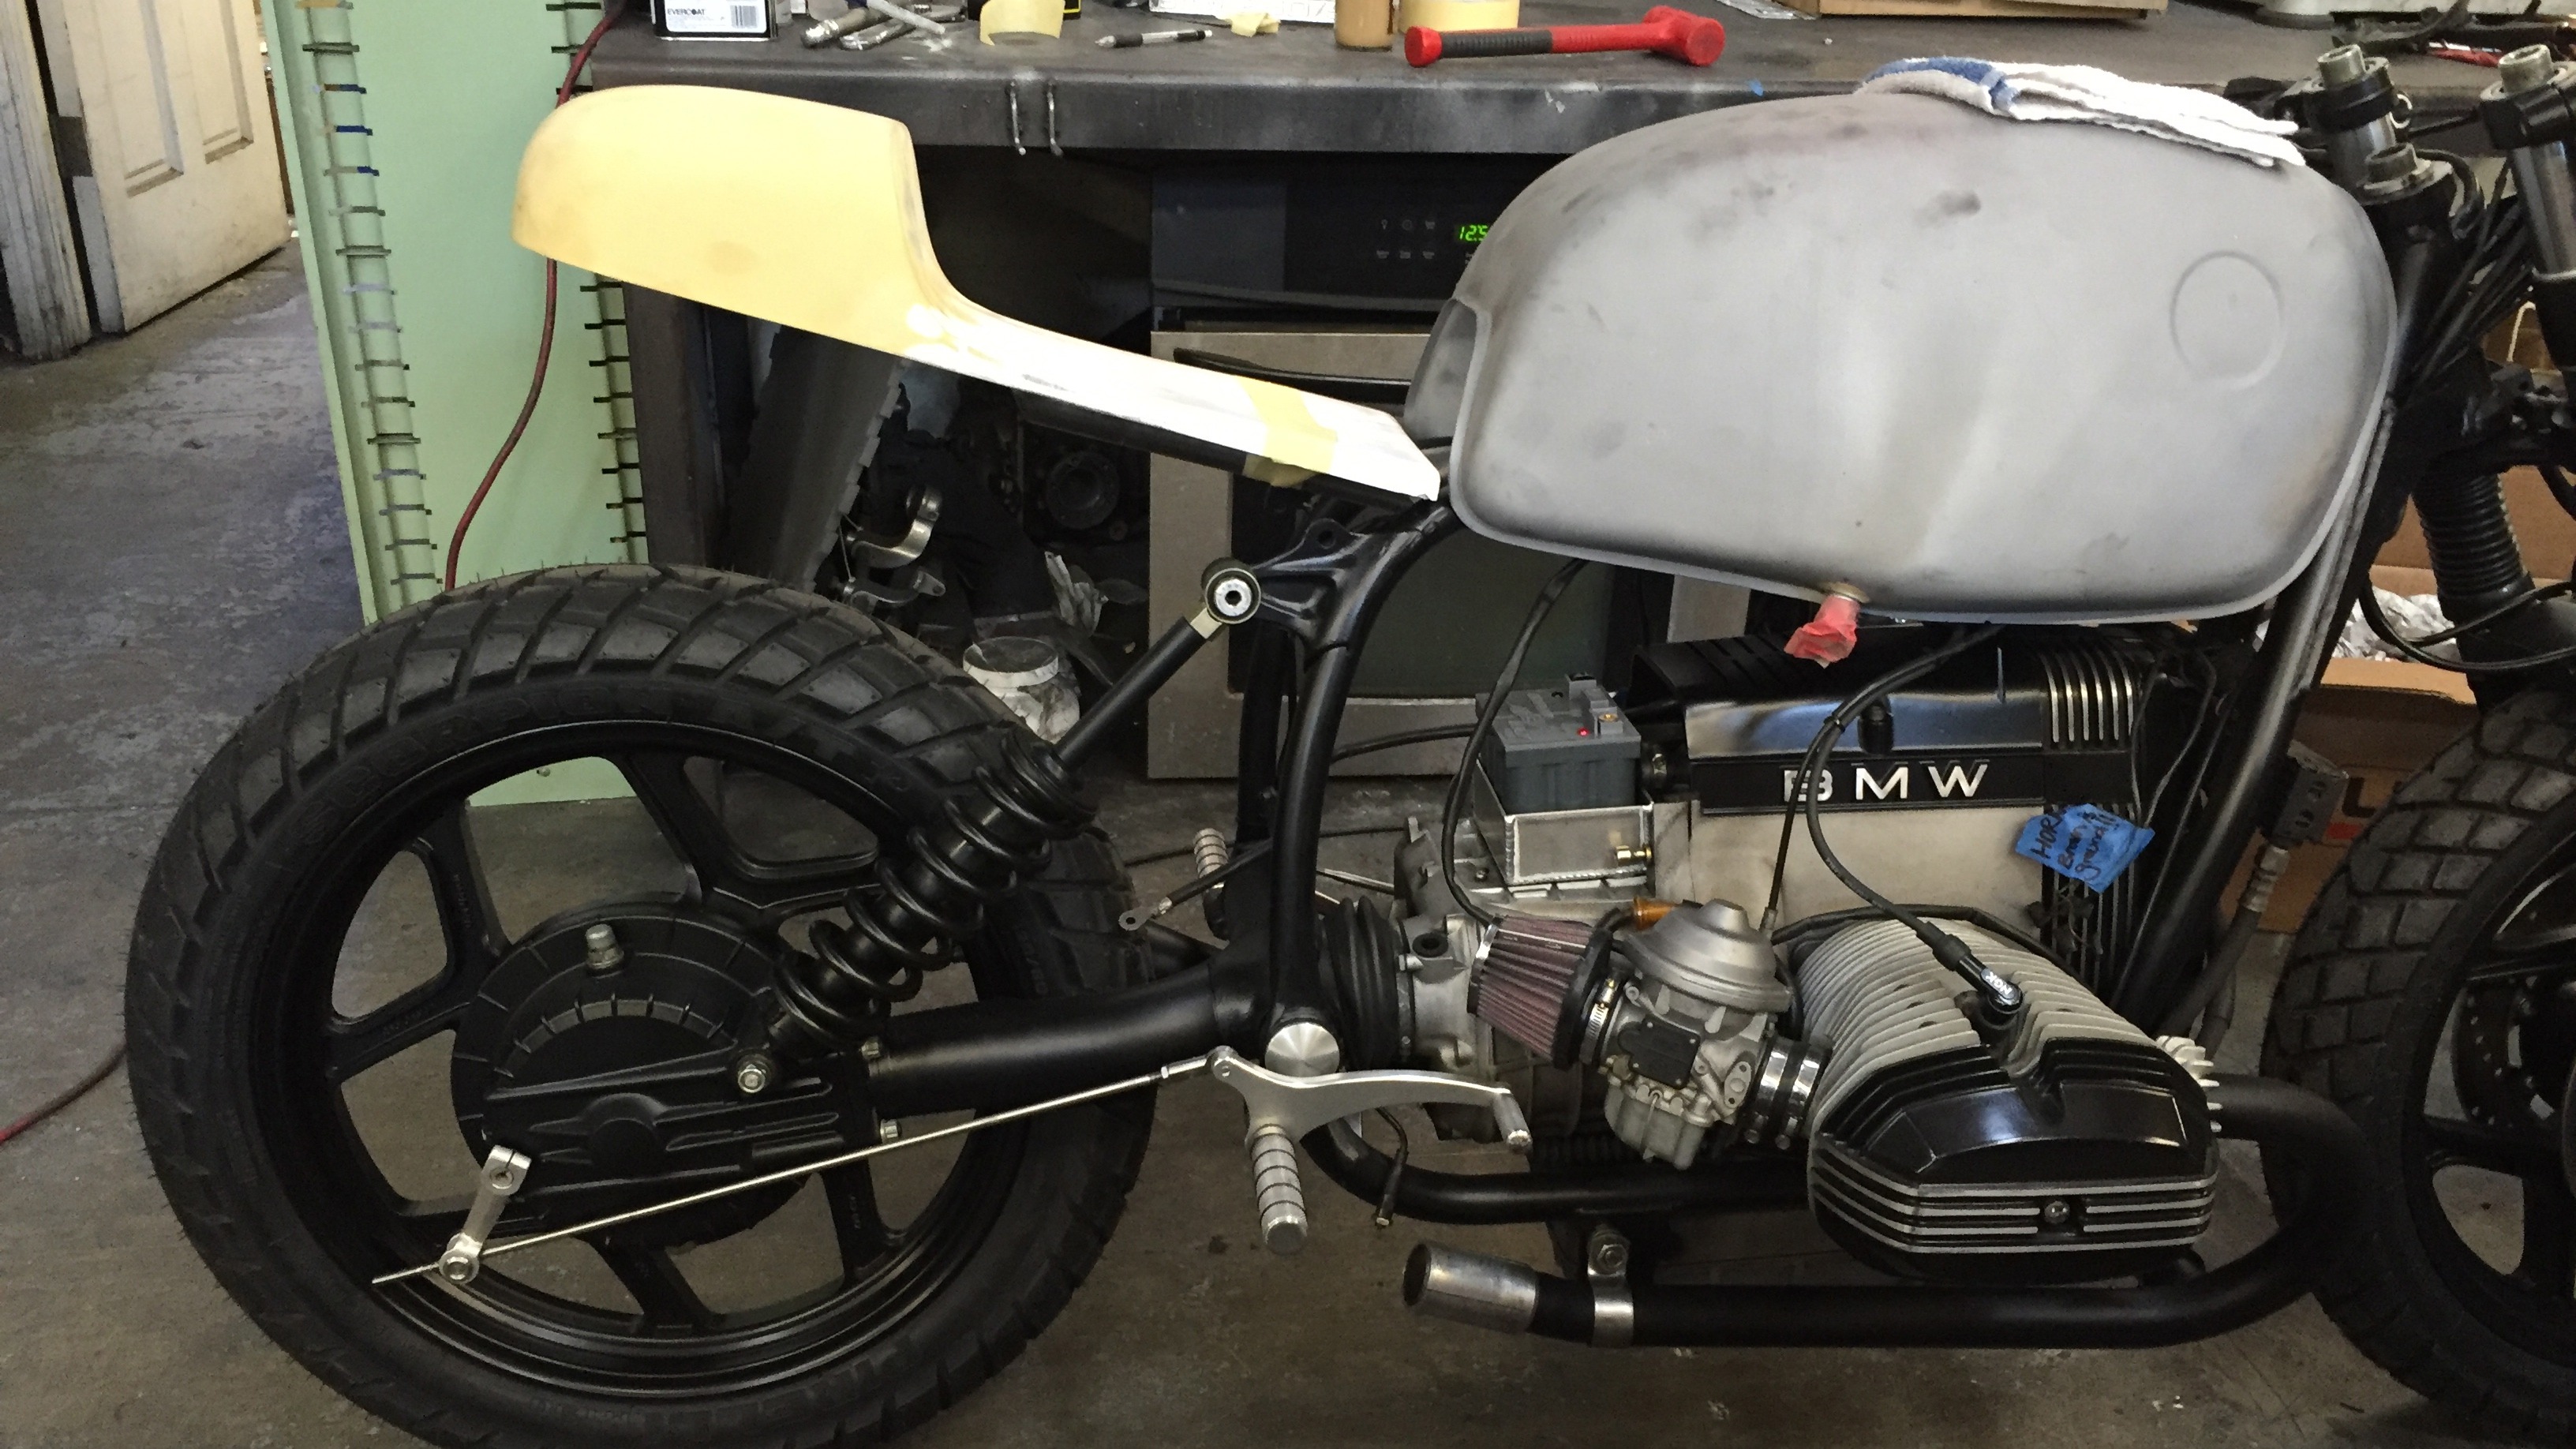
You can see the starter motor cover that I mentioned above in this picture below as well as the current state of the bike. It’s coming along nicely but there are still a bunch of things too do. First off is the new subframe and seat cowling. I eventually got sent in the right direction to attain a seat cowl that I really wanted from Jeremy Malman over at Worth Bikes in NYC. Jeremy put me in touch with a really great guy name Thor who makes custom cowlings for BMW’s. He lives in Florida and had one left of the 3 seats that he made from the template he used for Jeremy’s bike. Jeremy builds a bunch of custom bikes for which Oshmo supplies him with various different custom parts for his builds.
BMW R100RS currently
I also wanted to sort out the front brake discs as I had seen some on another build that had black centers which I really liked. Basically we just taped the rotors up and powder coated the center part that I wanted black. This was the end result.
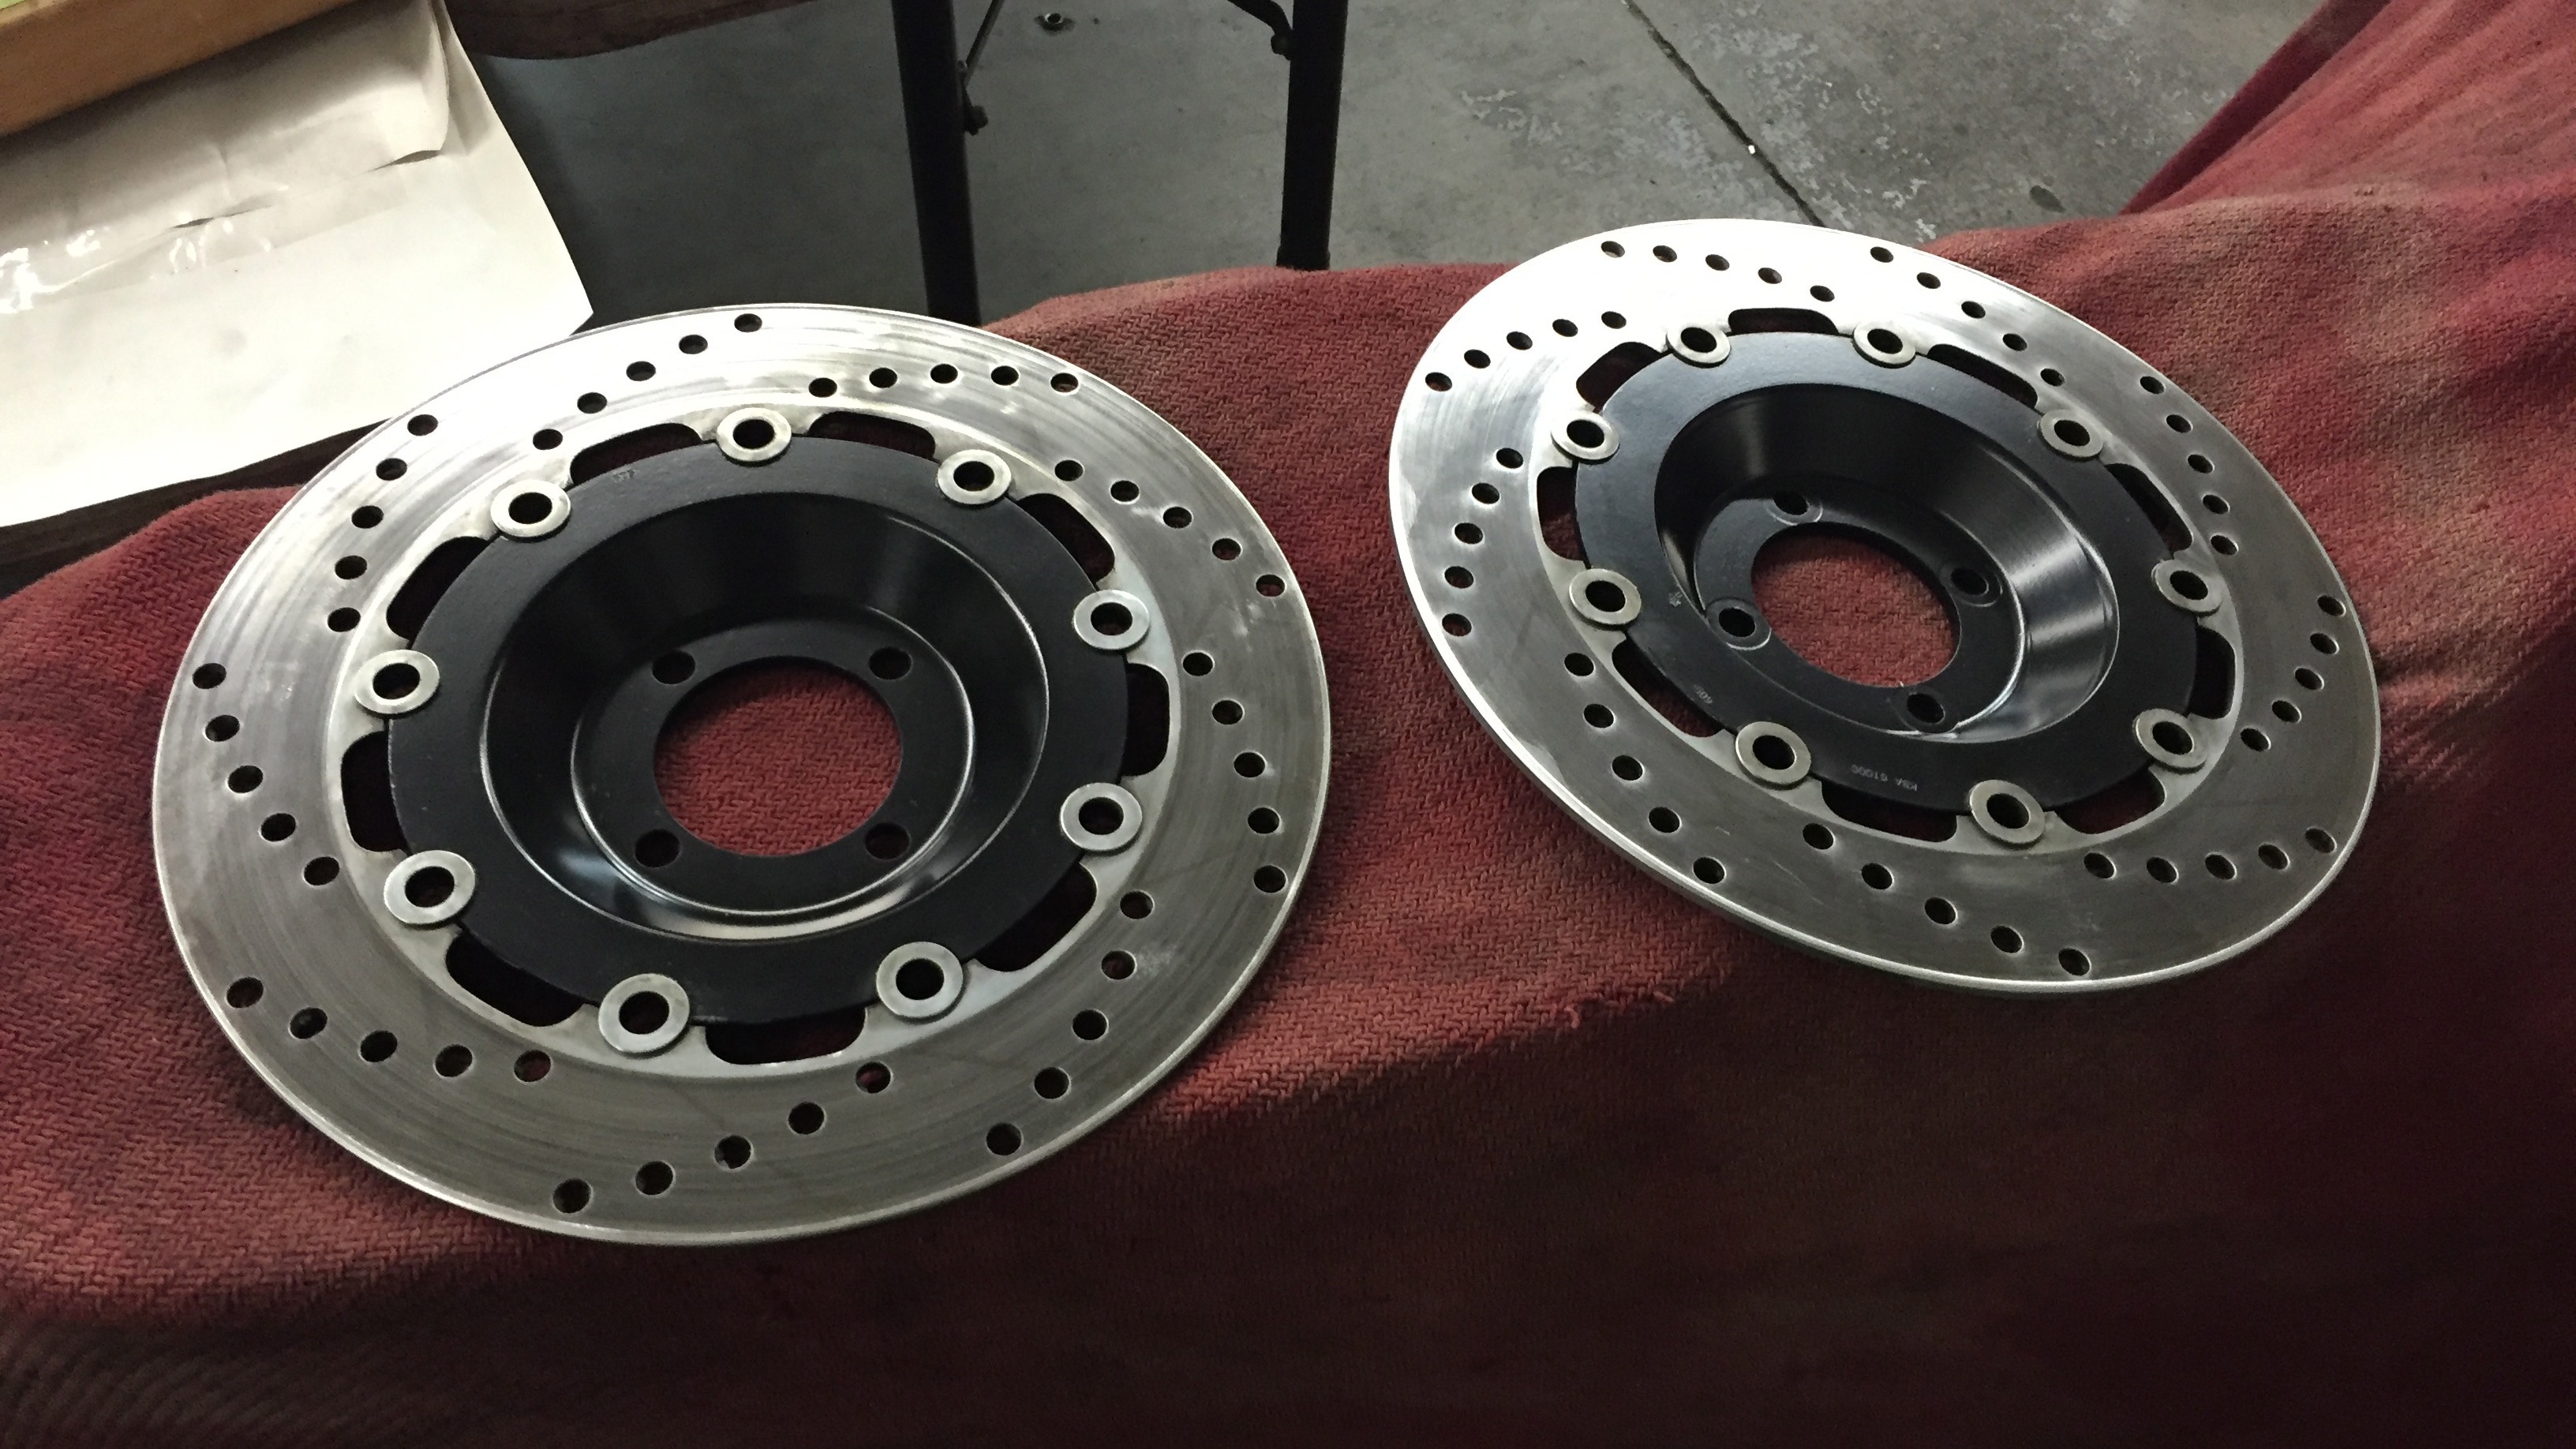
Front brake discs with black center
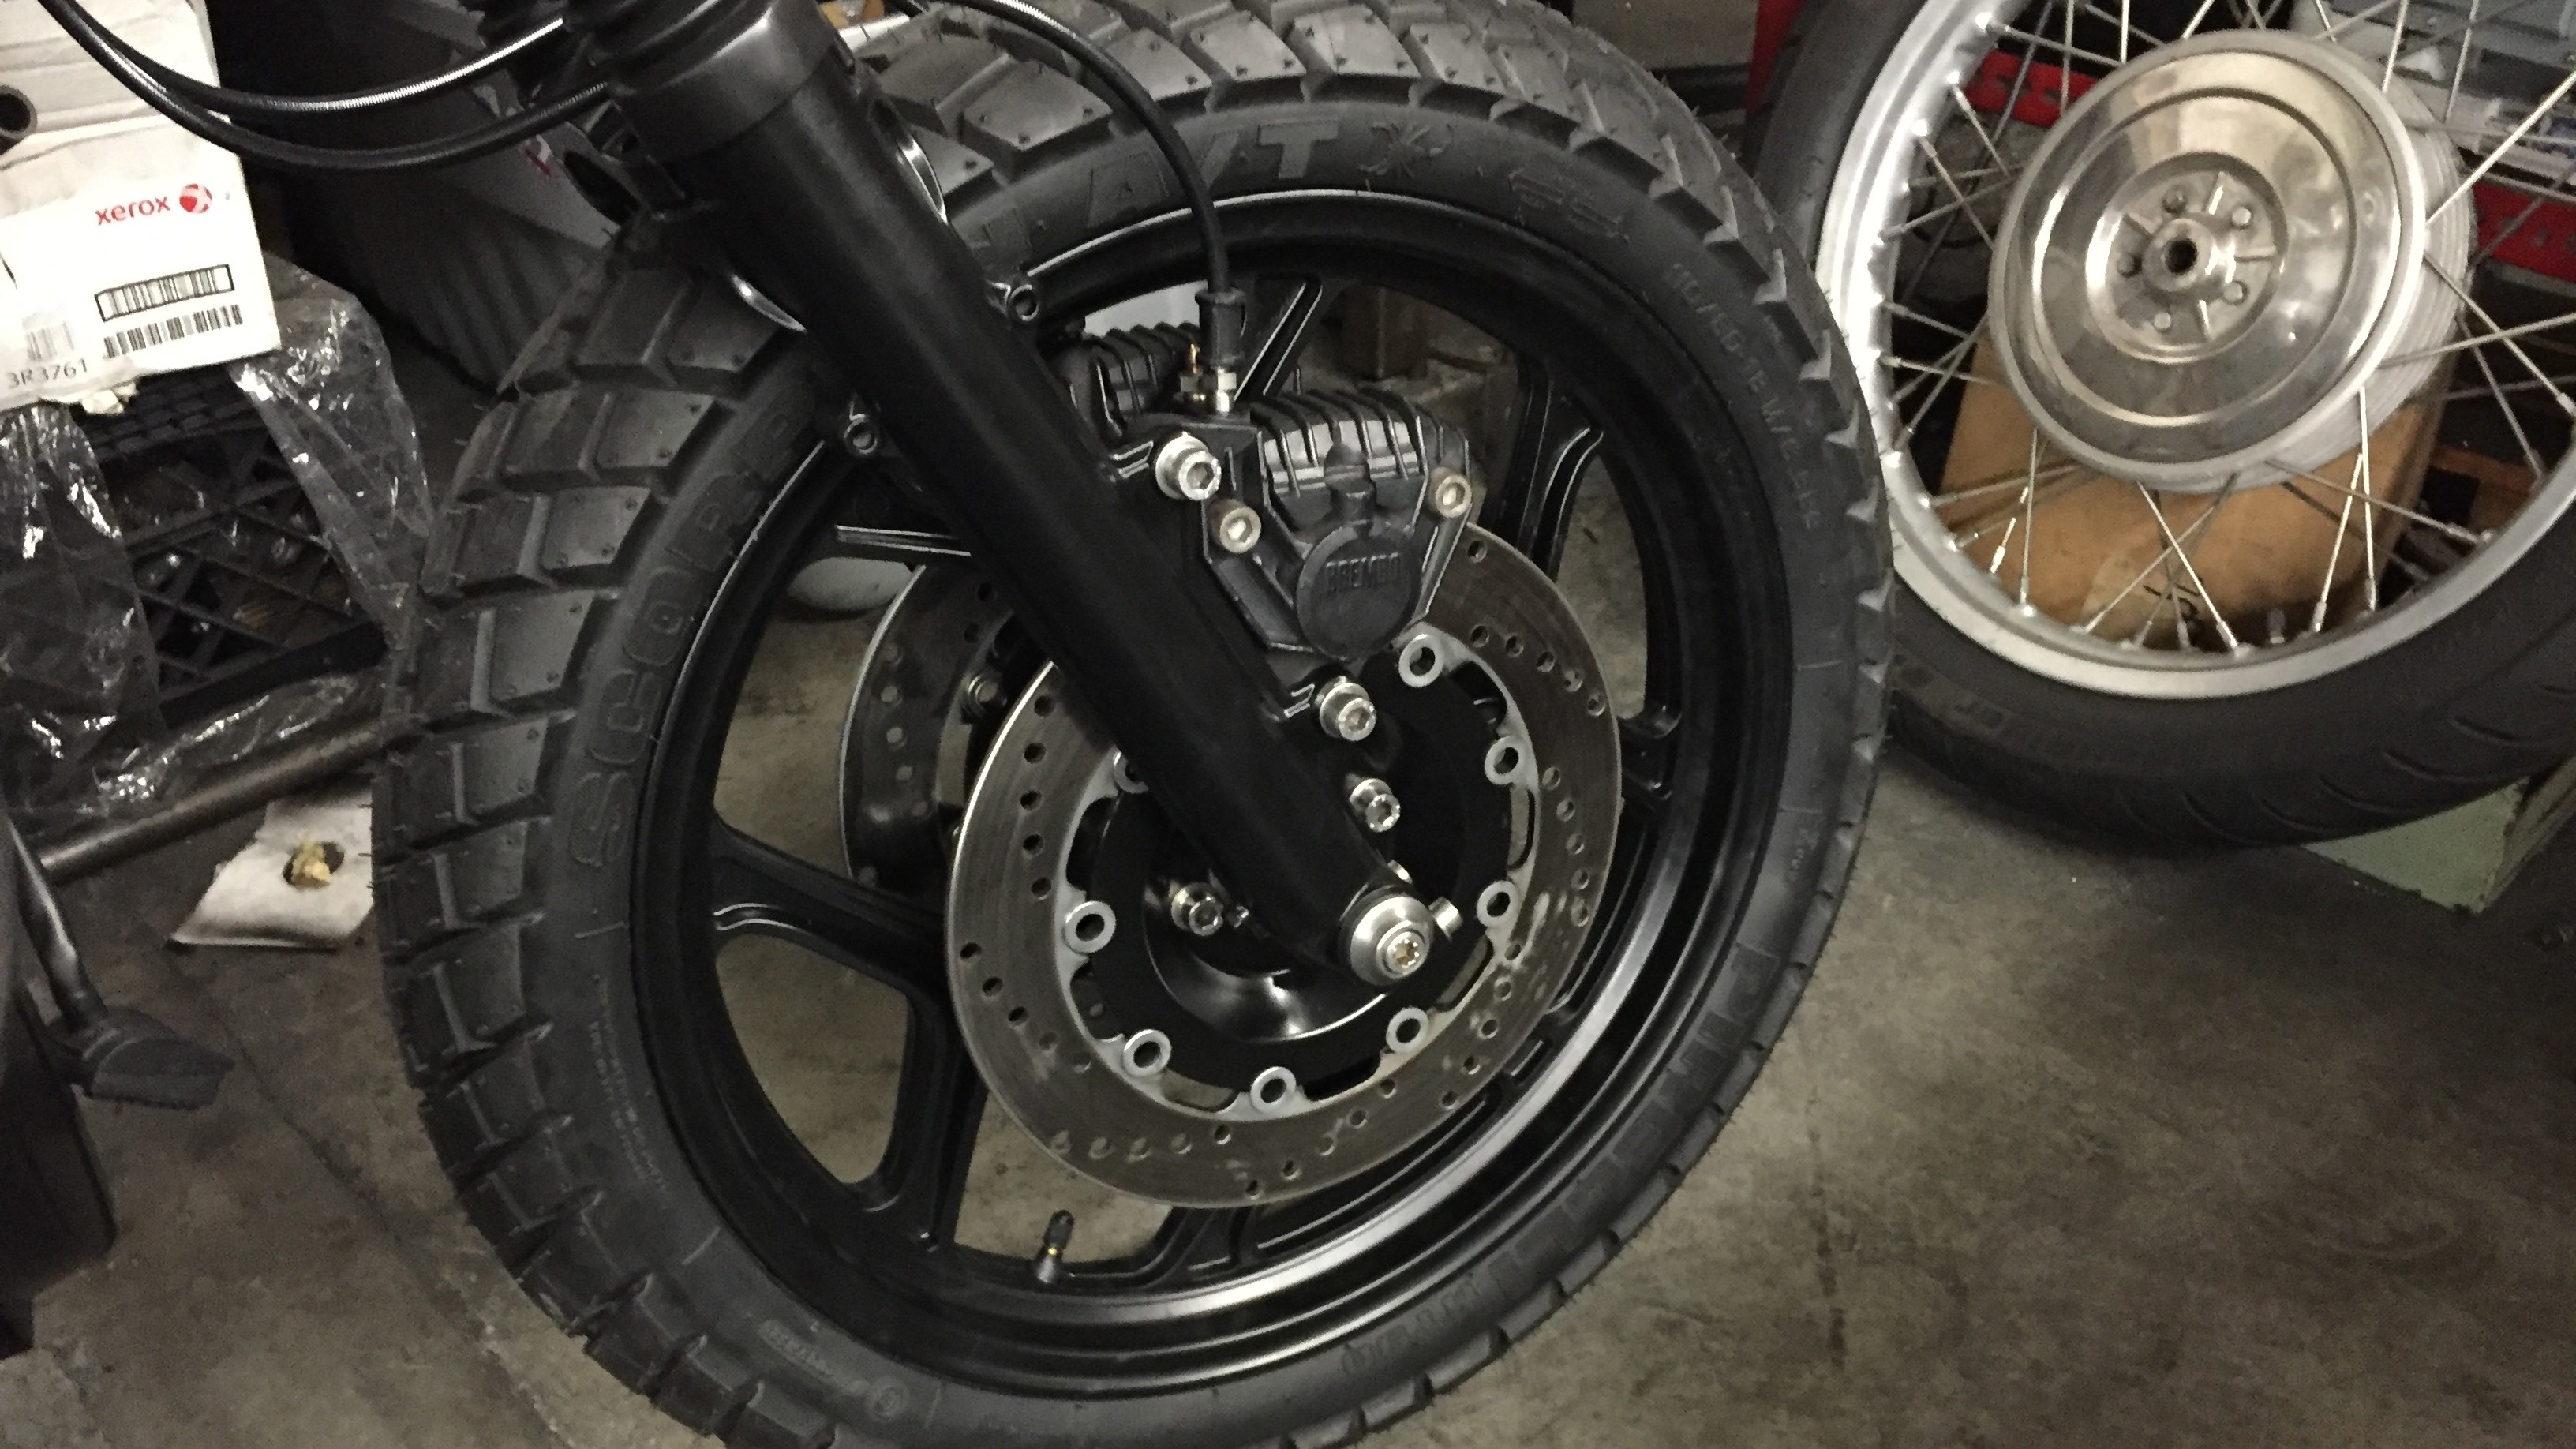
Front brakes discs on the bike
In the picture above with the powder coated brake discs you can also see new brake cable different to the stock setup. On the stock bike there is one cable that goes down to the left caliper and then a connecting metal arch that goes over the wheel to the right caliper. You can sort of see this in one of the early pictures where the bike is up on a table at Osh’s shop. Anyway, what I did is I ordered two separate cables and ran a double banjo bolt out of the master cylinder in order to connect the two lines. This way I could have one line running down to each caliper. I really love the way these brakes work in comparison to the older models of the airheads. It seems the big difference came when they started using the bolt on calipers.
Next thing I decided to do was look at sorting out the exhaust system. I had ordered a set of aftermarket black header pipes which I wanted to get on the bike with some nice short mufflers.
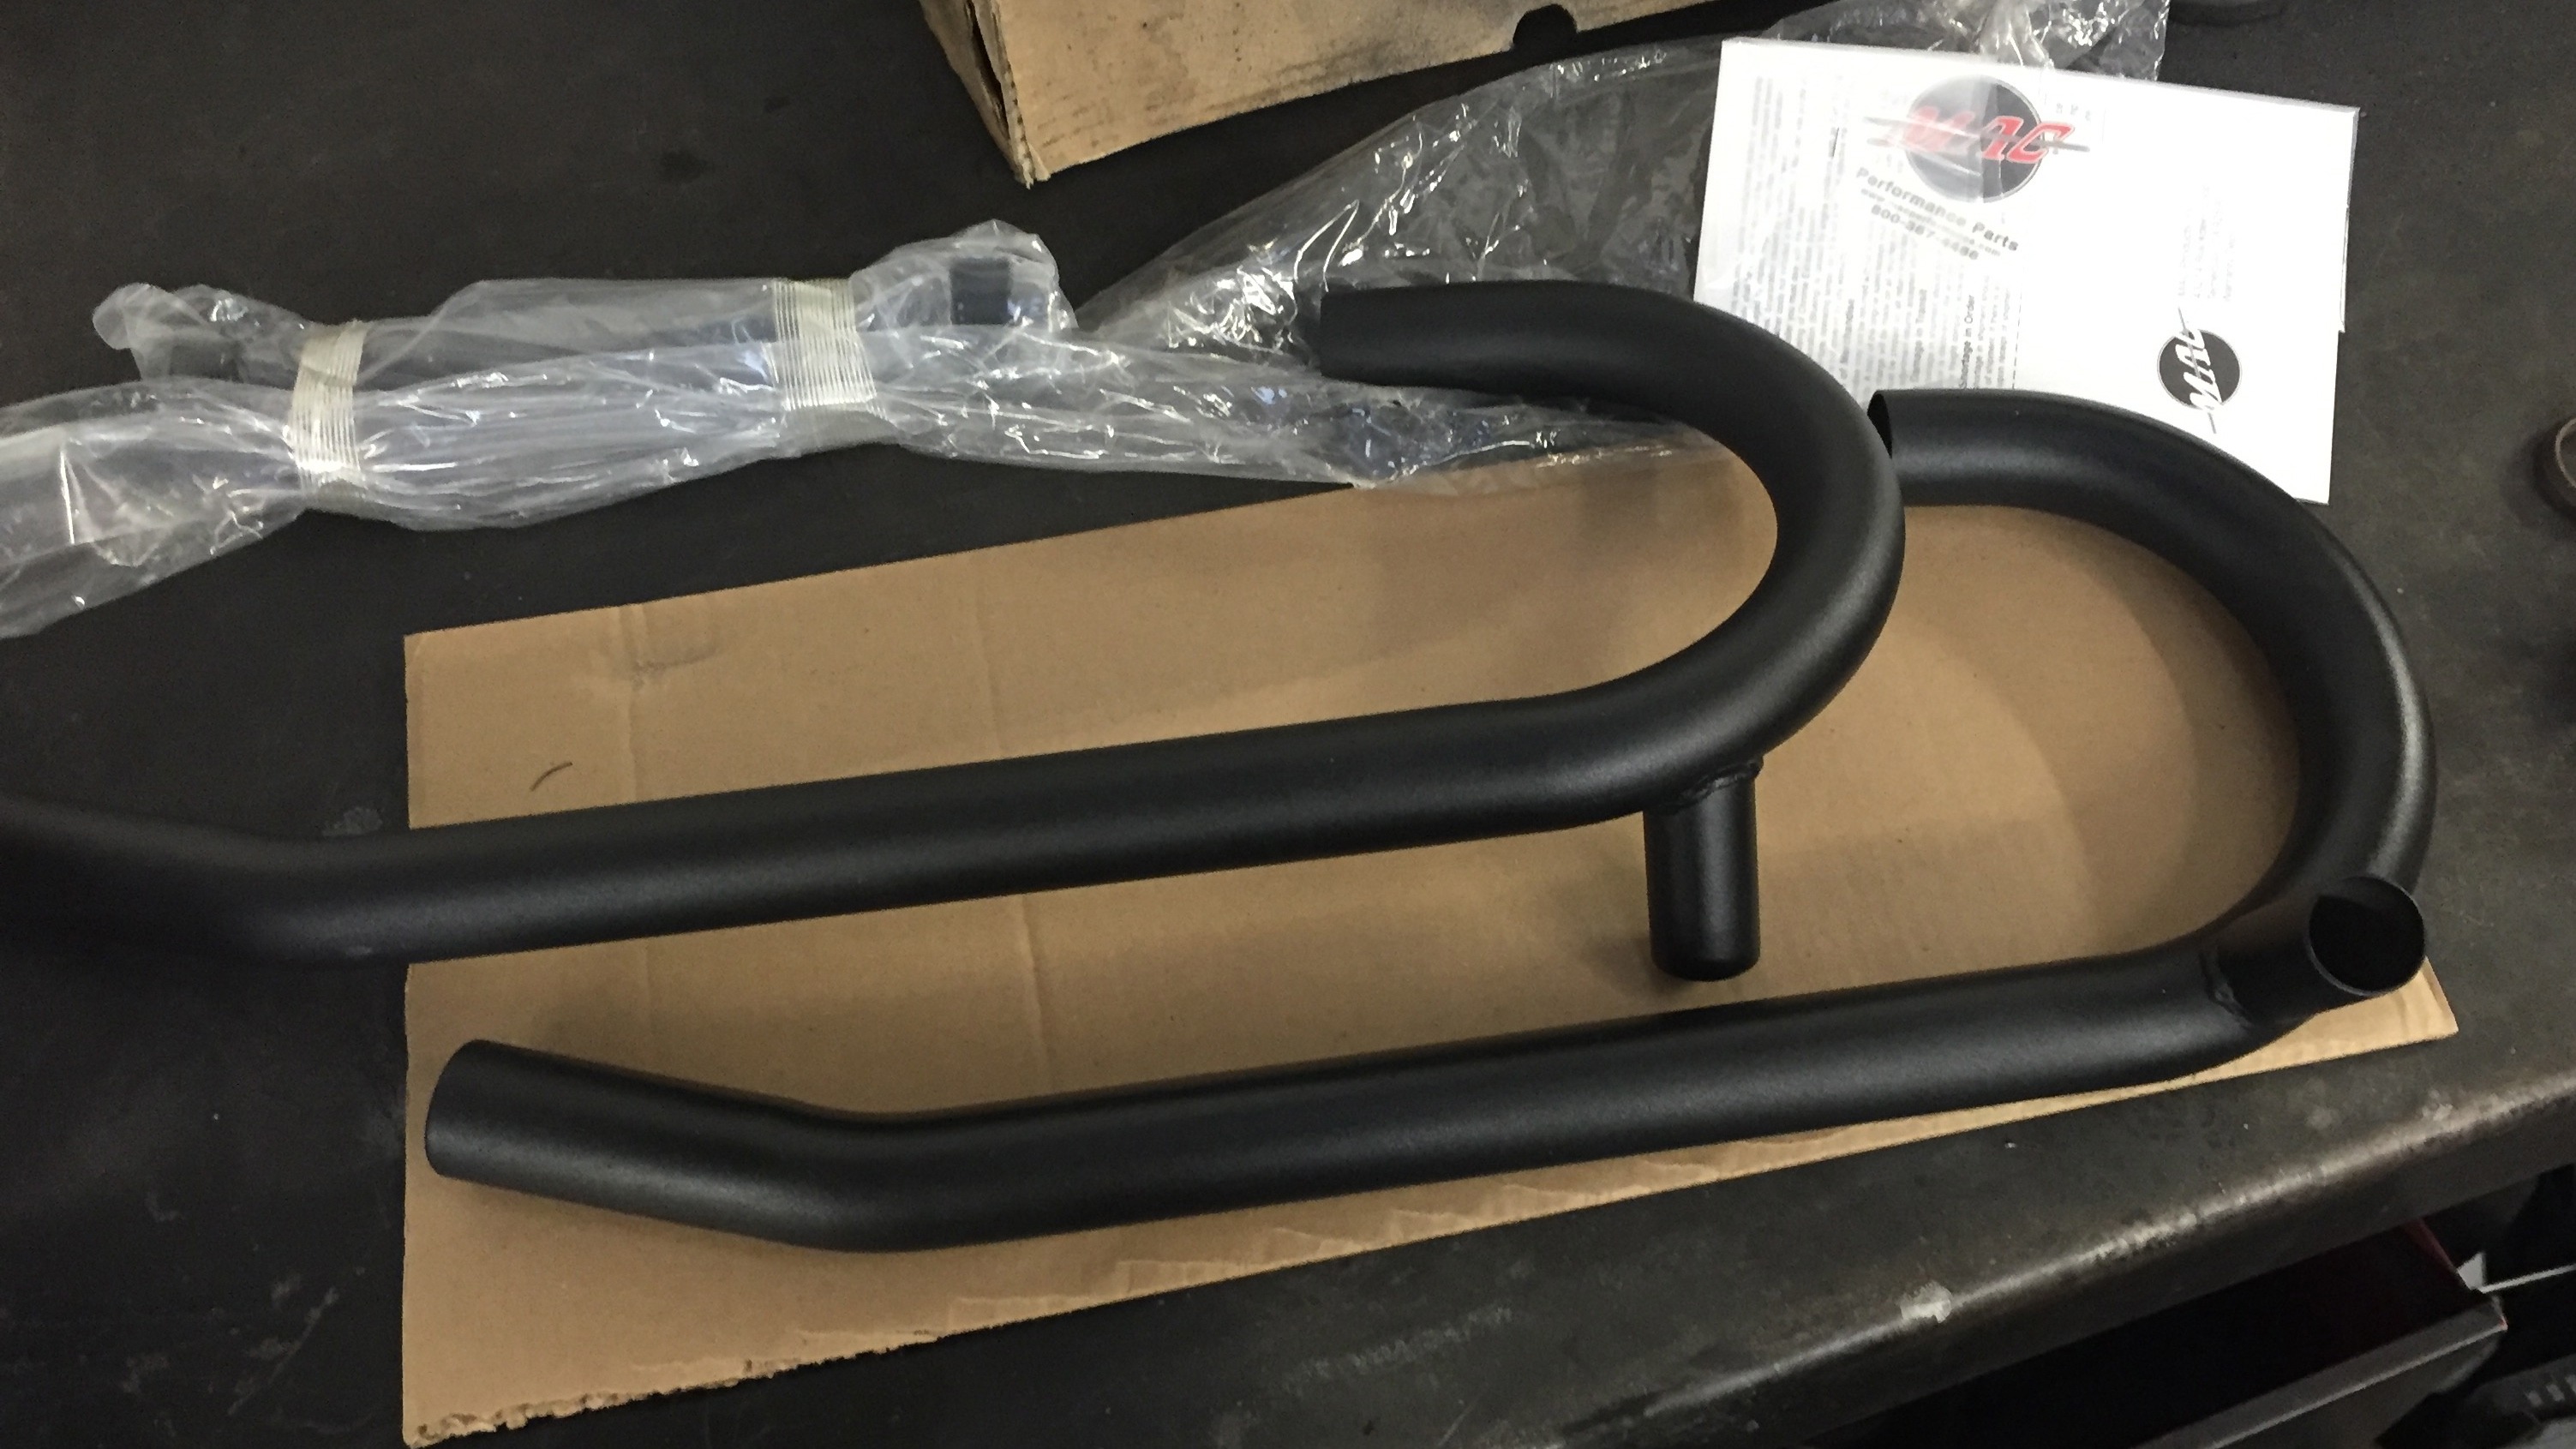
Header pipes
The mufflers I want to try on the bike are unfortunately 41mm internal dia and the header pipes with the black coating are just under 39mm so I needed to use a spacer of some kind to get them to fit nice and snug. They are pretty short so I need the join to be solid in order not to have to mount the mufflers to the frame for support. I got some help from Adam on this. Adam is one of Osh’s main guys who works in the shop and is a super talented and all around nice person. He has helped me with a fair bit of welding, powder coating as well as machining the odd part here and there and is always willing to give some input on ideas and help trouble shoot when we need to figure something out. He has also fielded lots of “where is …..” questions from myself while I was finding my way around the shop which I appreciated his help with. It is always nice to have an additional view on things other than just mine or Osh’s regardless of whether we all agree or not too. Adam helped me make some nice little spacers to fit the exhaust. It is a sleeve similar to the sleeves Osh made for the fork ear’s which would be tucked away under the exhaust with only 2mm or so showing. I will upload a few pics below of the part and the end result.
Header to muffler spacer sleeve on the lathe
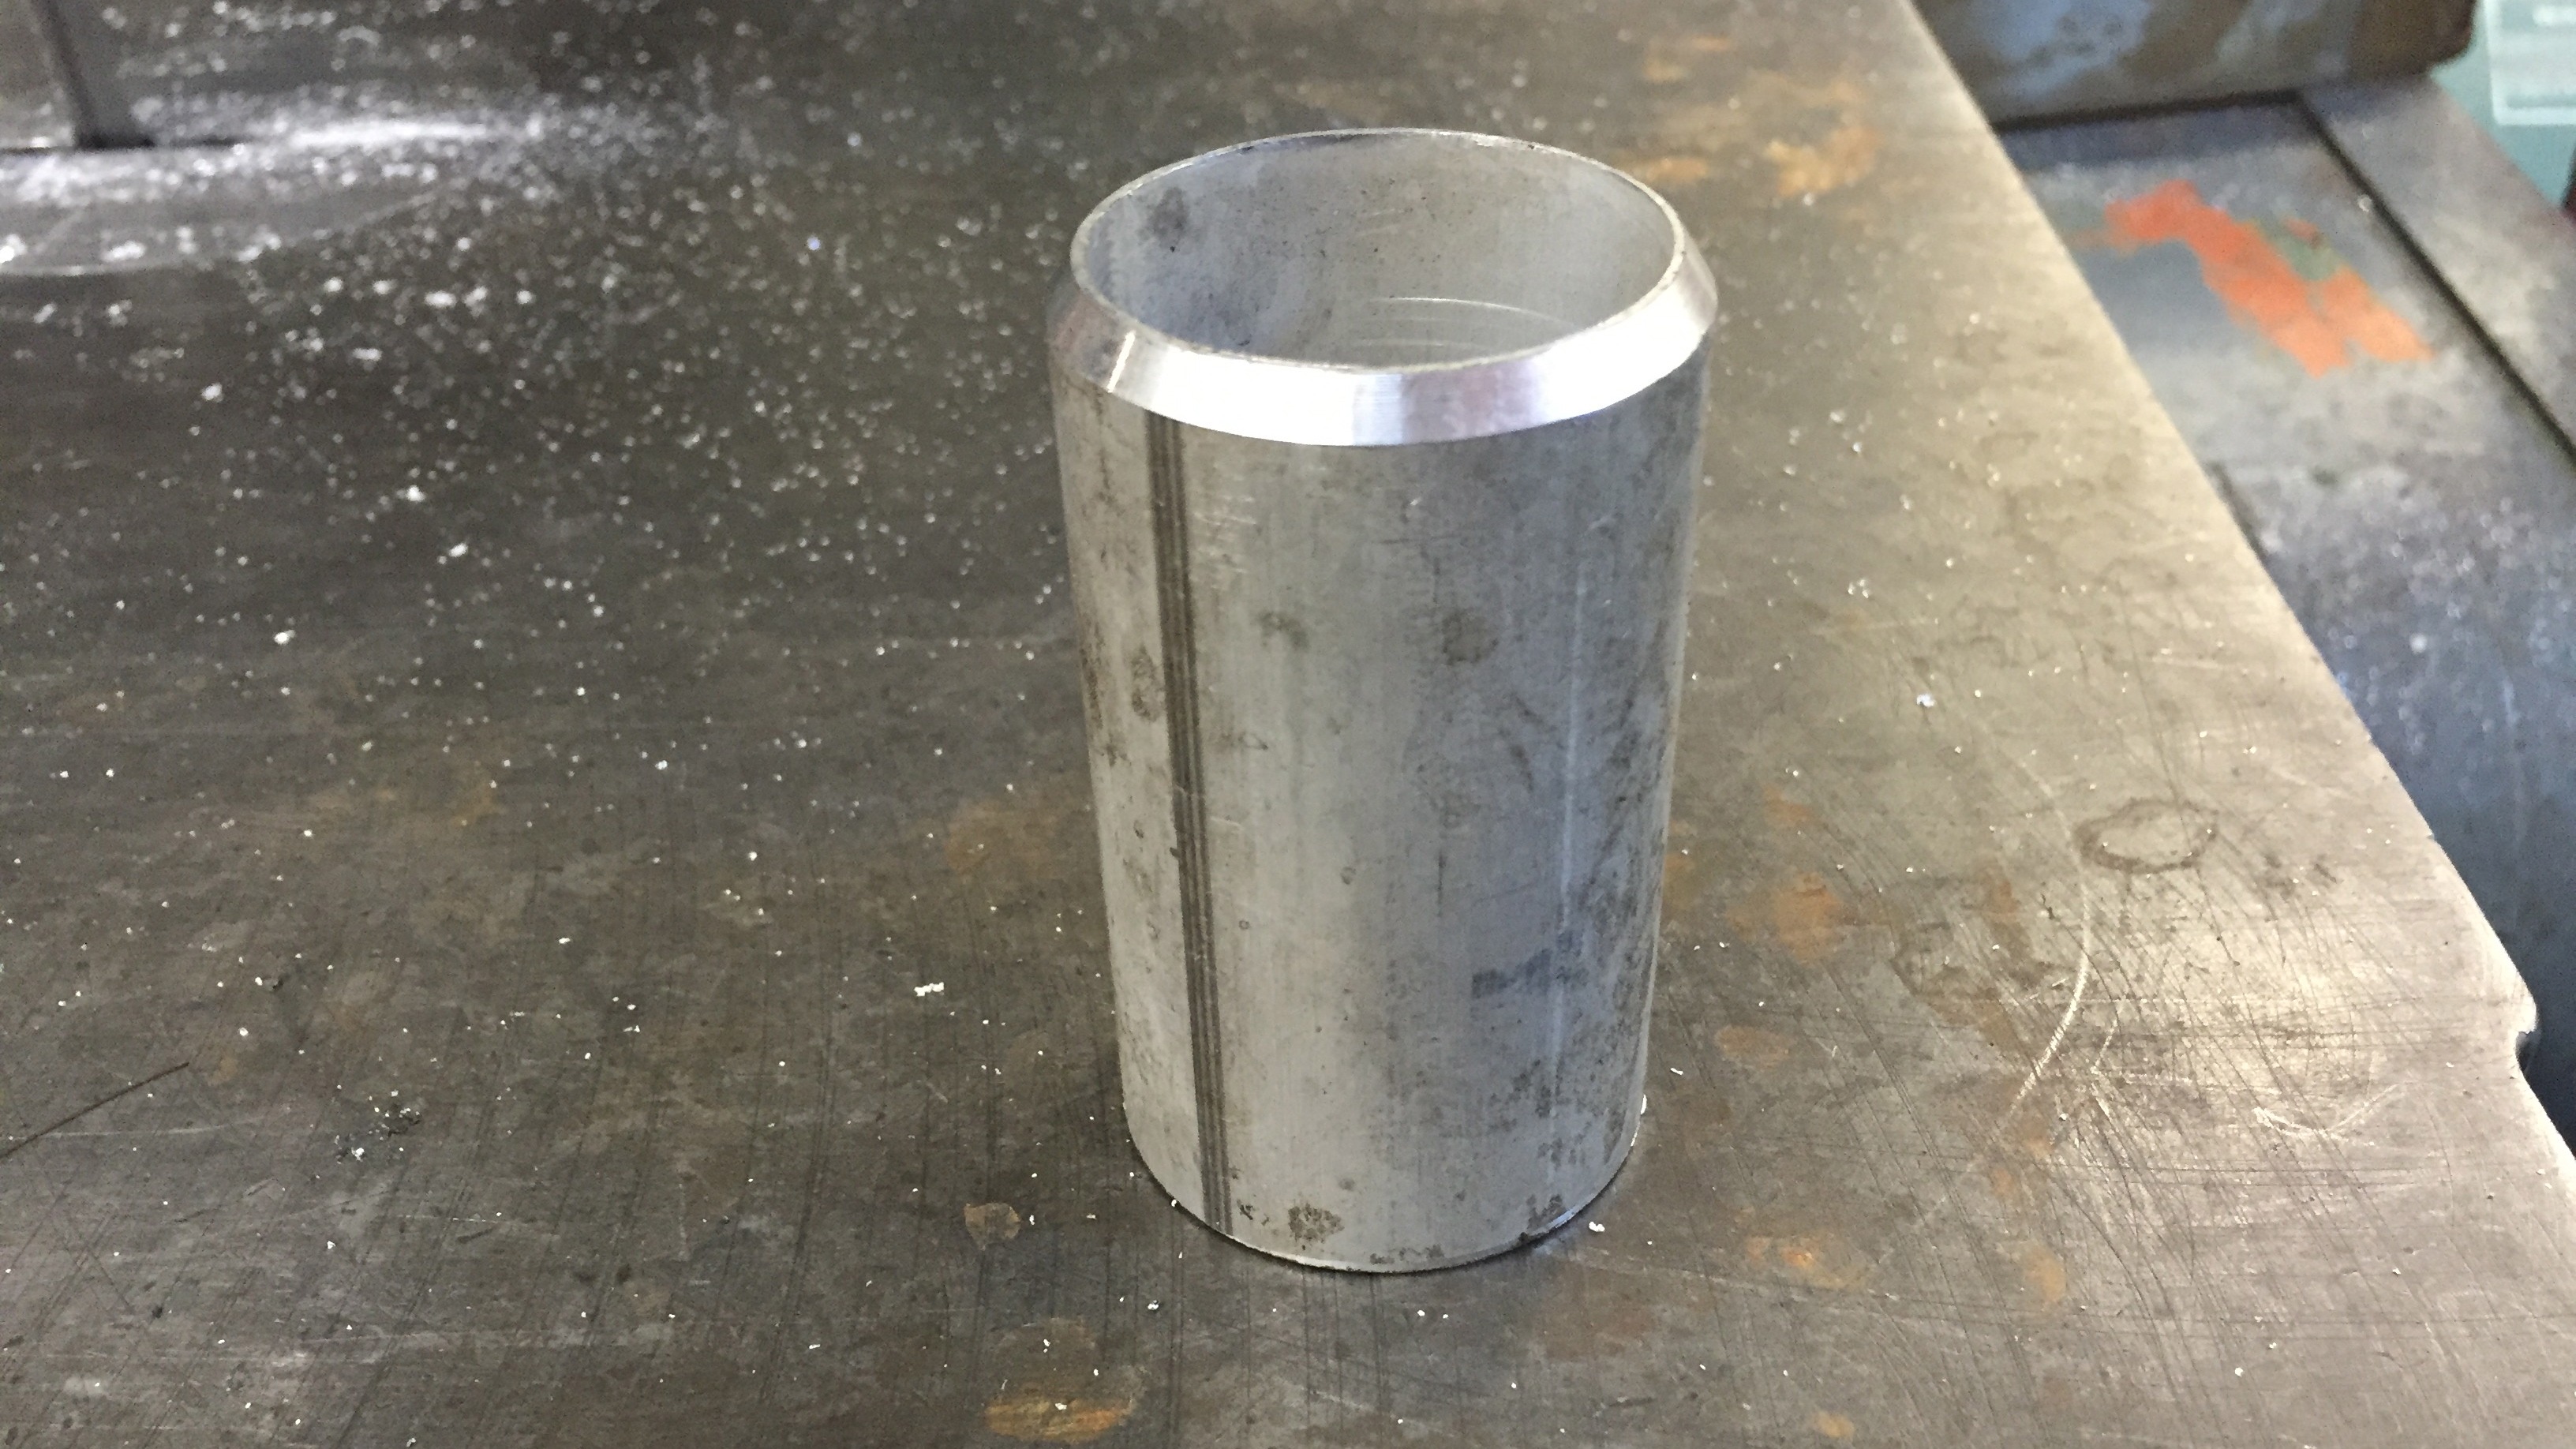
Spacer
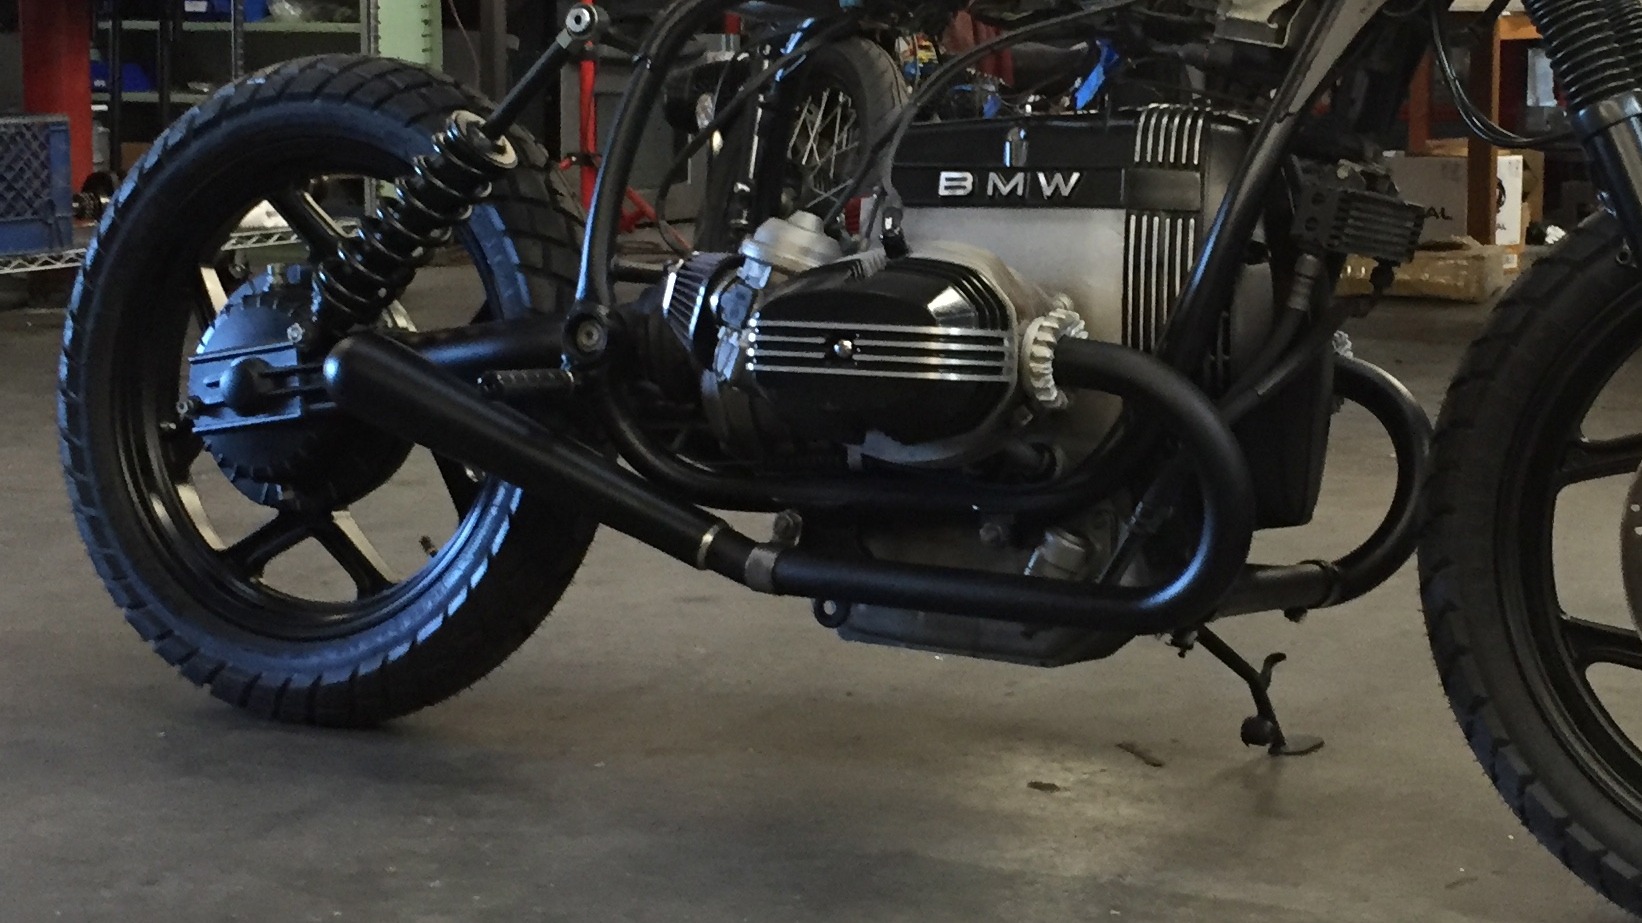
Black headers and mufflers on bike
You can see the little spacer showing ever so slightly just back from the stock clamp that attached the header pipe to the frame. I might look at painting the clamp black too but I’m not mad at the way it looks now so I might just leave it like it is. Here is a quick picture of Adam and Josh trolling instagram feeds during a quick break. Josh is one of the younger guys that works in the shop under Adam. He’s also a great kid always willing to help where he can.
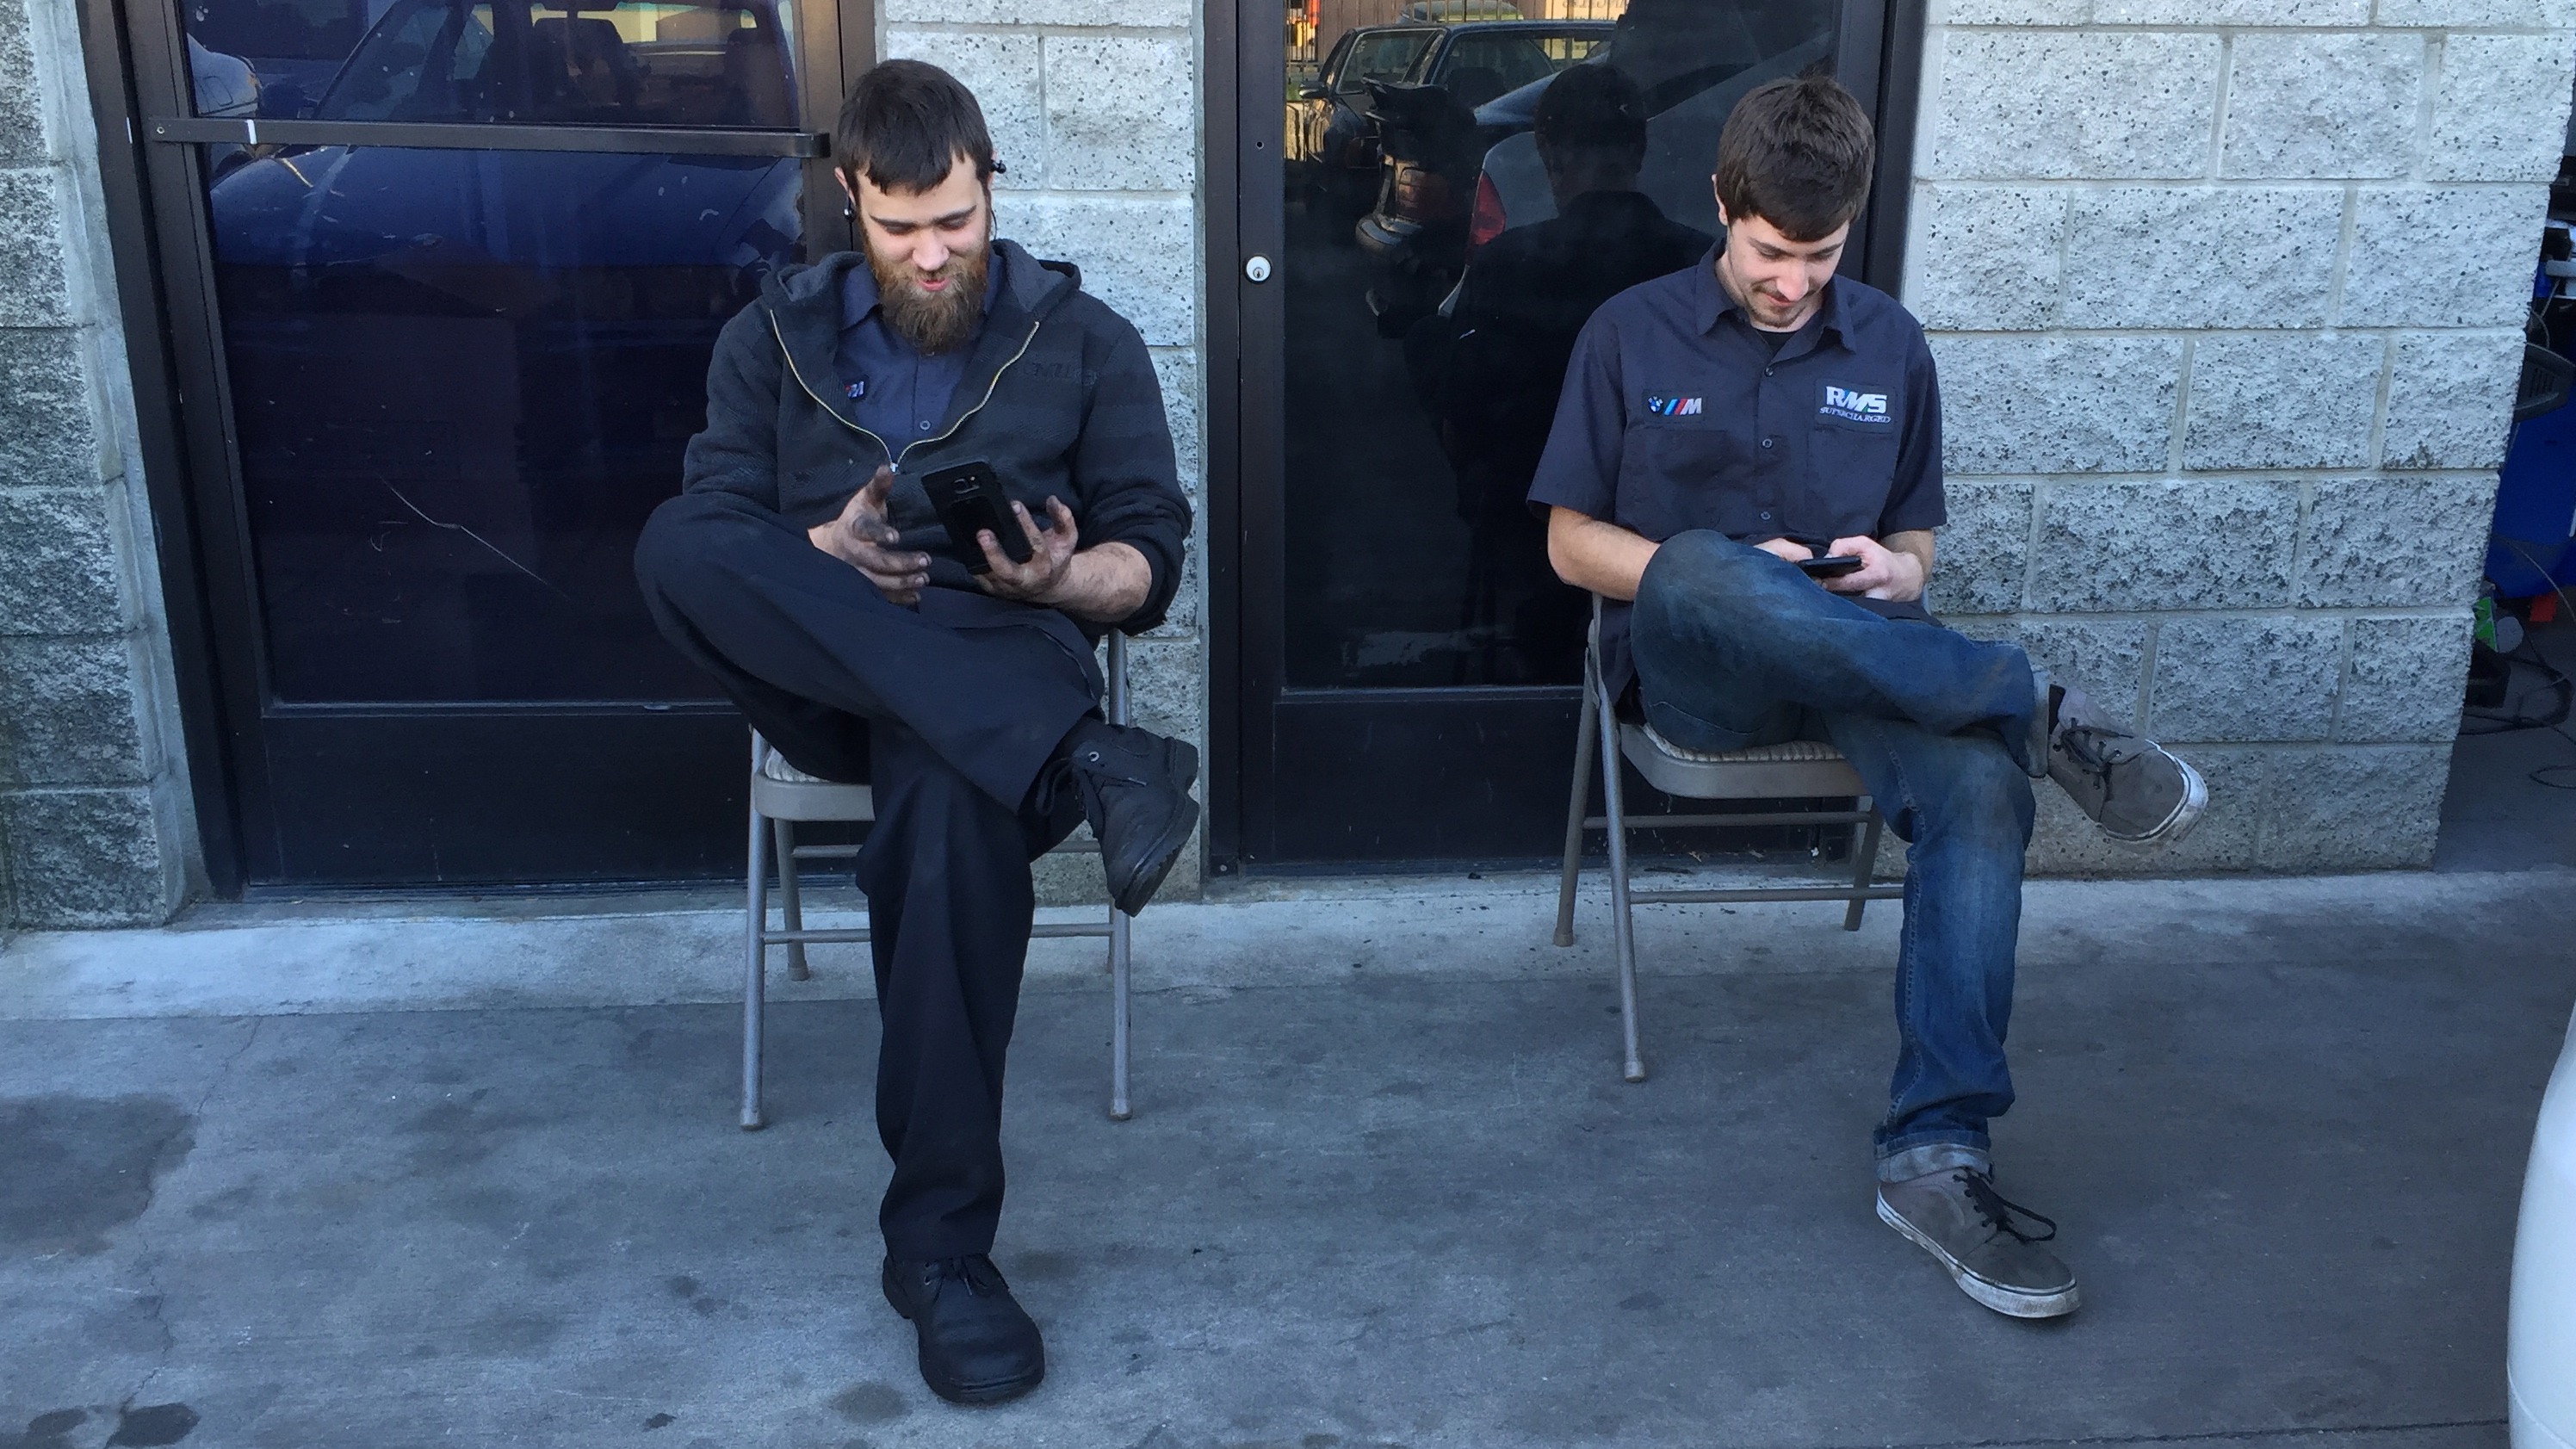
Adam and Josh, the break time instagrammers
Next I really needed to figure out the rear cowling and so I started to mess with angles to see what was going to look best. I just took a piece of wood and bolted it to the front subfram mounts and then propped that up with another piece of wood balancing on the rear wheel and messed with the angle until it looked close to what I wanted. Then I moved ahead with how to create the new subframe structure that was going to hold up the new seat.
Finding the new seat angle
When looking at the pictures I took of the seat I felt that the bubble on the seat I had bought was a little bigger than what I wanted but I figured out the angle so I could start working on the subframe but went back to the internet in search of a different bubble seat. In the mean time I painted the rear drive assembly black which was something I had been meaning to do for a while but had not gotten to as yet. I just painted this with a rattle can using a good quality heat resistant low gloss black paint.
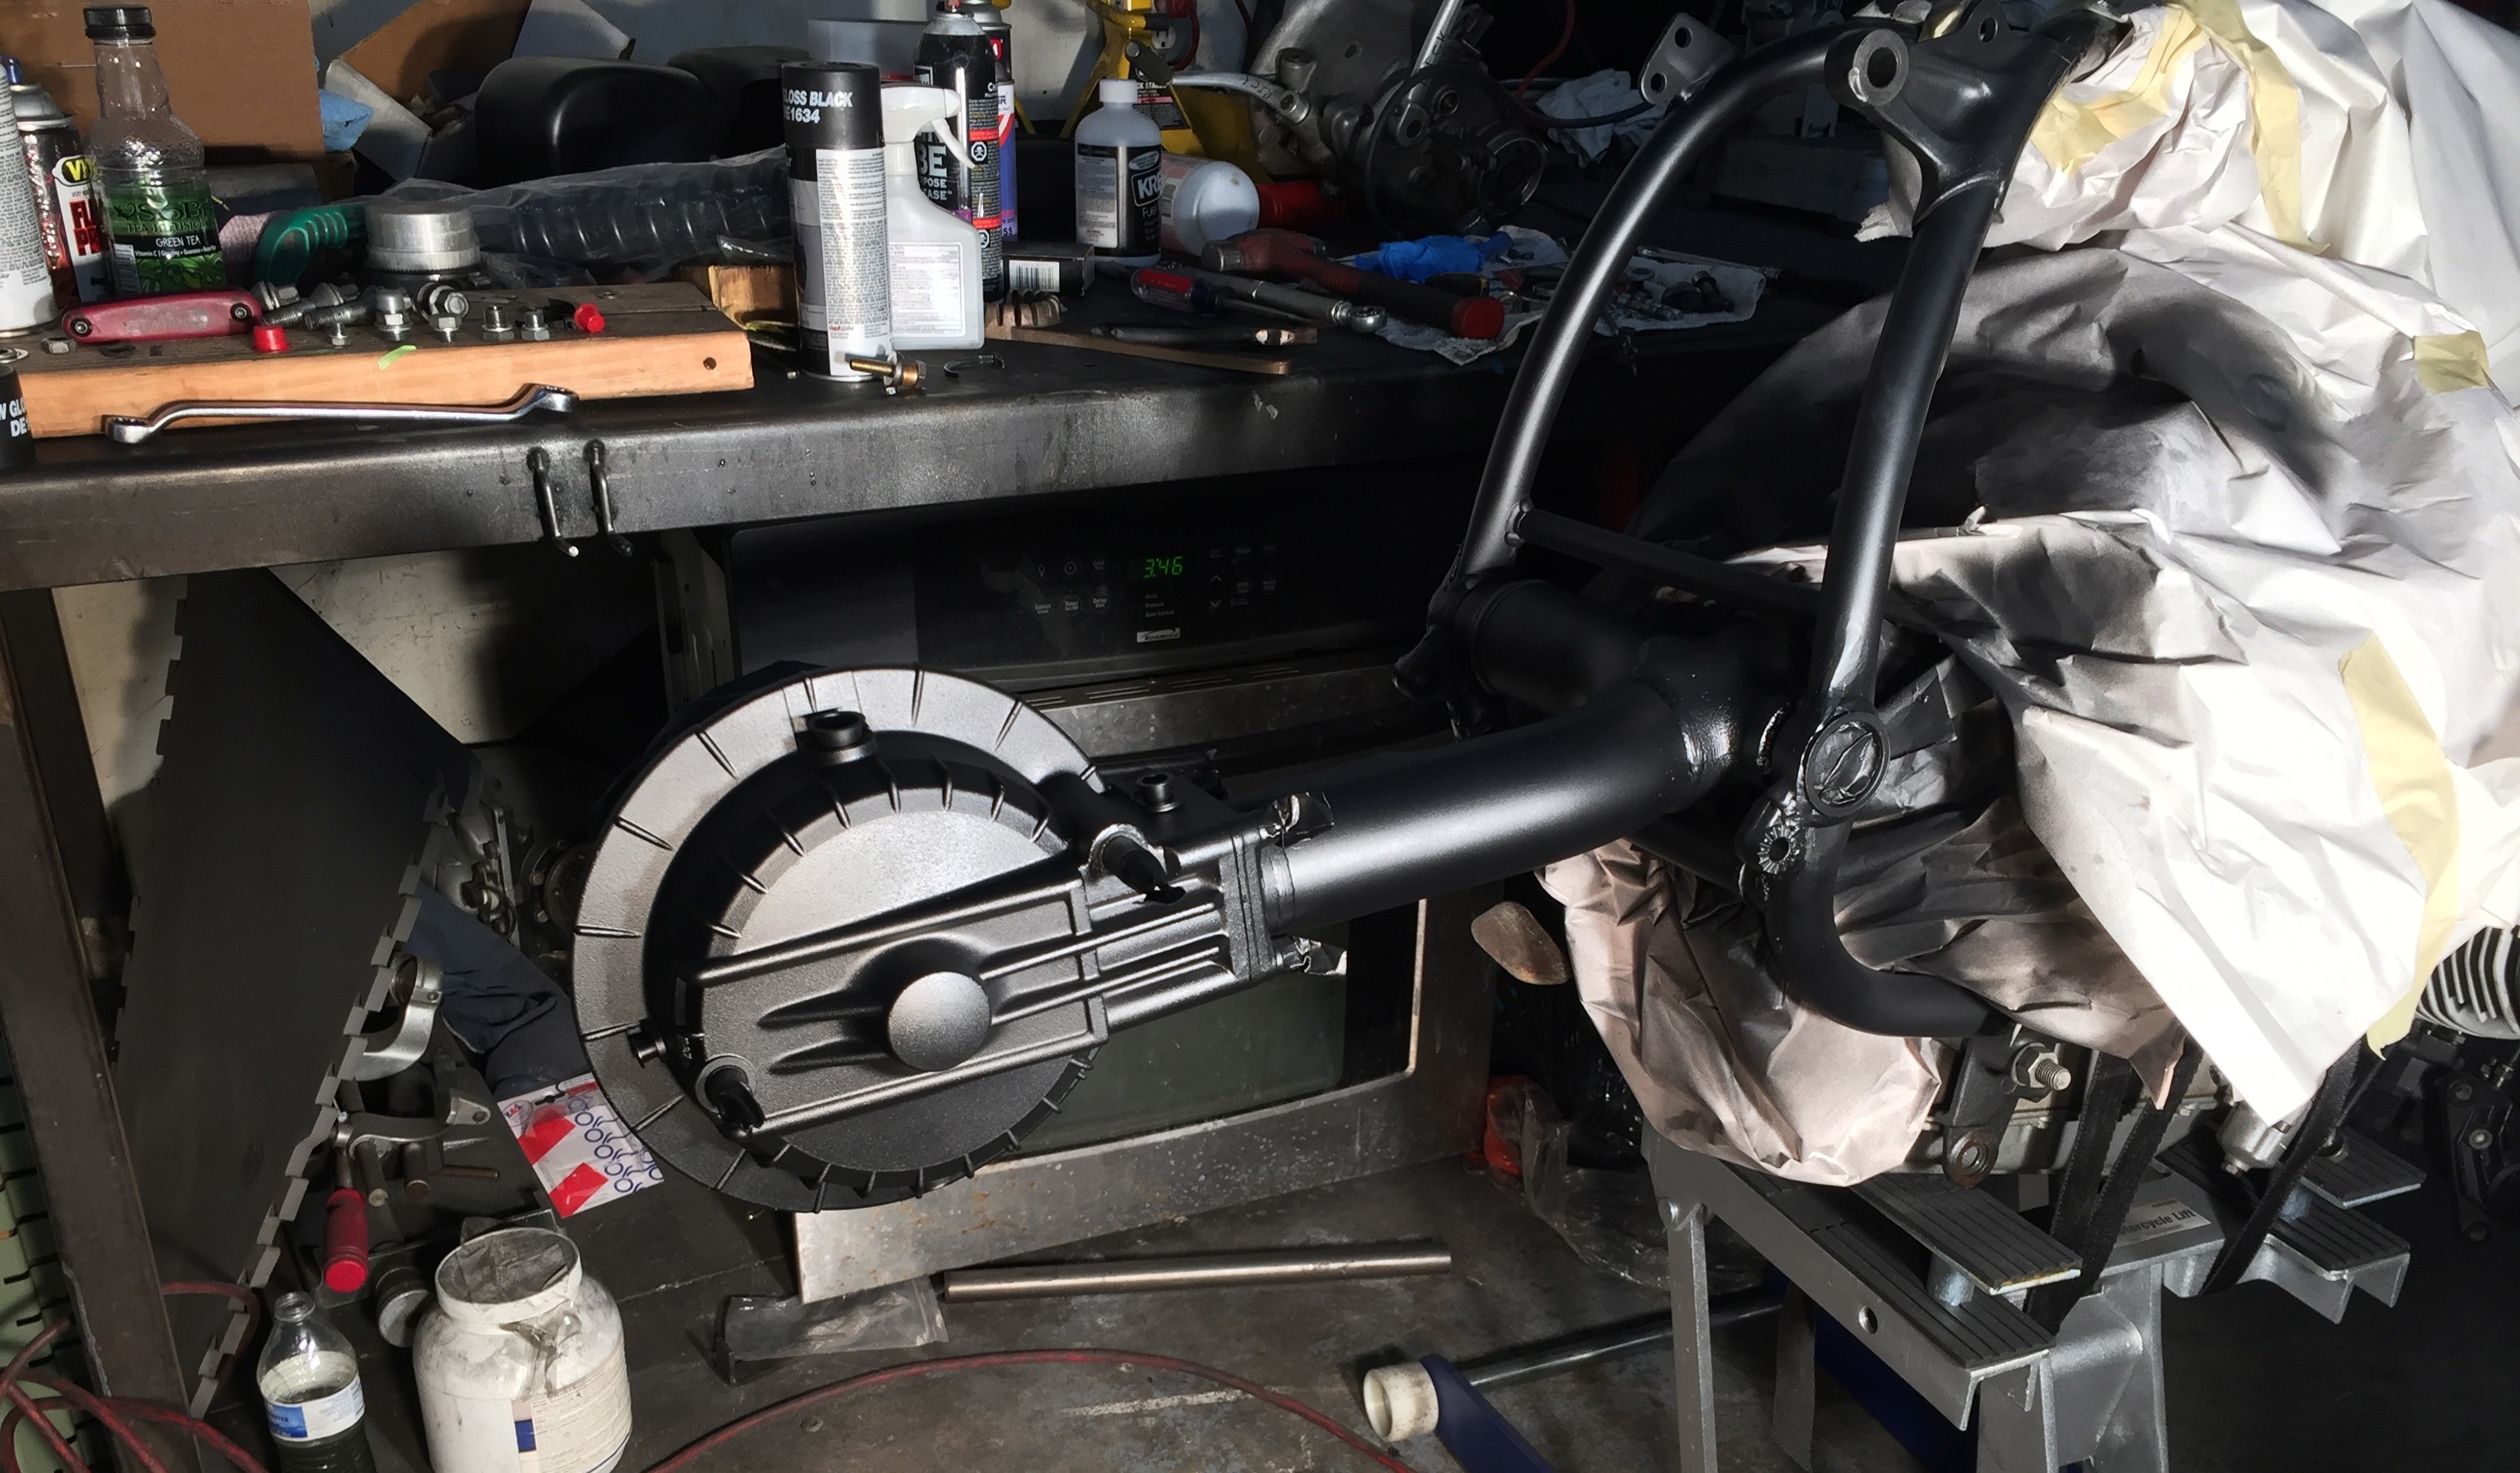
Black final drive
Ok, so back to the subframe and how I was going to mount the new seat. I had seen a bobber on the internet that gave me this idea where the seat mount came straight out of the main top tube of the frame. Everyone like the idea as we could then keep the rear of the bike even more open and have the seat with a floating kind of feel to it. We pie cut some tubing the get the angle correct and simply welded a nice thick plate to the new extension of the tubing which would now support the seat. I also pushed for Adam to help me weld some additional support plates around this new join to make sure the frame could easily support this method of mounting the seat. It’s kinda hard to explain so I’ll just add a few pictures which should make things a bit clearer.
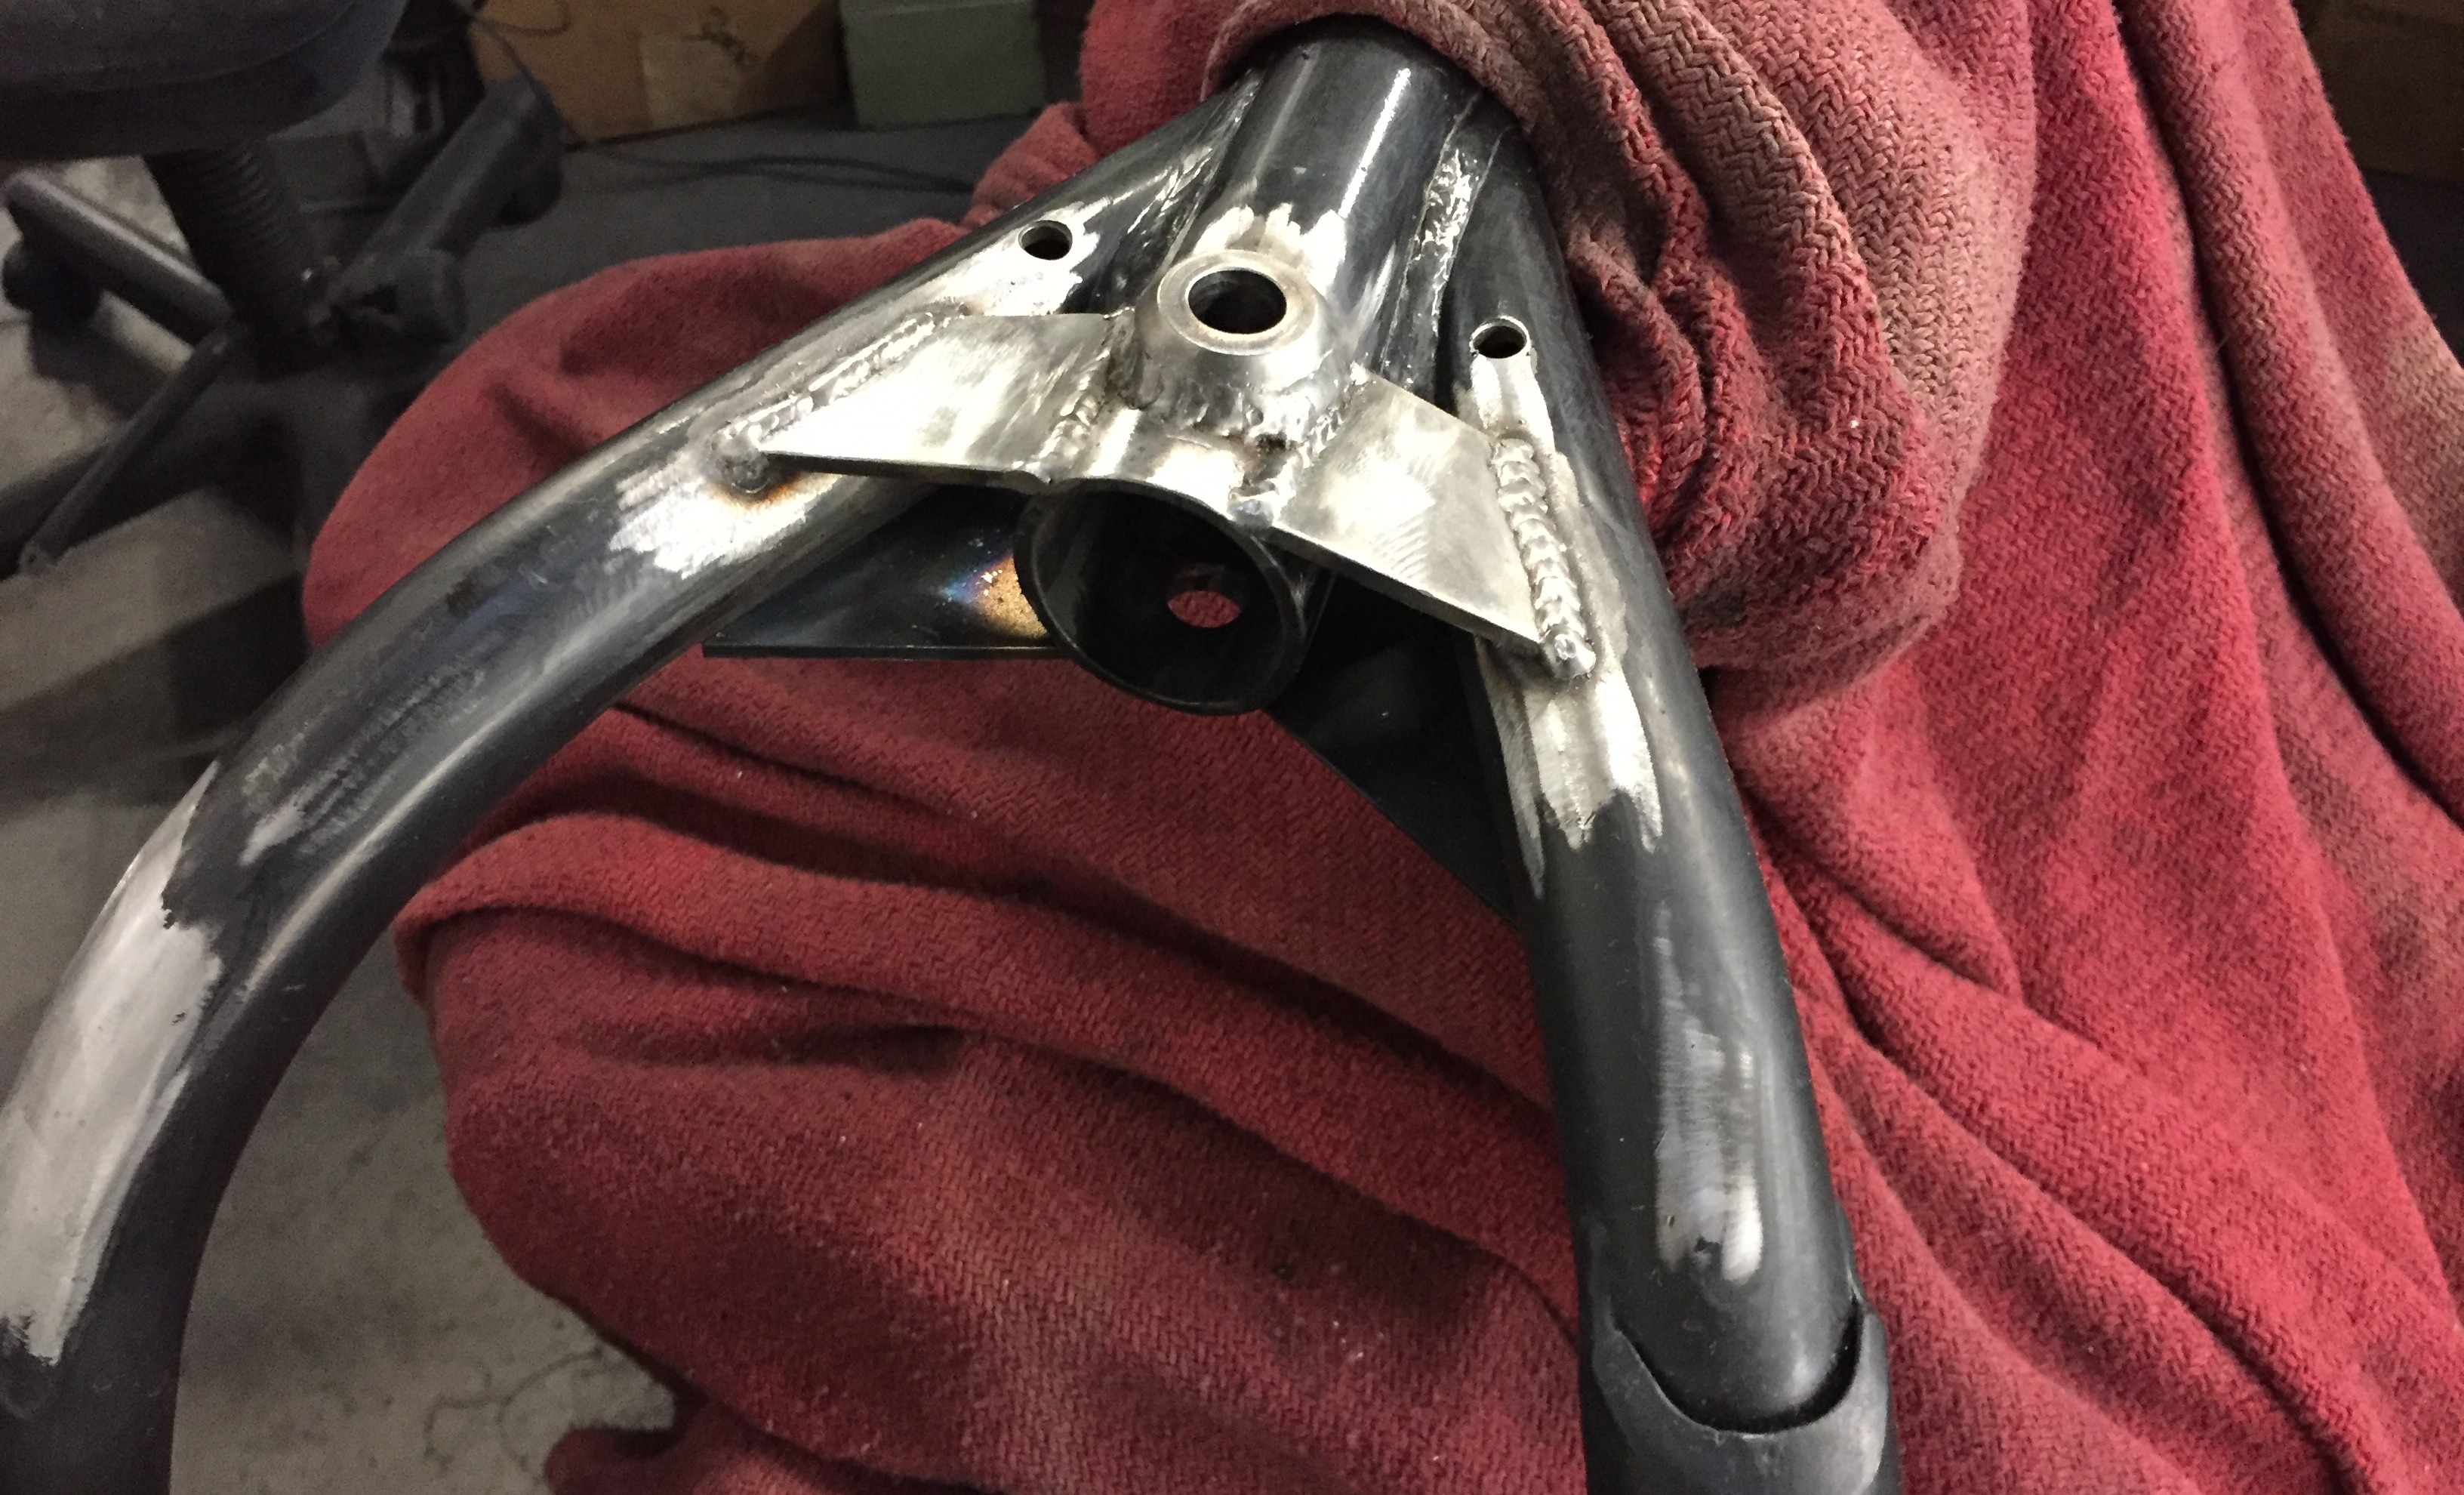
Plates added for some additional frame support
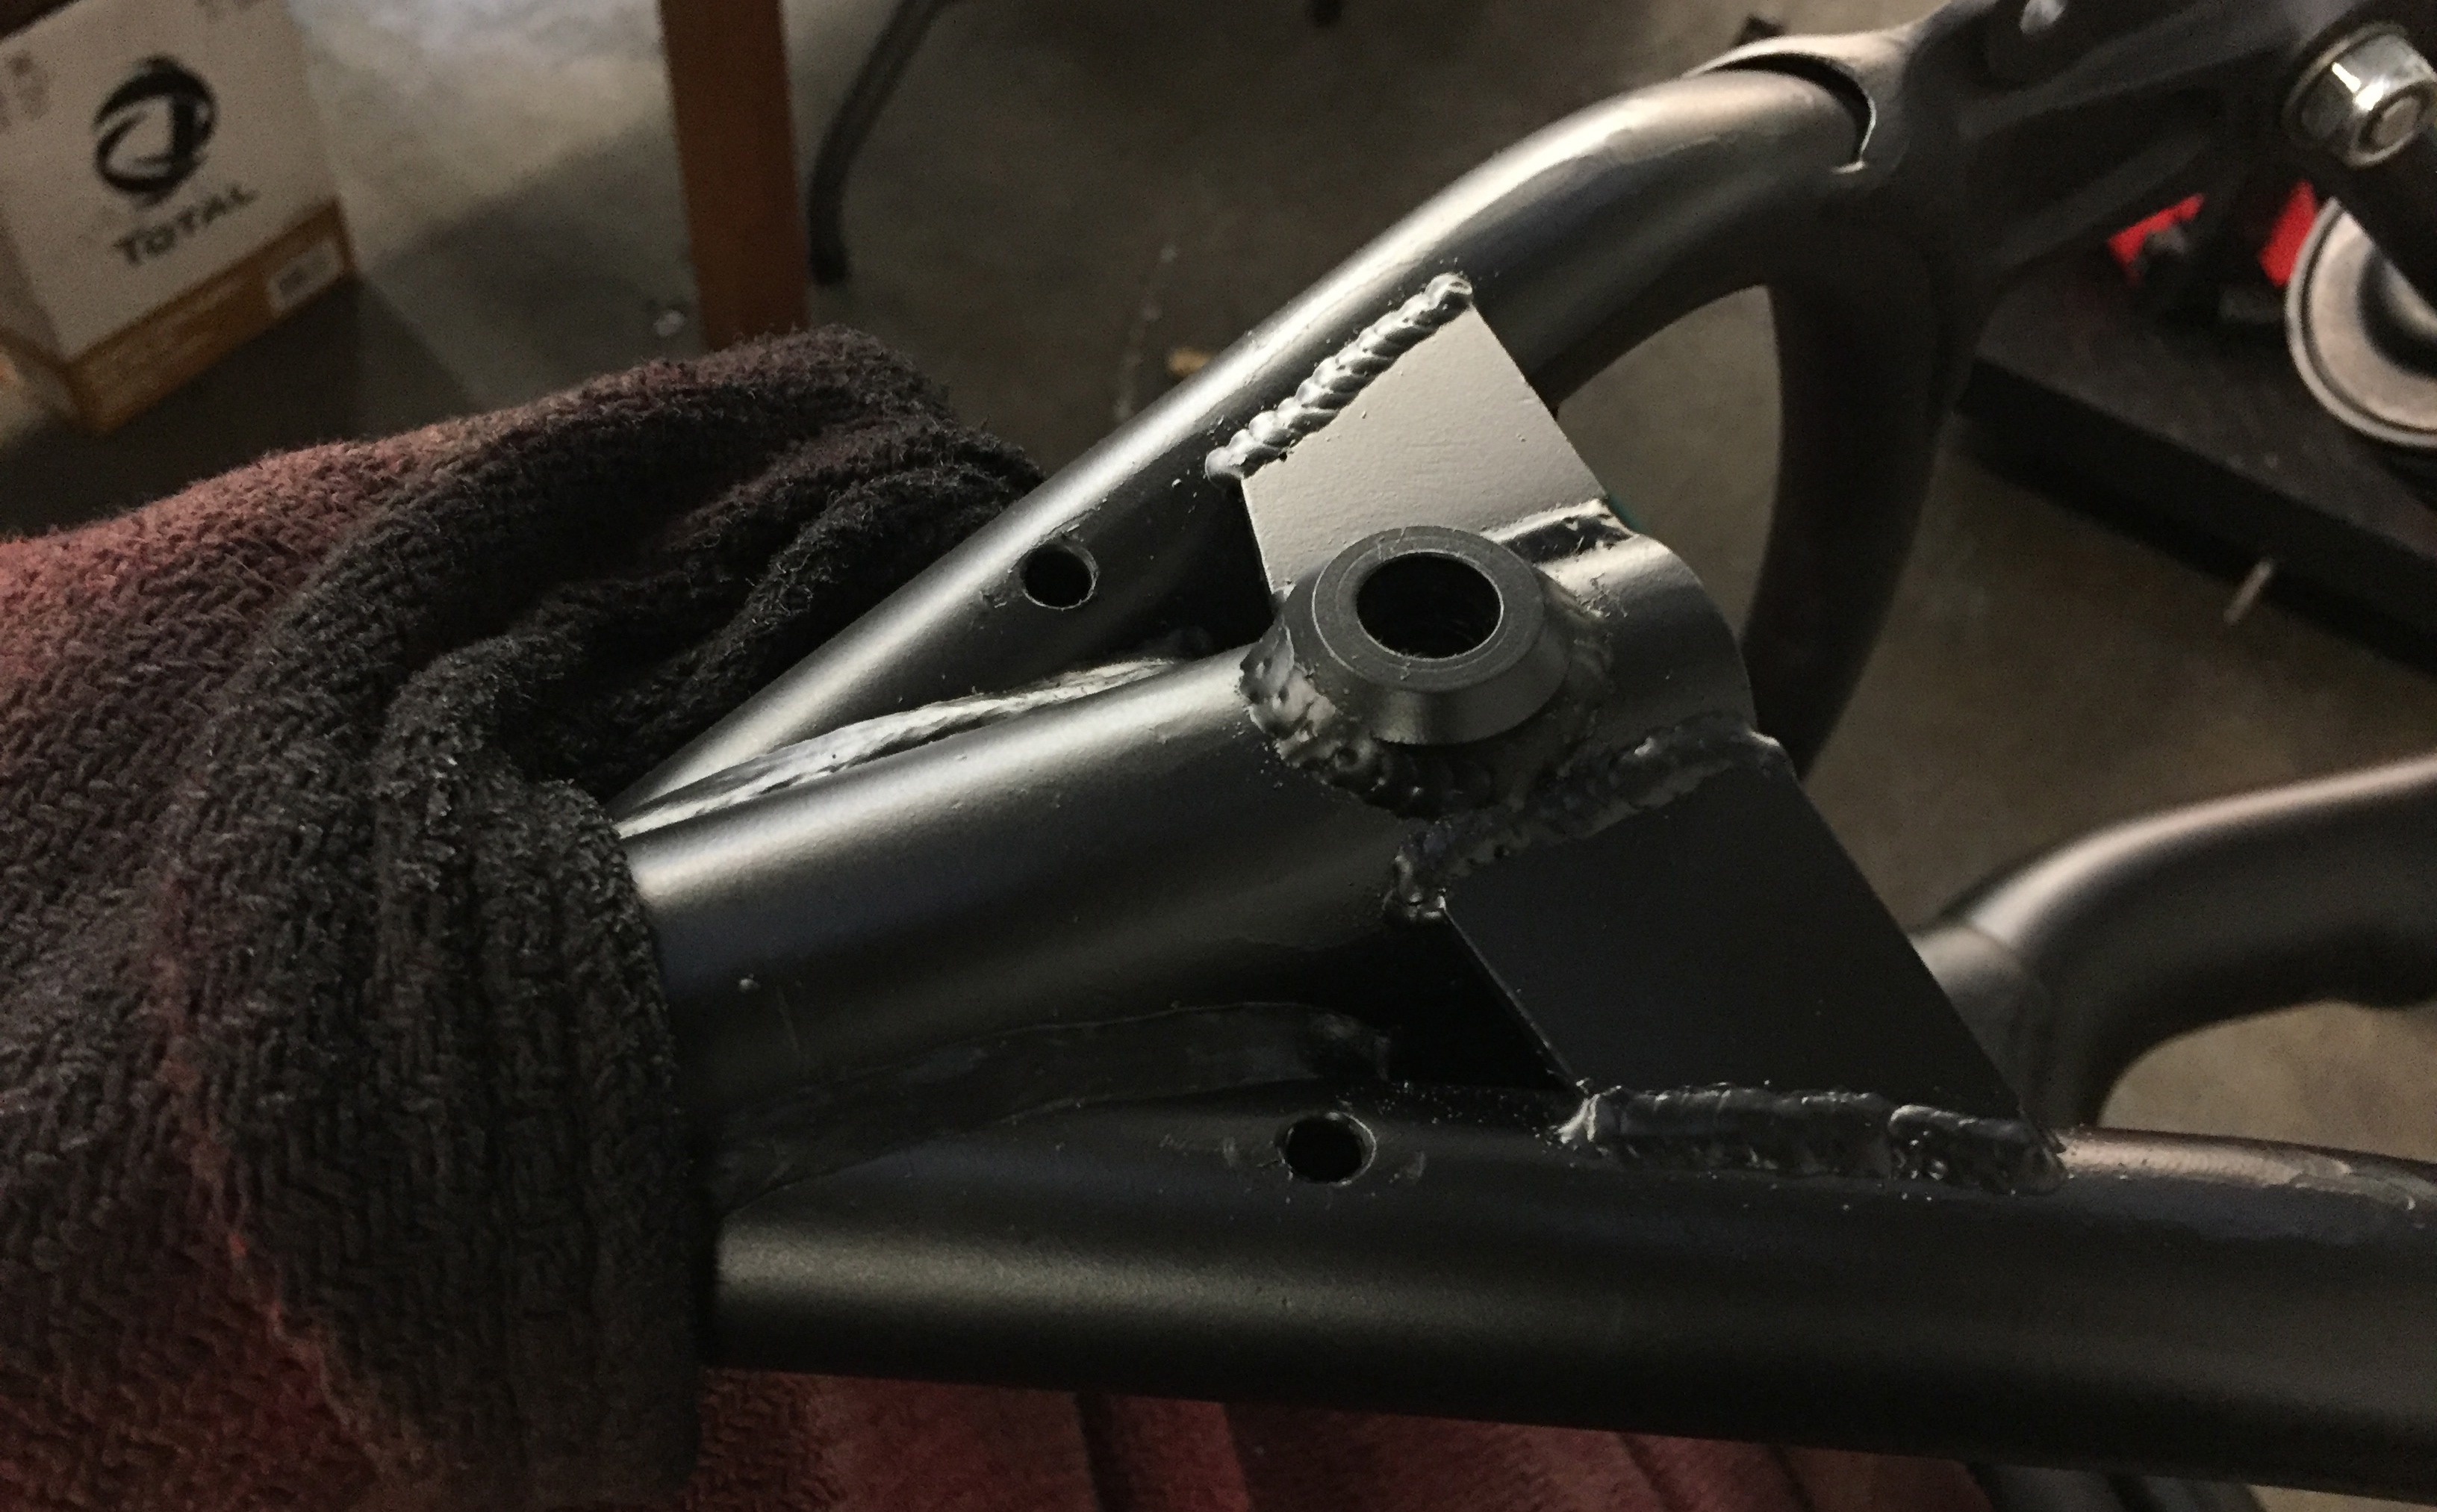
Frame support with paint touched up
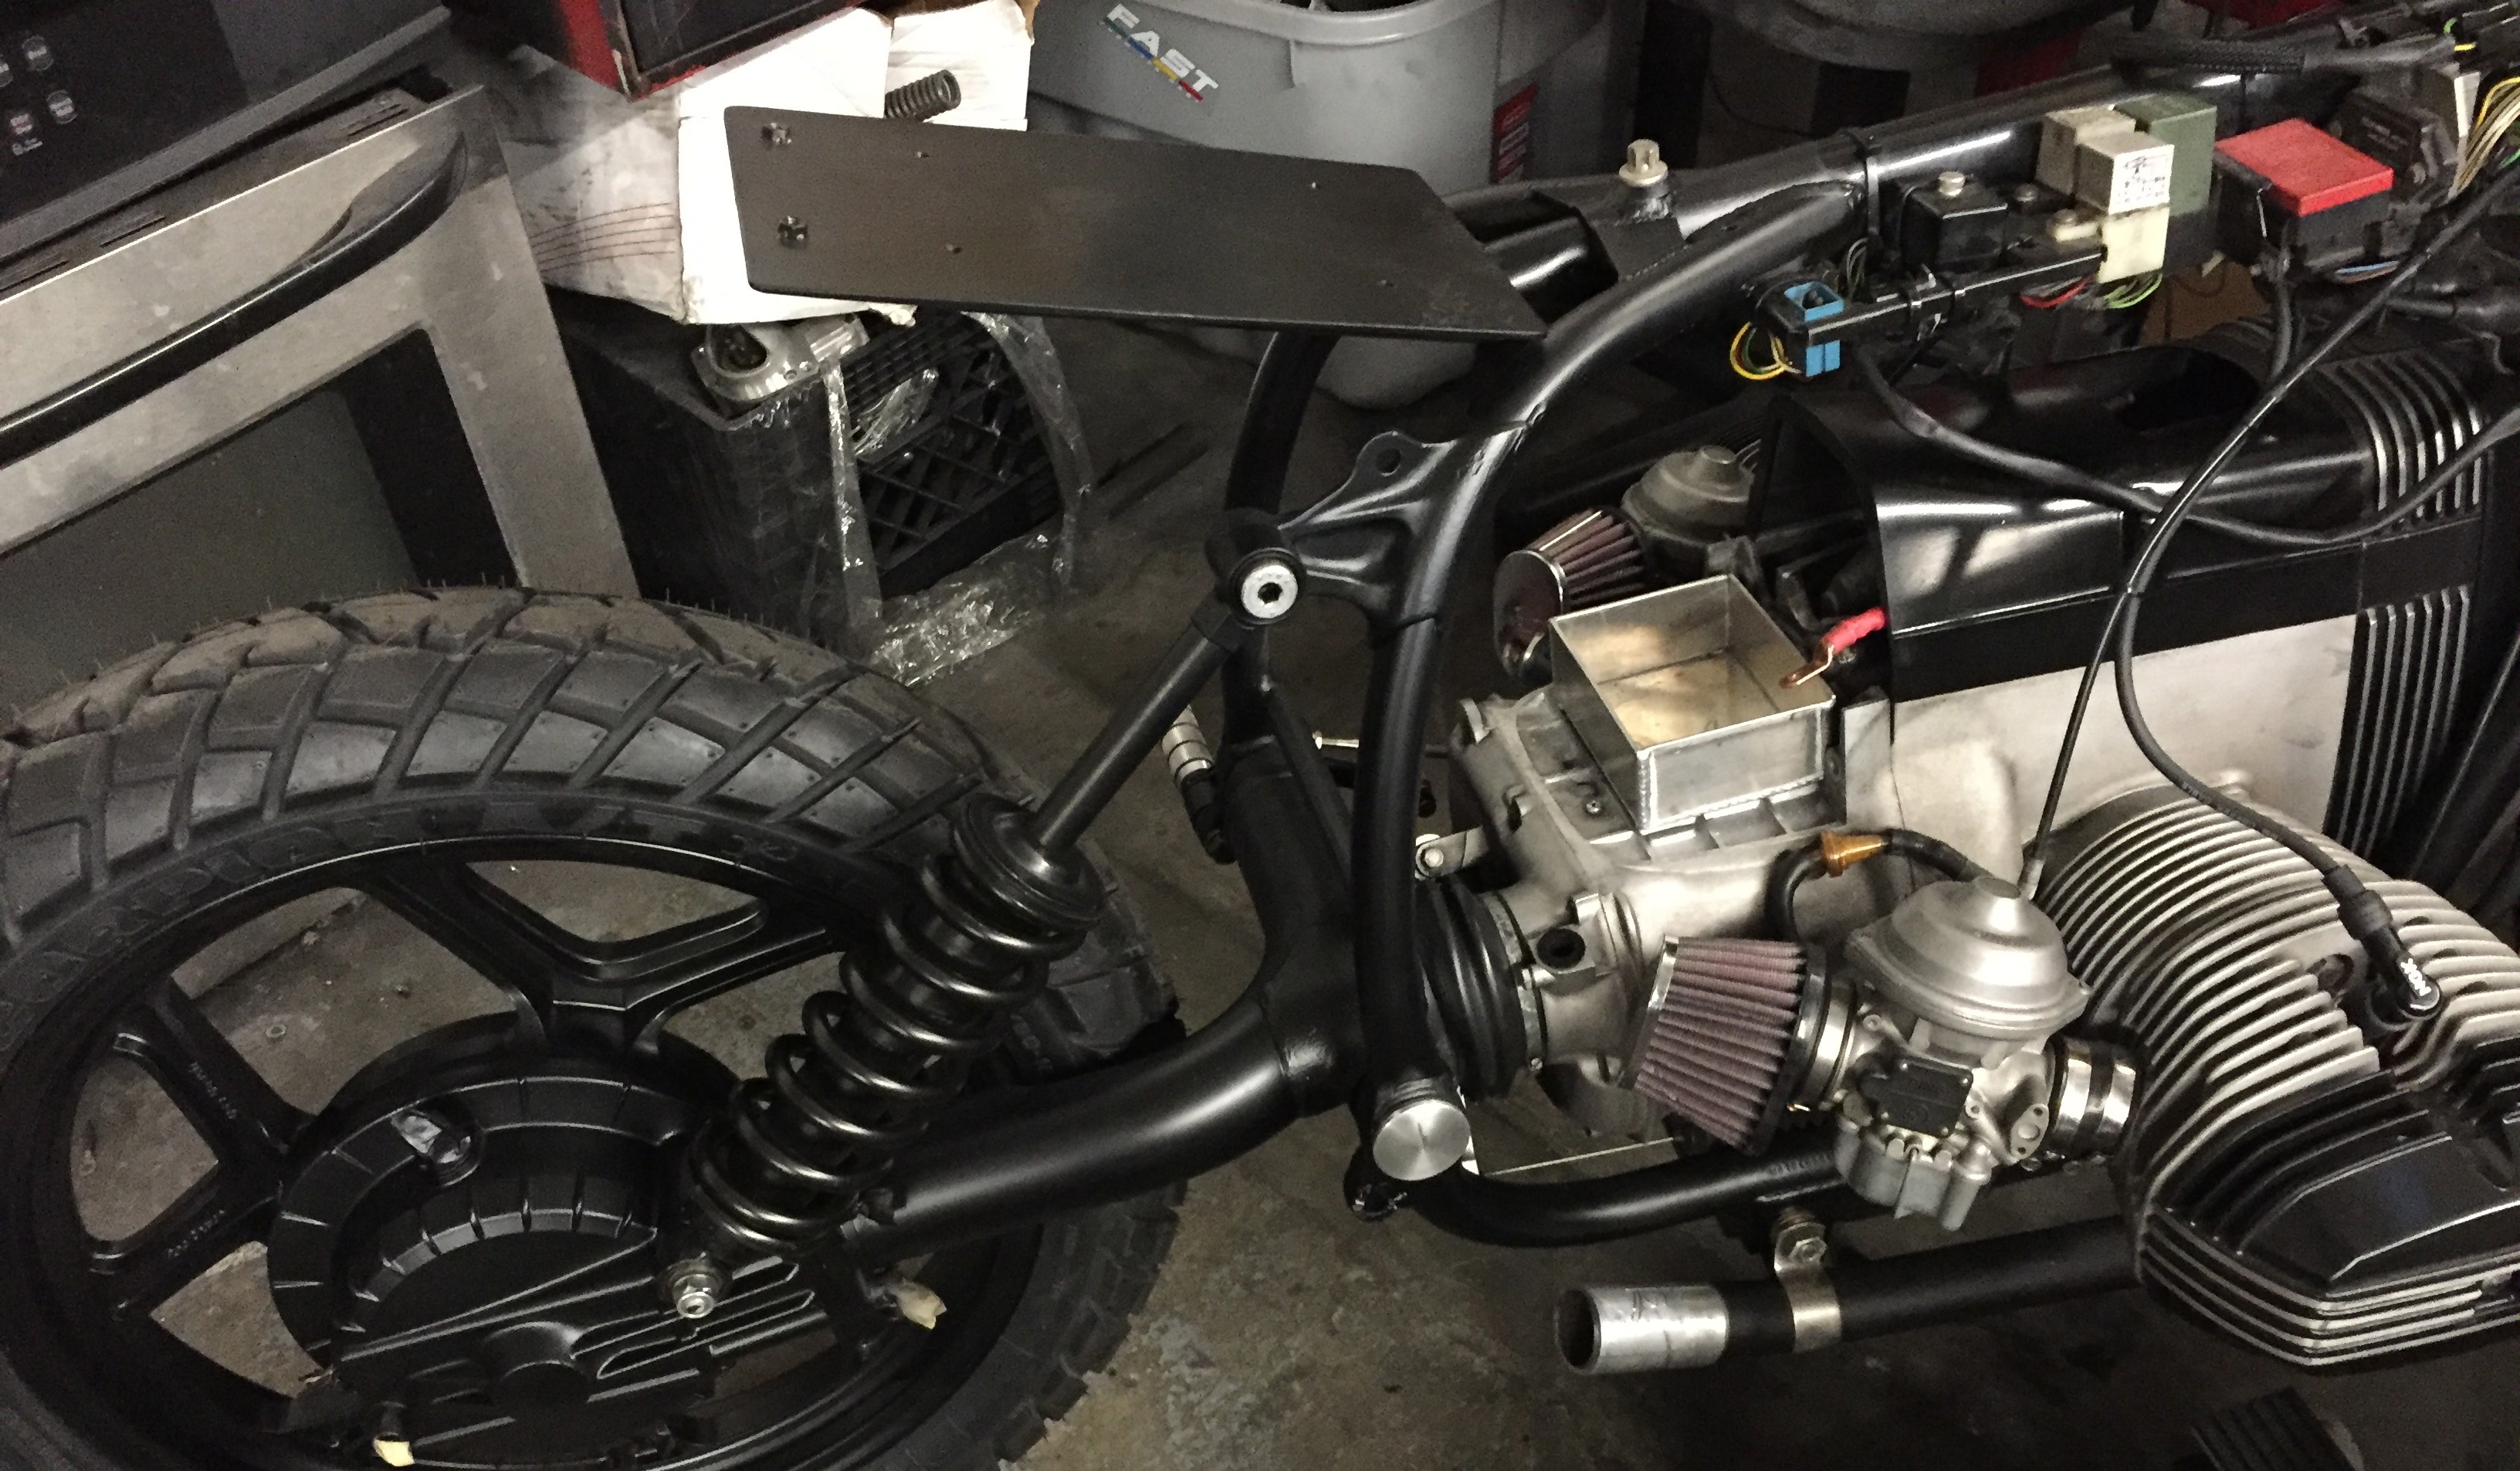
New subframe
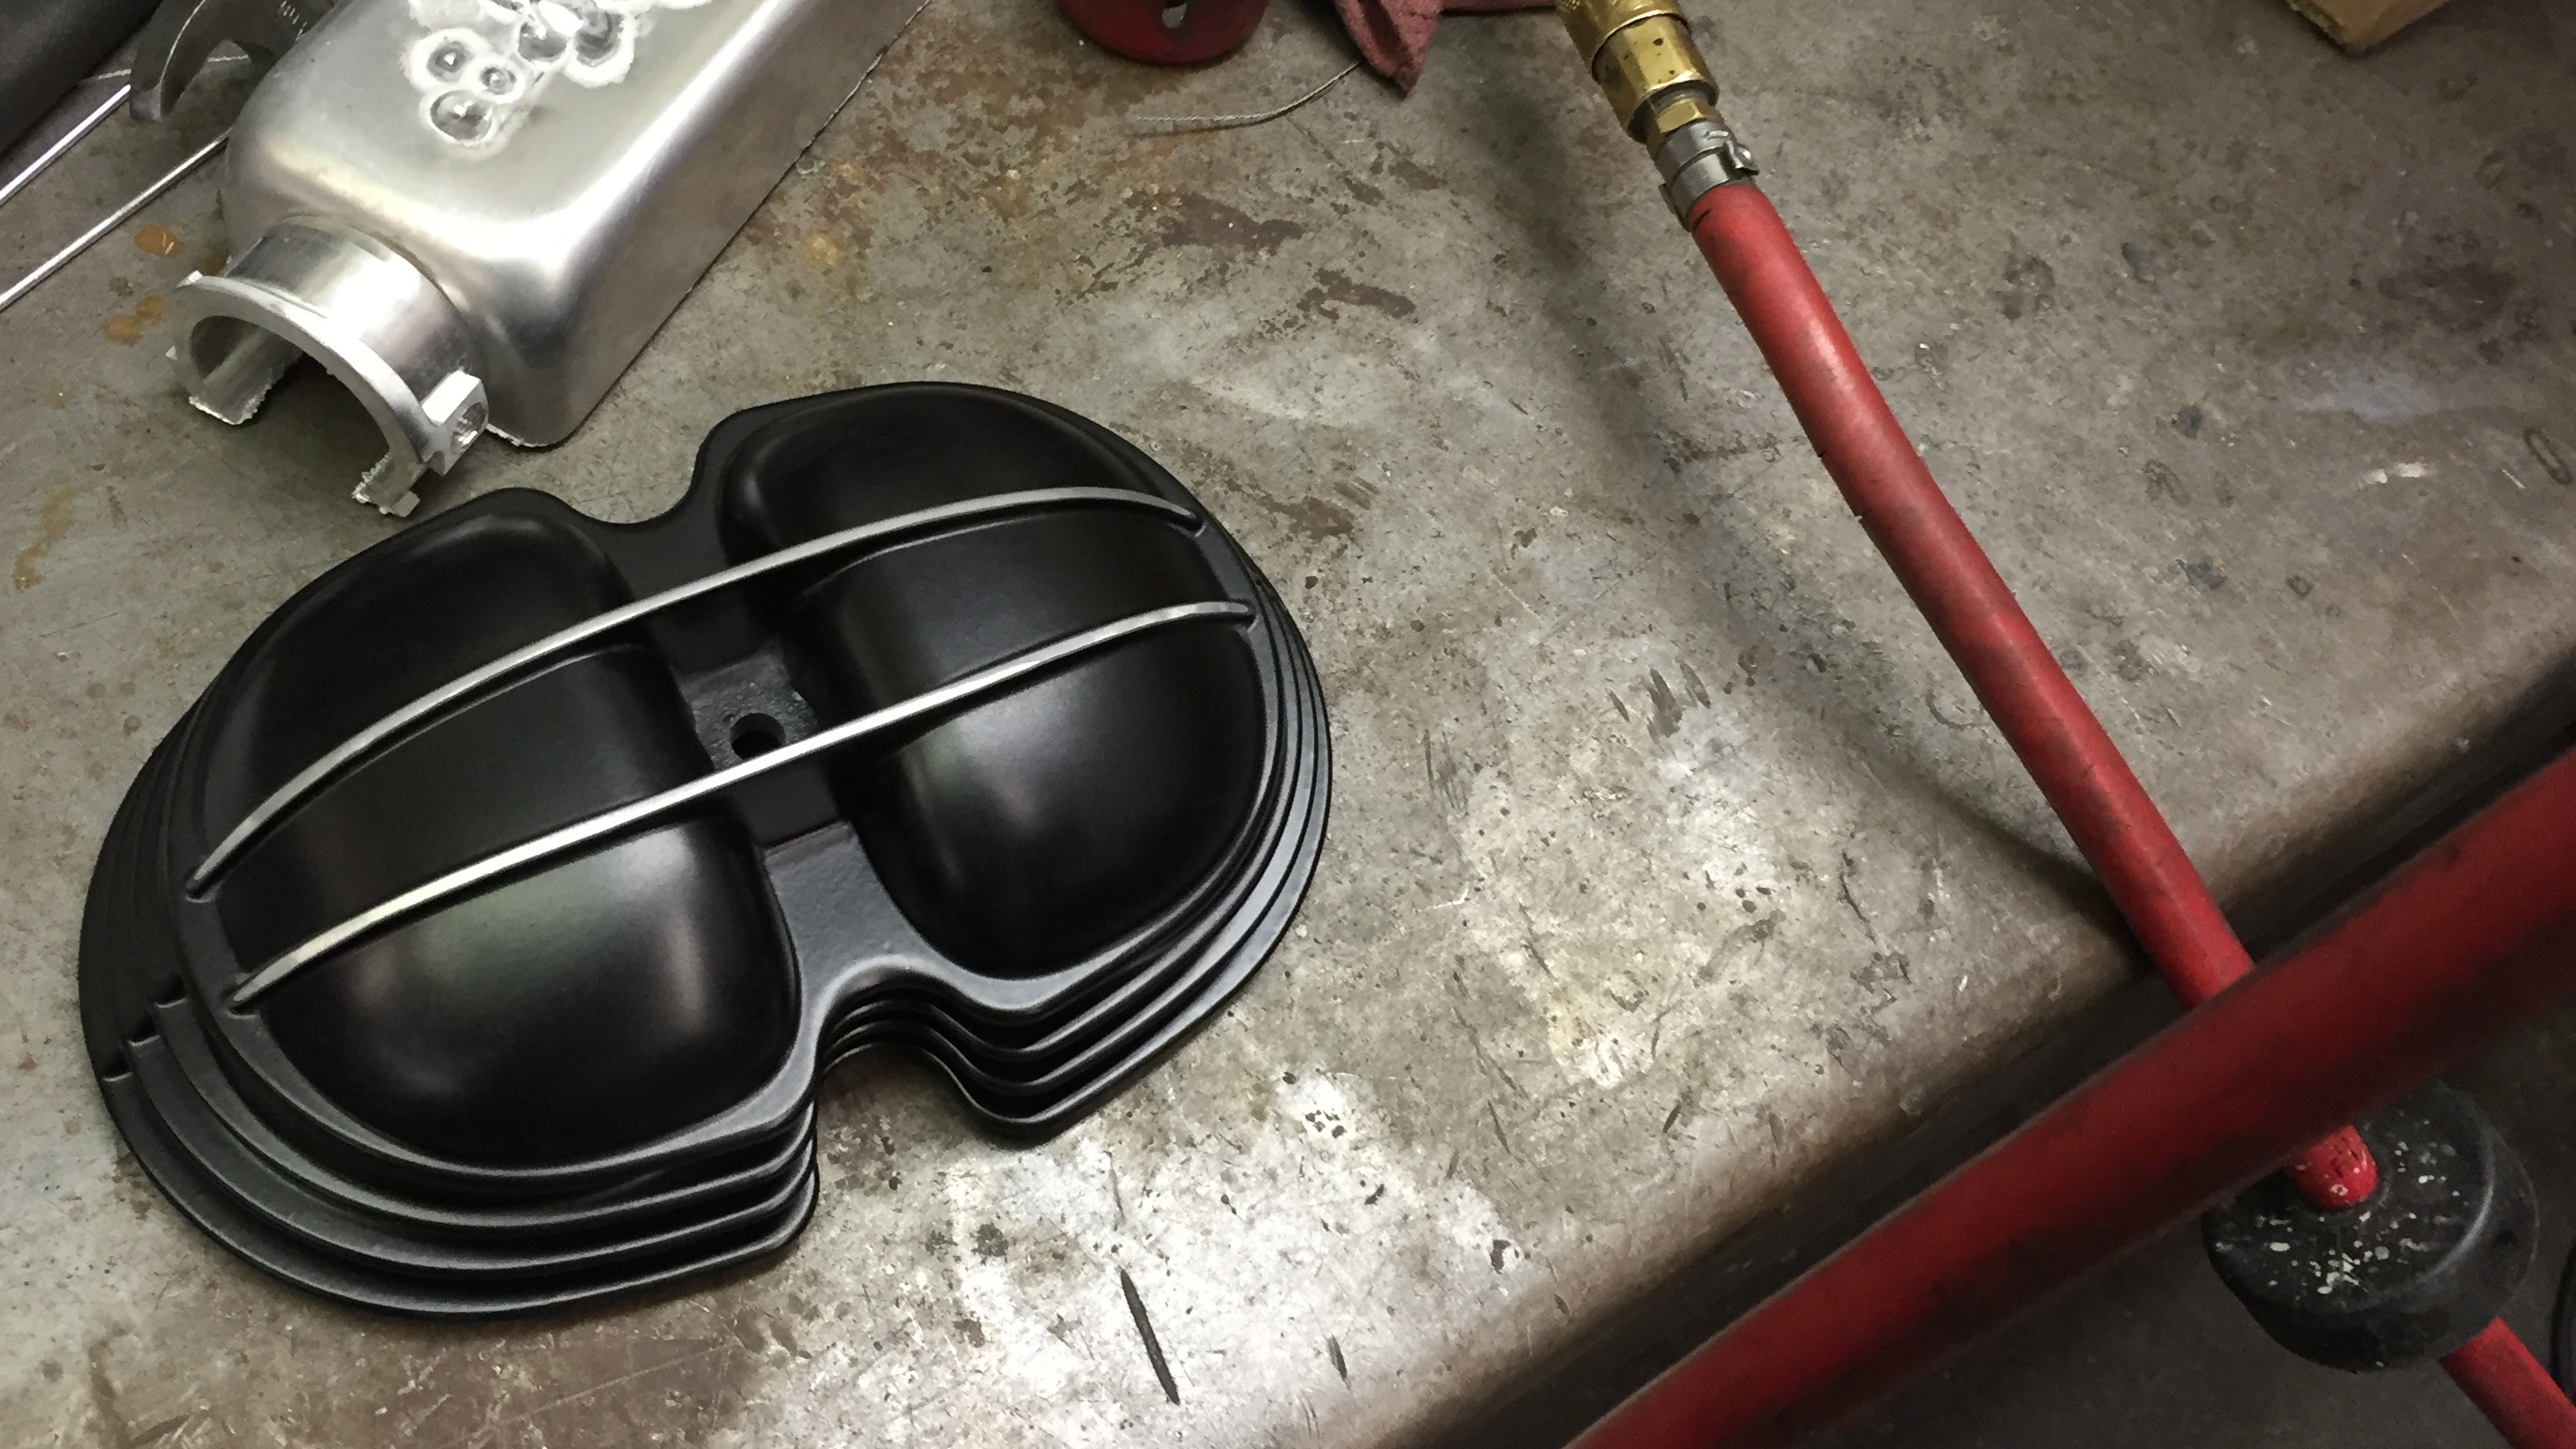
Hopefully those few pictures help to understand what I meant about extending out of the main top tube. Now I might as well get to the new battery location seen as though the sneaky little box that Adam made for me appears in the picture above. Osh has made some really nifty molds of the original twin air boxes which fit perfect over a small battery which allows you to hide the battery fully. I believe the air box cover and the batter box will soon be available for purchase on his website and if you dont see them up there you can always e mail him as I’m sure he could get one out to you if you wanted one. This really cleans up the engine amazingly and remove so much unwanted clutter of the original battery placement.
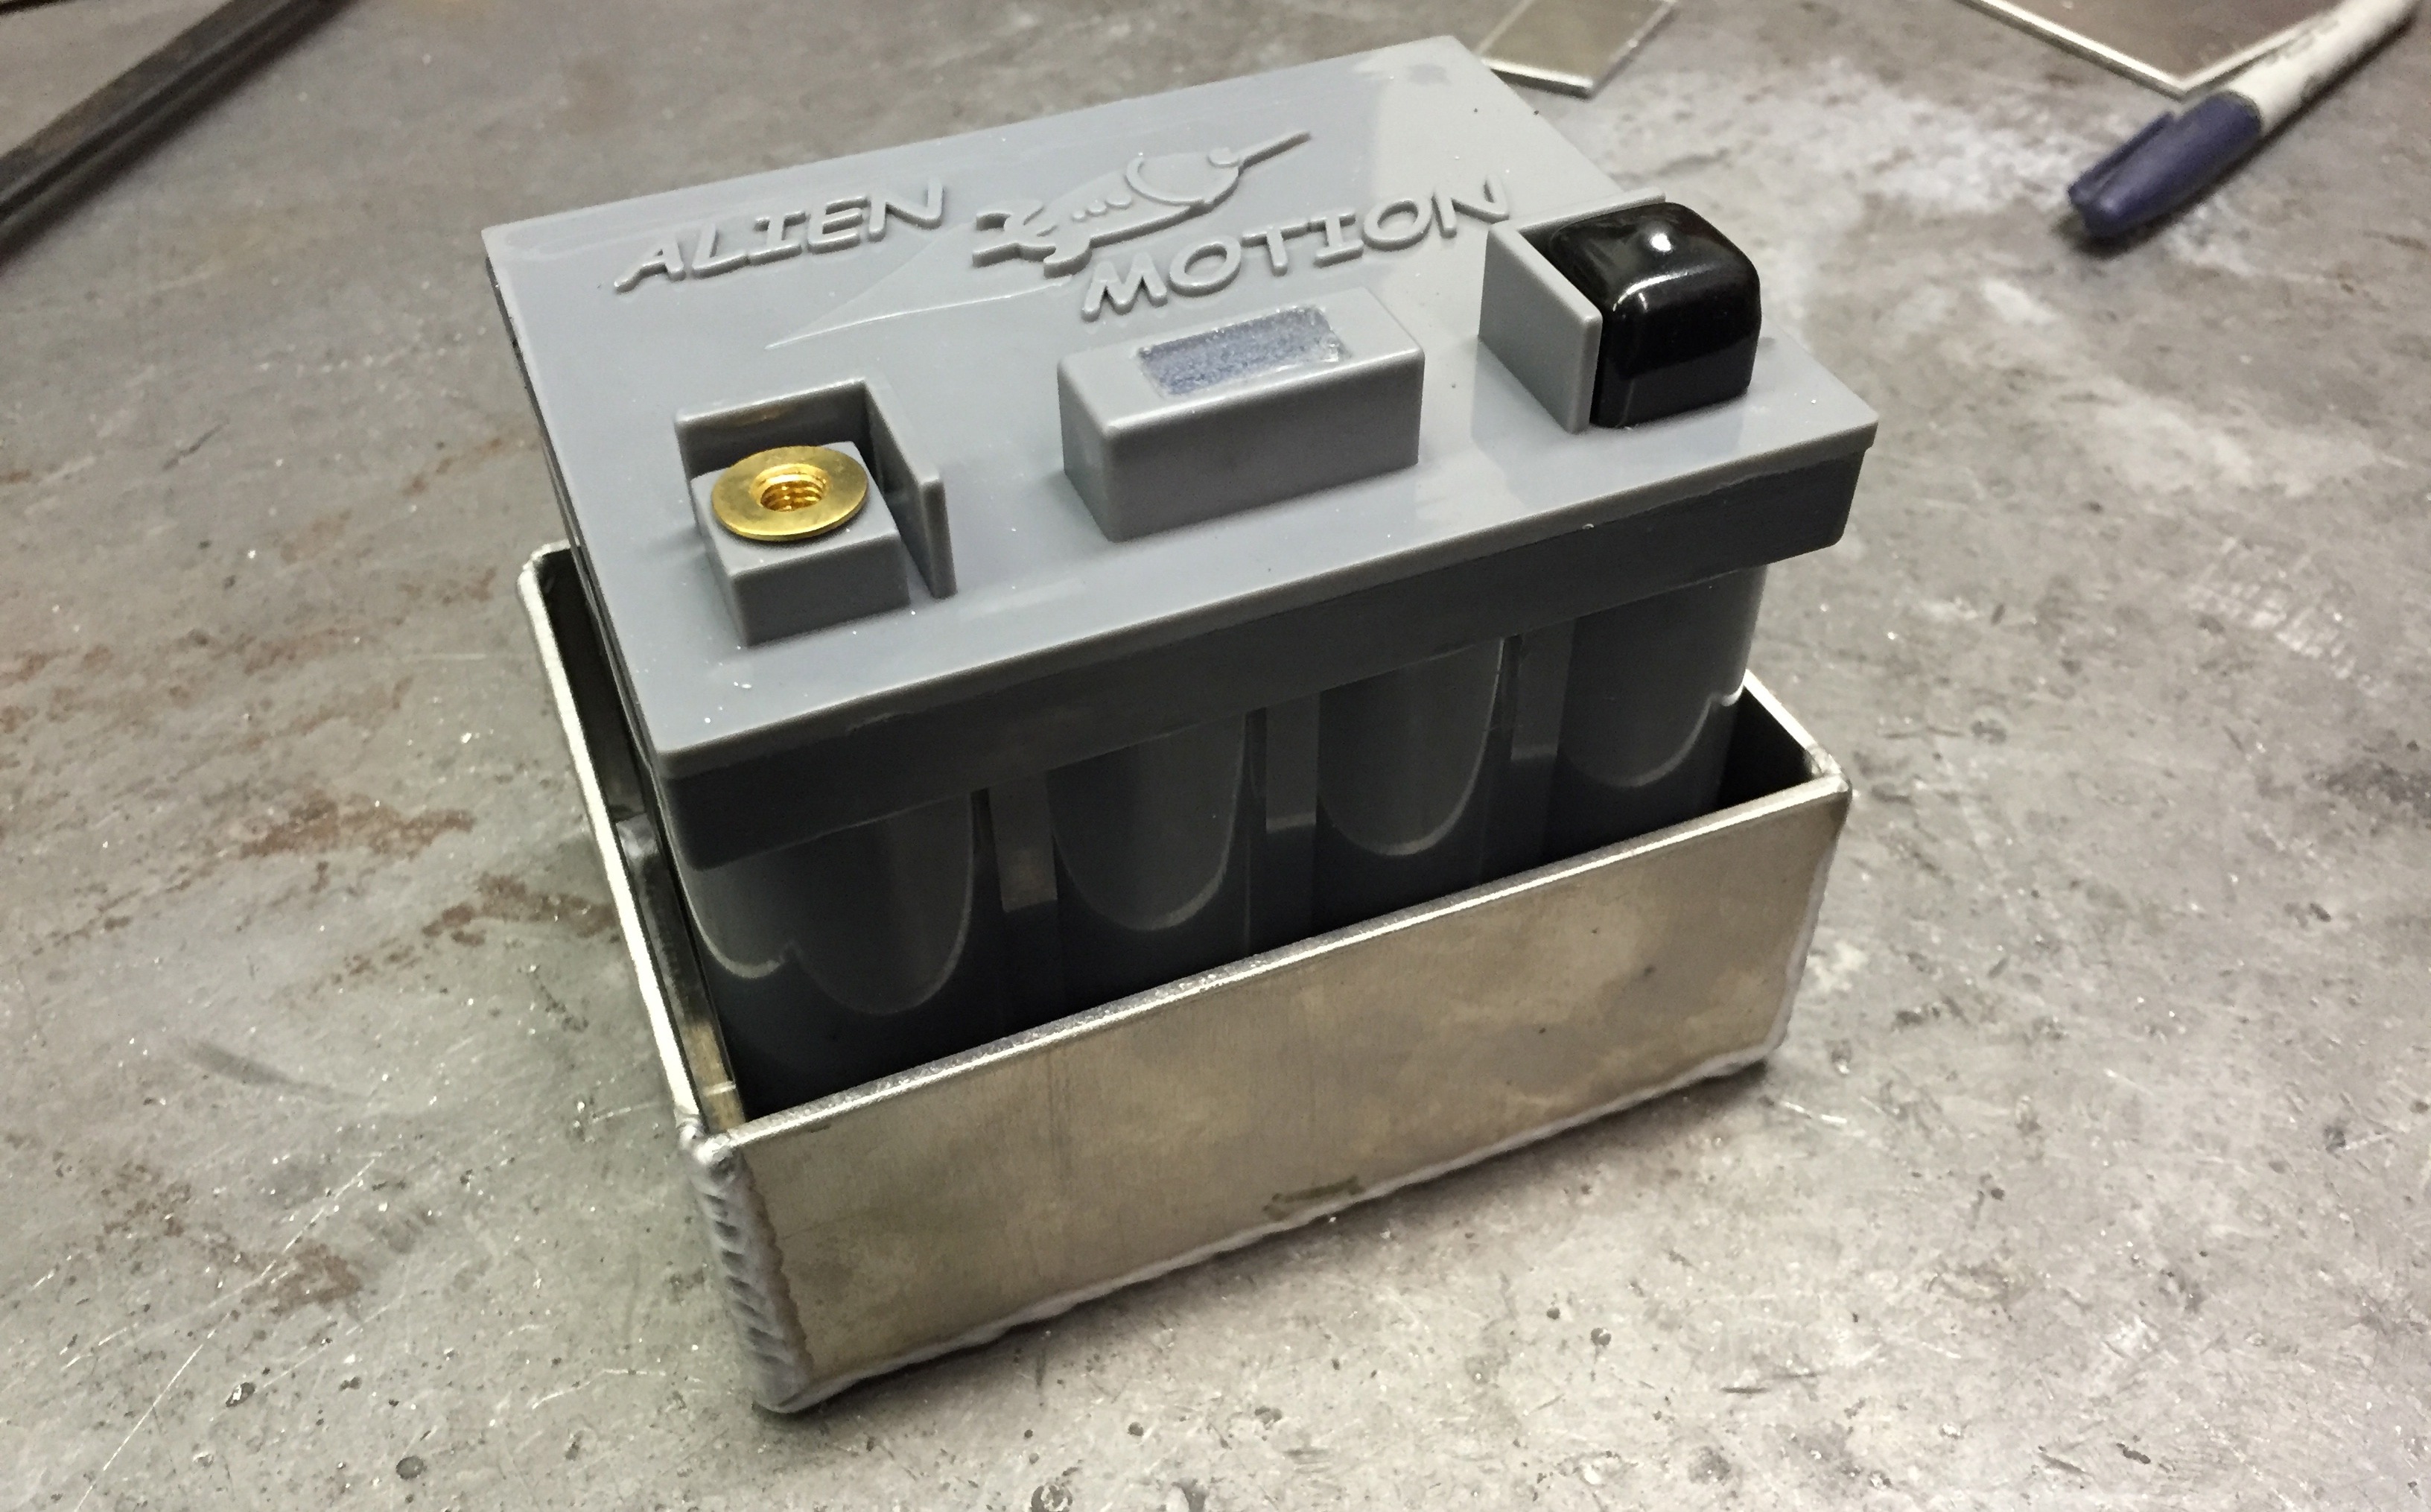
Alien Motion battery in it’s custom box
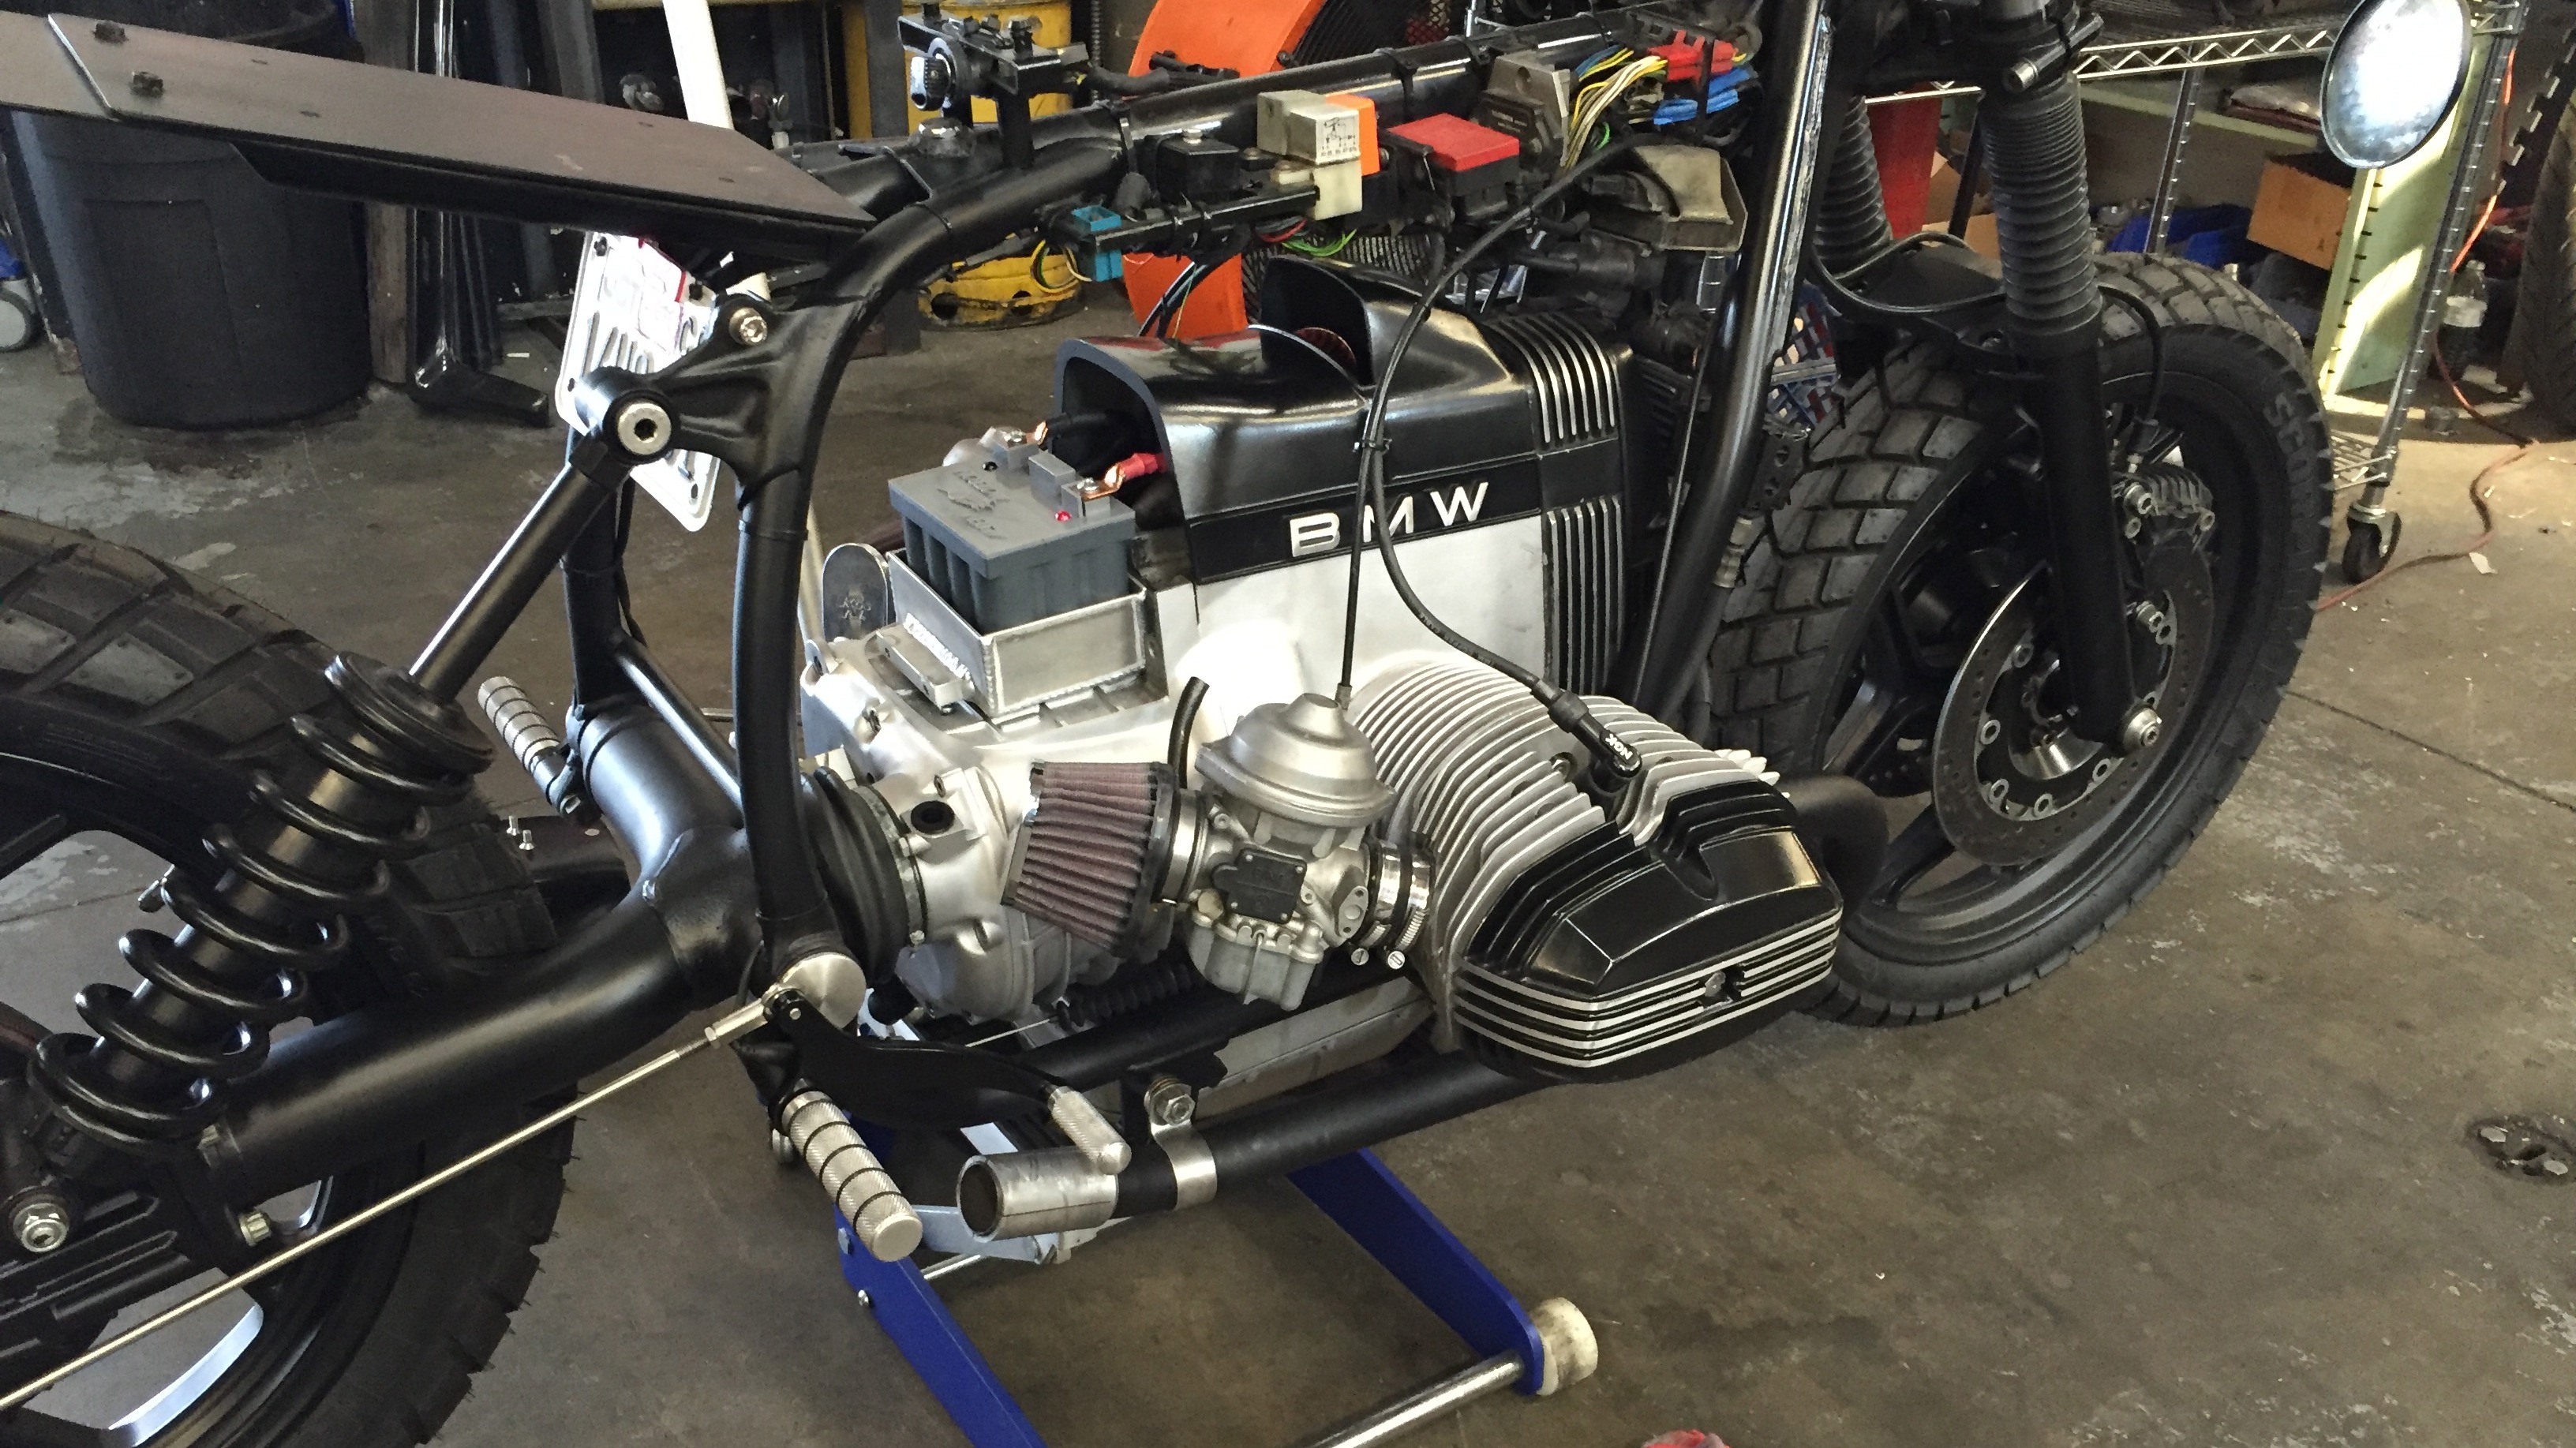
Battery mounted in its neat little box
Airbox replica cover over battery
Here is a quick picture of the new bubble seat I decided to go with and I must thank Jeremy Malman from Worth Motorcycles for the hook up on this seat. Jeremy uses various custom parts that Osh makes on his builds which are all super dope. I reached out to Jeremy when I saw a seat he used on a very similar build that he had completed recently which I loved. He put me in touch with a german fellow who lives in Florida named Thorsten Strenger. It was my lucky day because Thor had only made 3 of these seats and Jeremy had two of them. He had initially intended on keeping the last one for himself but was really kind and decided to let me have it. For a small fee of course, haha but it was very reasonable so I jumped on the opportunity. Thank you Thorsten, I am super happy with the seat! And another thank you to Jeremy who has been very open with his experience and a great person to chat to about ideas, he has also been super helpful with suggestions on various things.
Thorsten Strengen custom seat
Getting real close now and I just got sent these pictures from paint! Next thing to do once I get the tank, seat and front fender back will be too put the pinstripe on them.
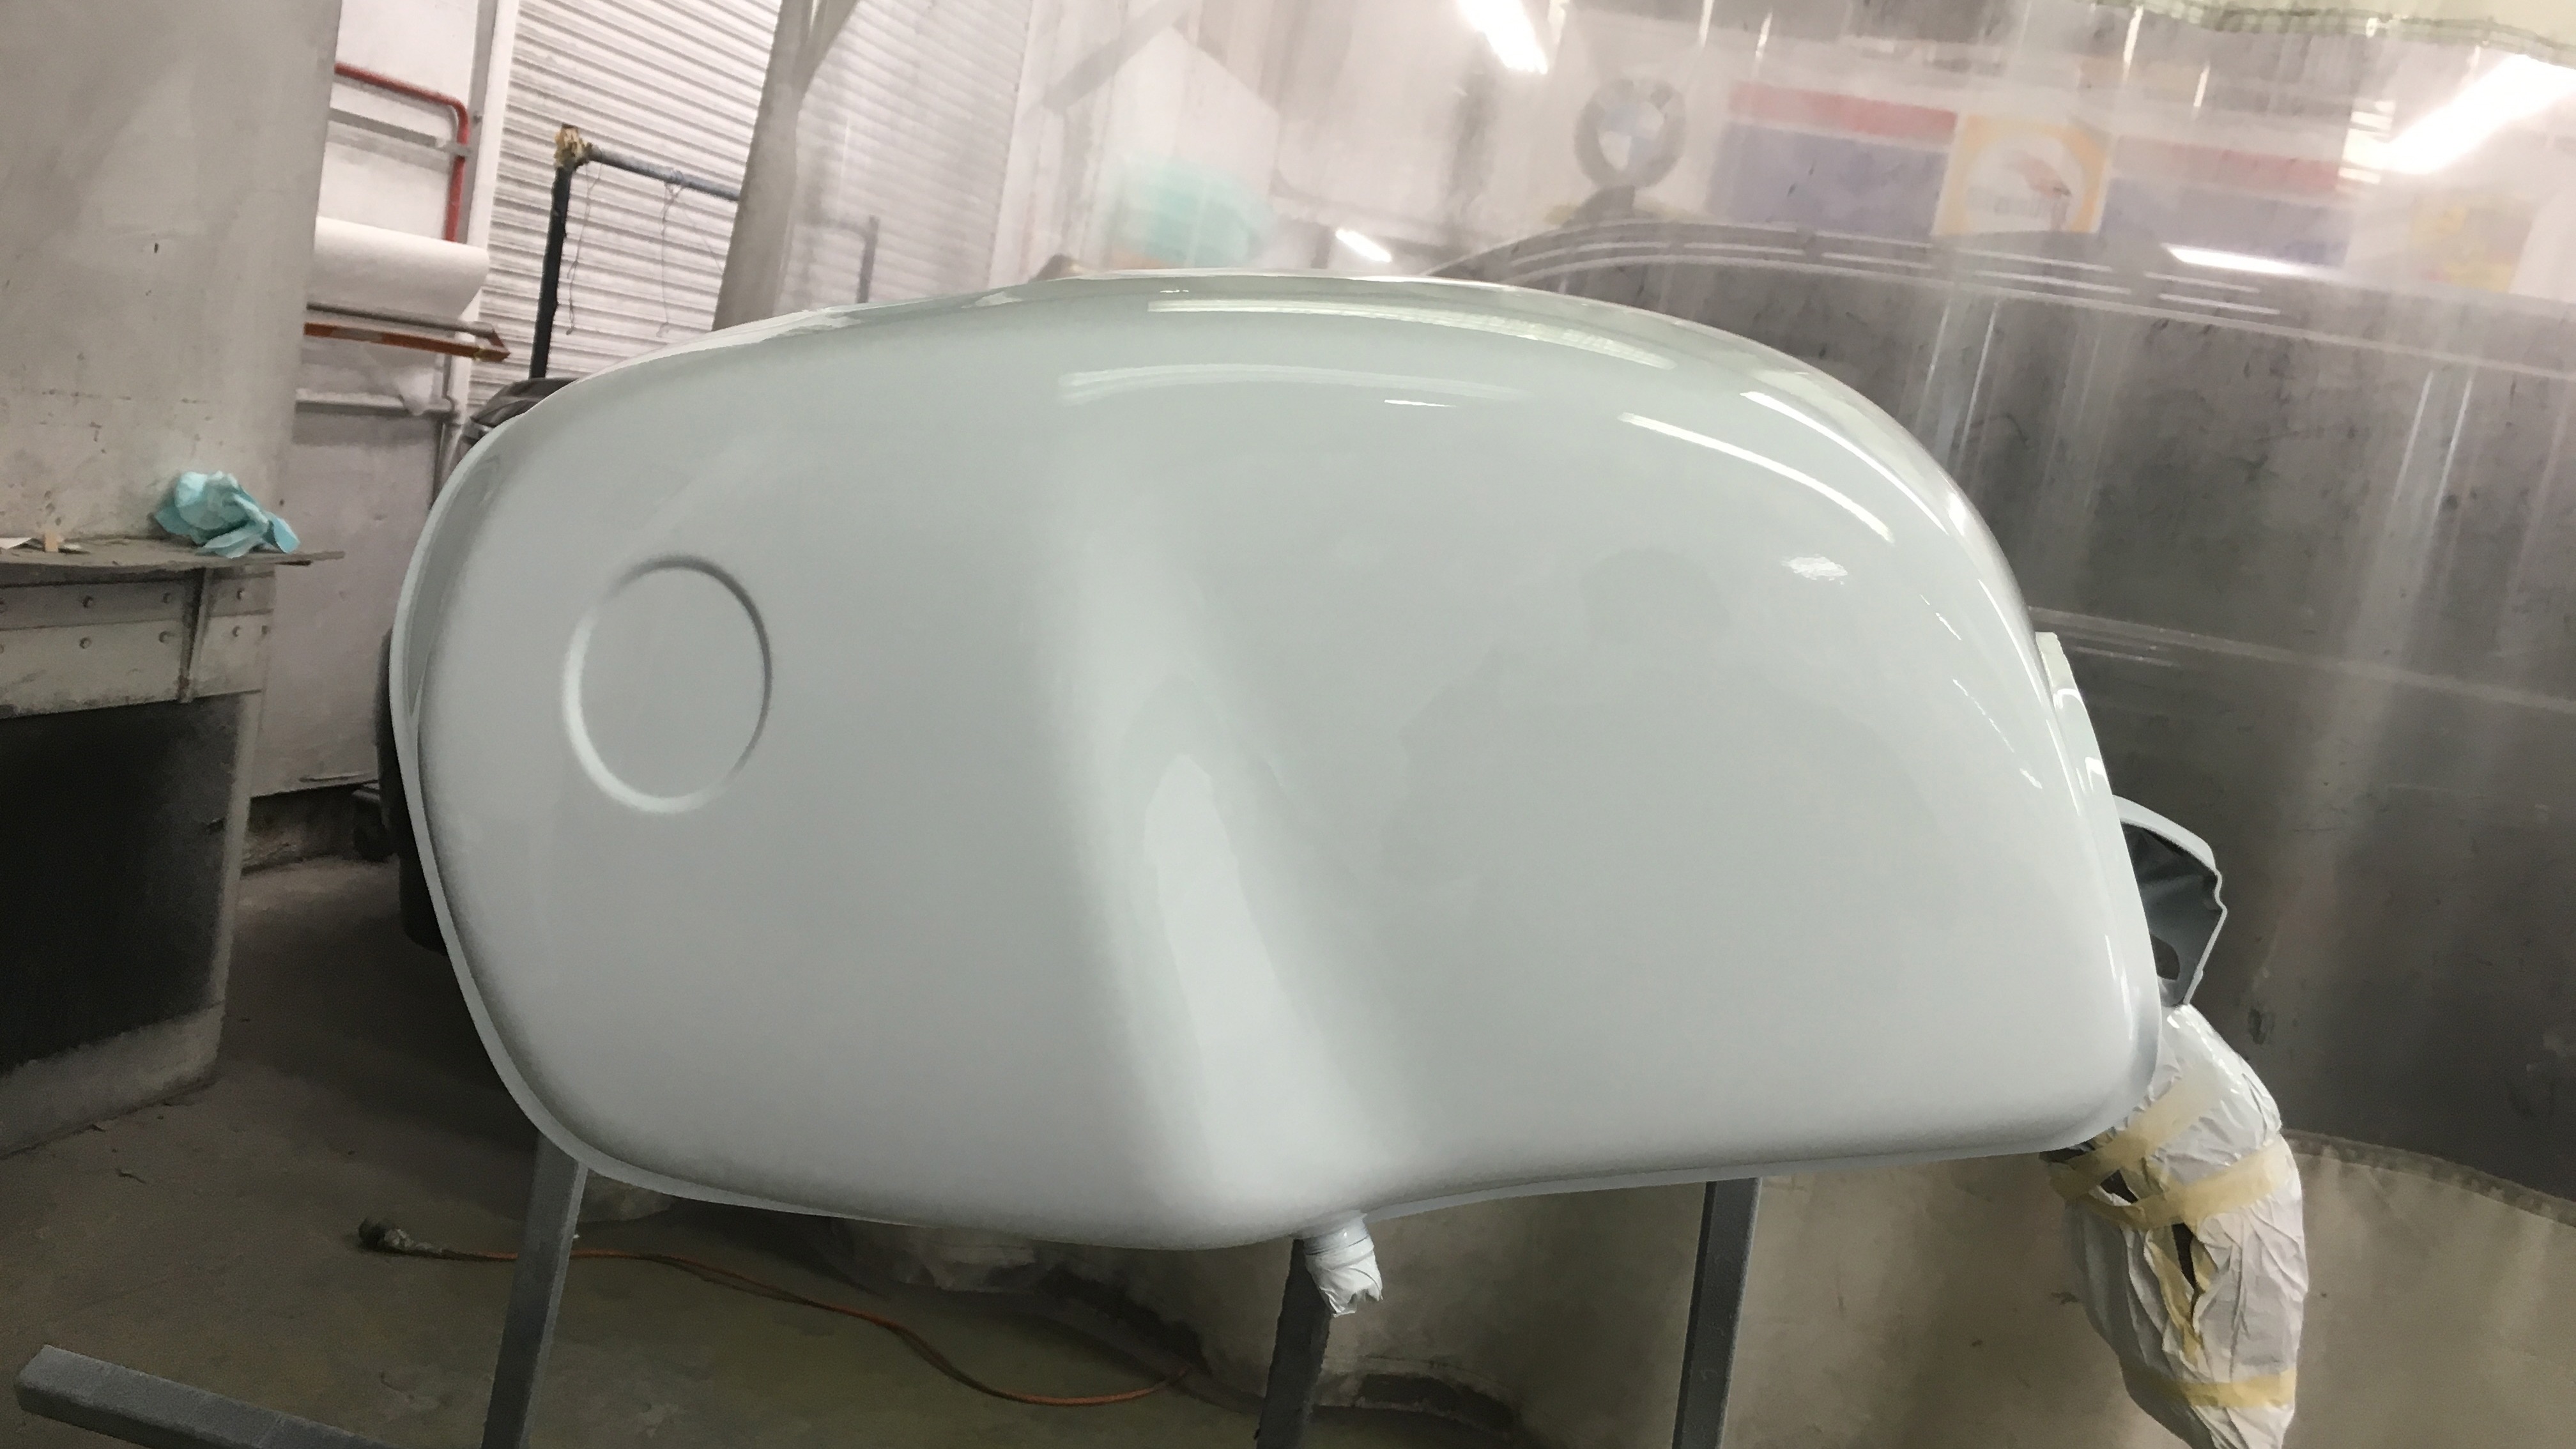
Tank
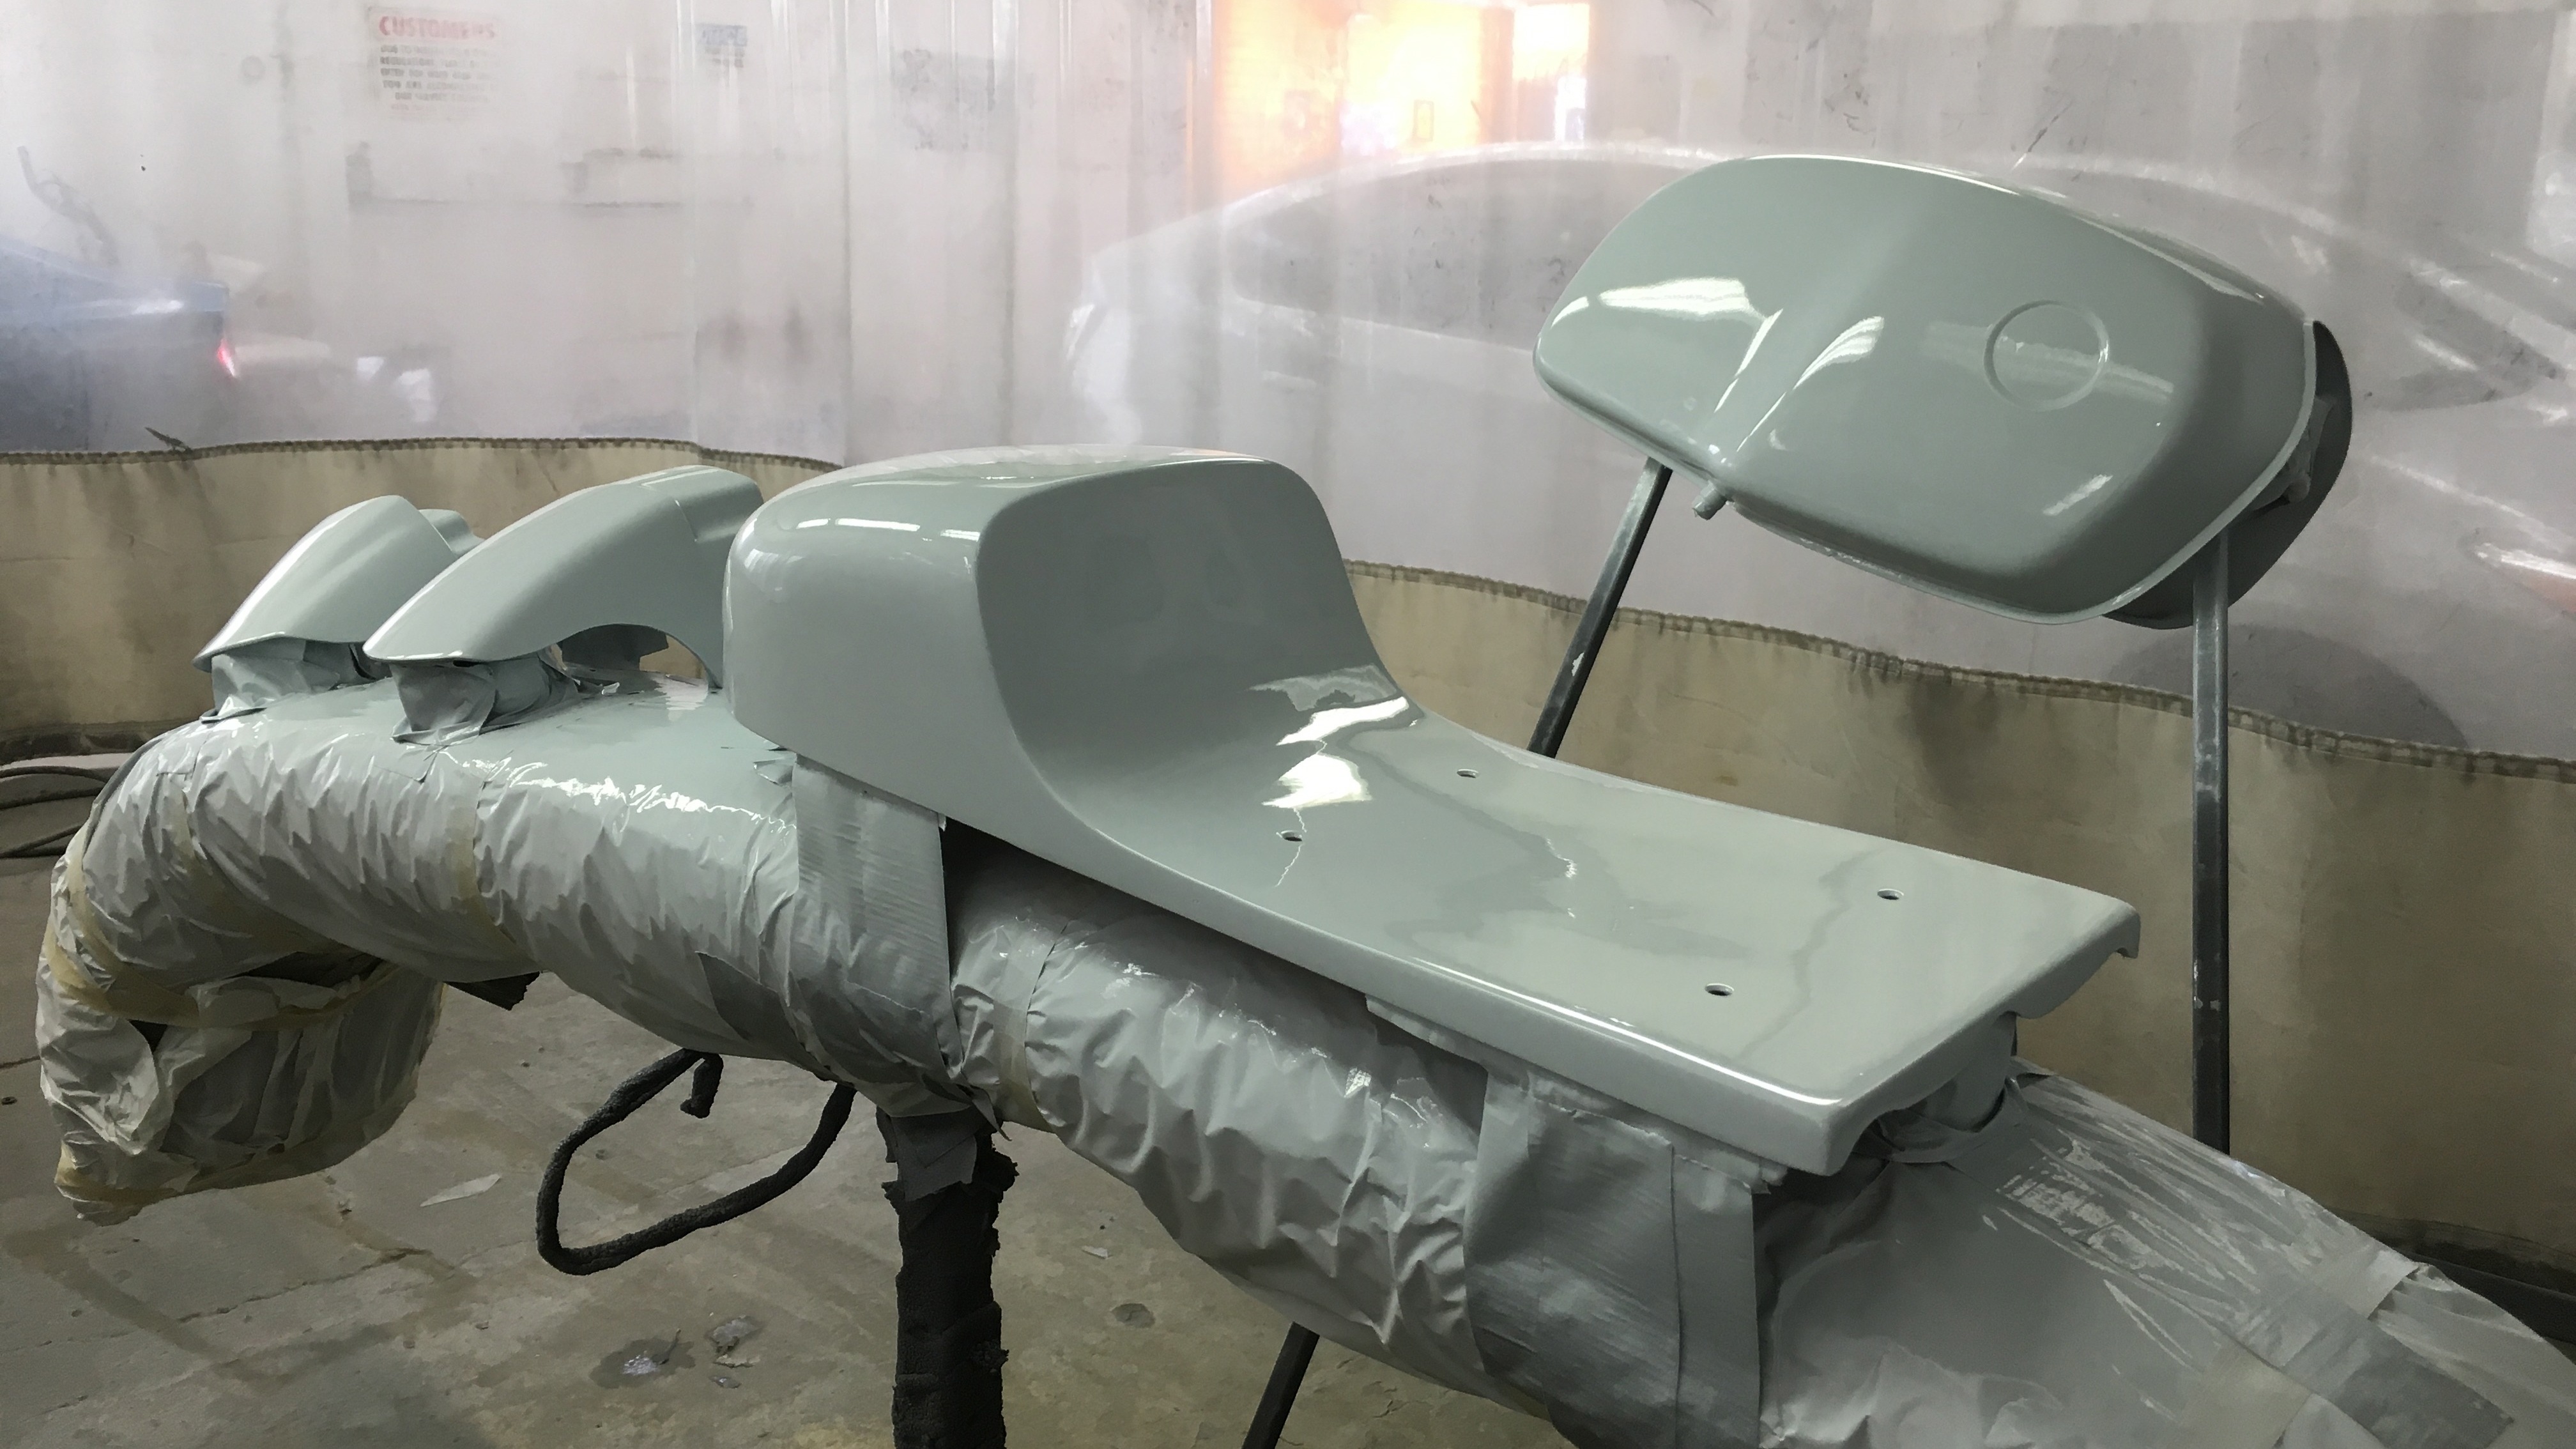
Seat, Tank & Fender
So I got the parts back from paint and went ahead and put the pinstripe on them. The way I did it is I just got some material from a shop that wraps cars and bikes. I got them to cut me some long strips in the correct width’s of the pinstripes I wanted to put on. This material is pretty flexible so you can easily take corners with it without it bunching up like one would expect and I find this to be way more efficient than having someone spray the pinstripe on plus I have the flexibility to pull these off and try something different at anytime in the future. I wish I had taken some more detailed shots of the process for you but I was so excited to get it done. Anyway, if you have any questions about it you can always message me in the comments and I’ll be happy to help you out. Here are some pictures of how it came out. In the first picture you can see the material I used to do the stripe. I’ve kept it simple and just gone black over the white tank.
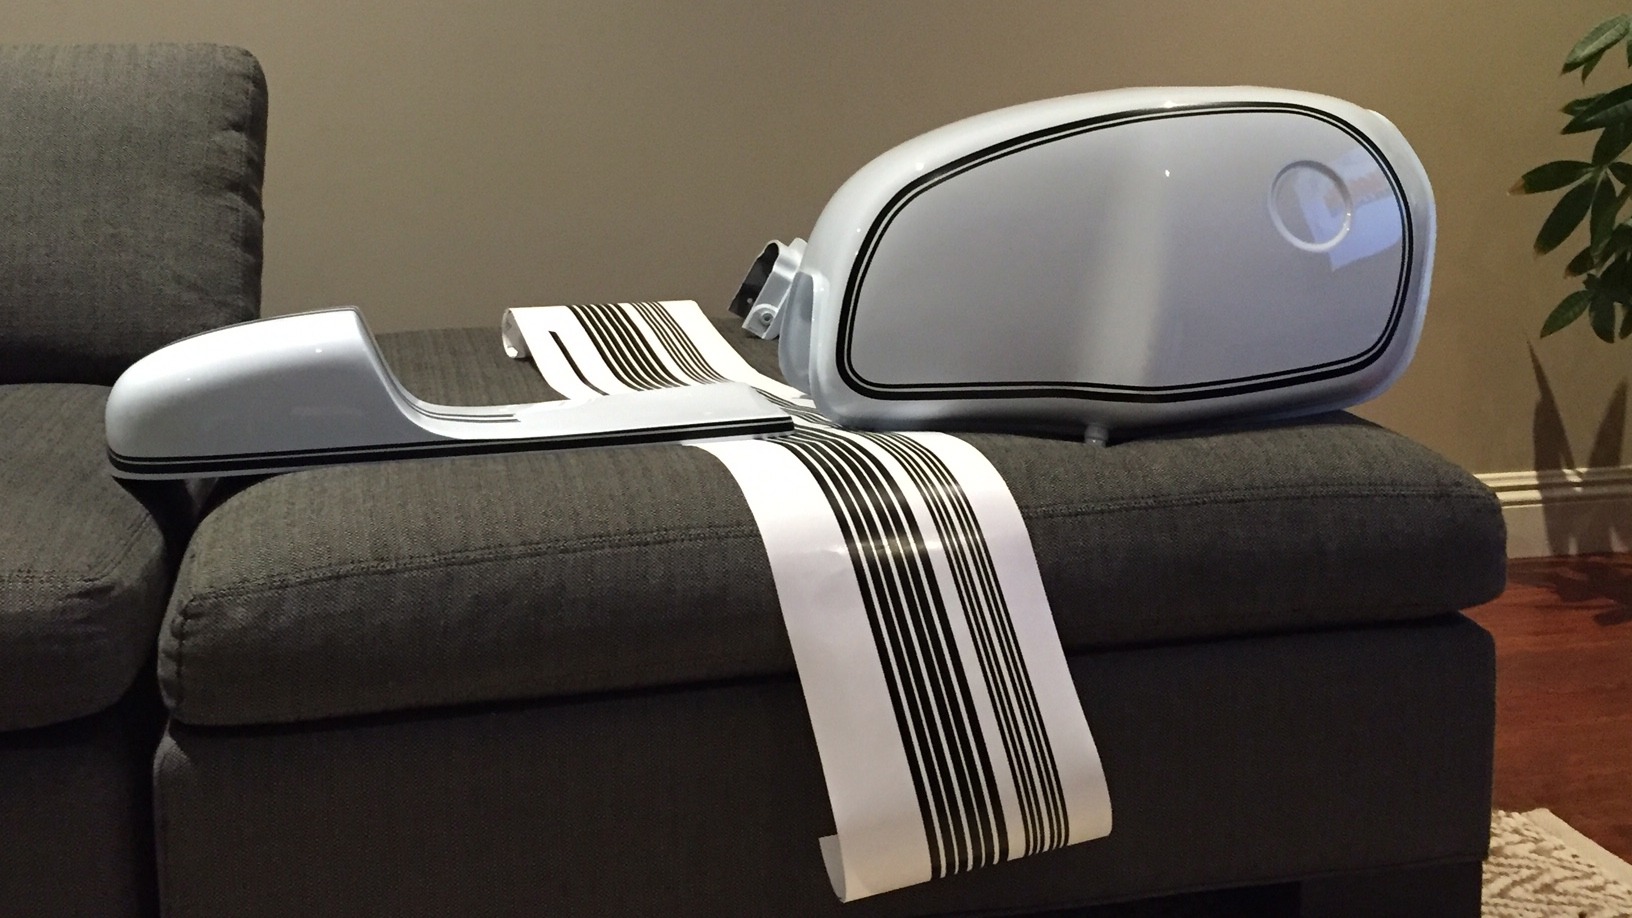
Pinstripe
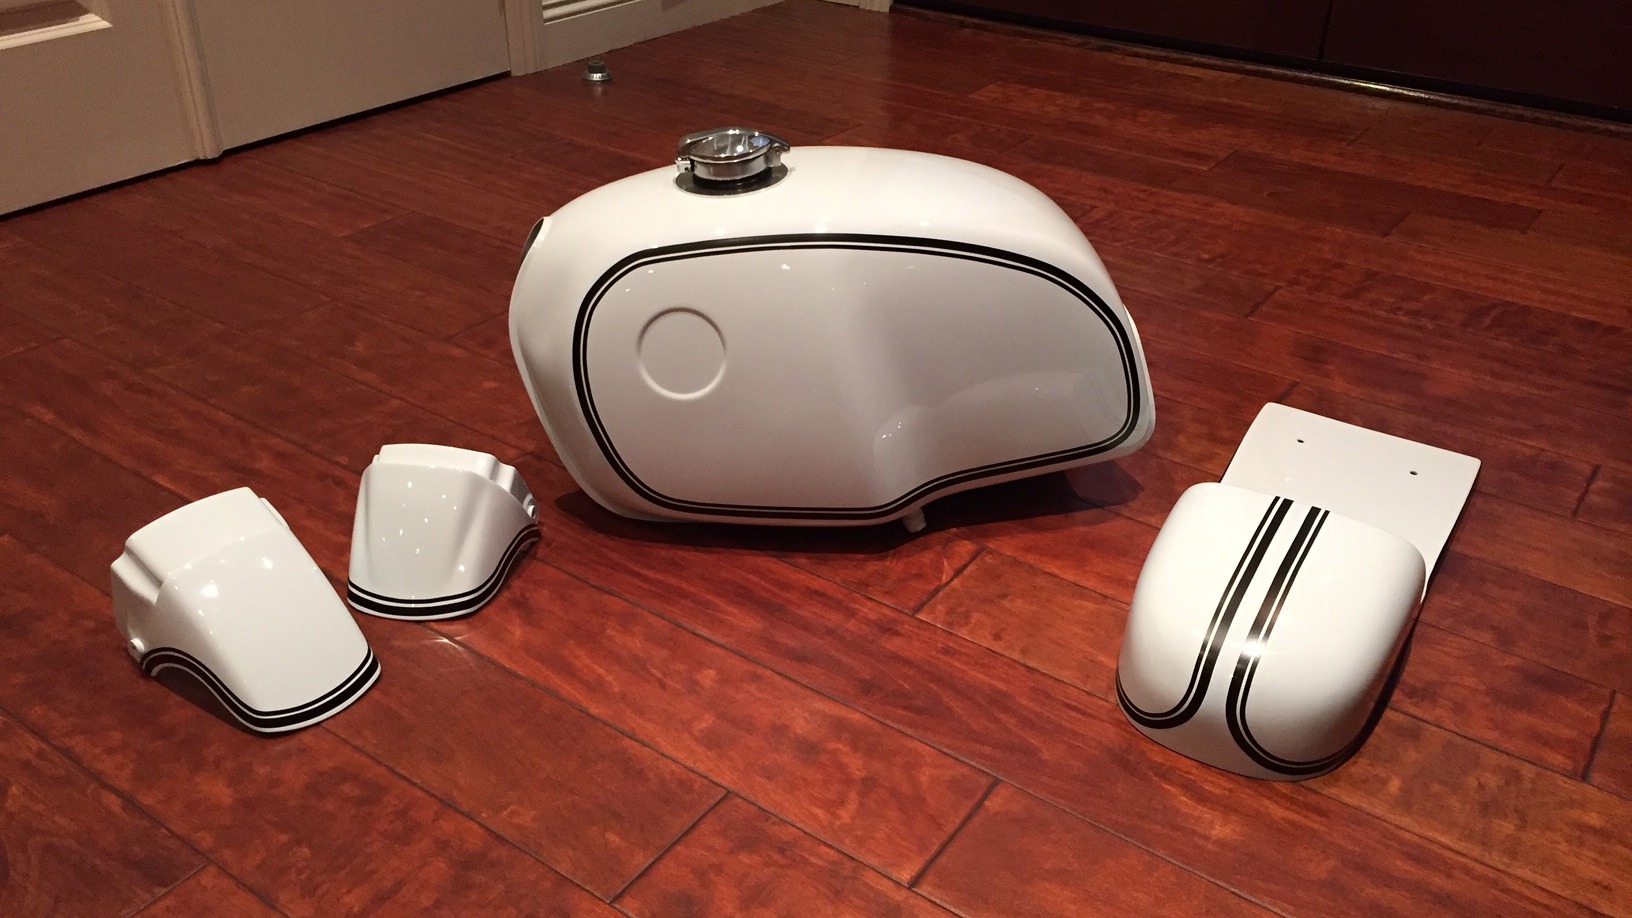
Tank, Seat & Fender with pinstripe
So the bike is pretty much done now minus a few very minor things to finish up. I am really happy with the way it came out and can’t thank Osh and the guys (Adam, Tex & Josh) over at Oshmo enough for all there help! Thanks so much gentlemen. I really appreciated all your help as I could not have done this without you. I will still post some final pictures once I get everything done but it’s ride-able now which I am pretty happy about. The final few things left to do is to make a cover for the oil cooler to neaten that up a bit. Fork tube top nuts, and we also want to make a nice billet housing for the number plate. Oh, I also need to connect some final things on the motogadget gauge and calibrate that too. Anyways, here is a pic of what the bike looks like all together ready to roll. Hope you like it as much as I do. Once those last few things are done it will be 100% finished and I’ll post some more detailed pictures of the finished bike.
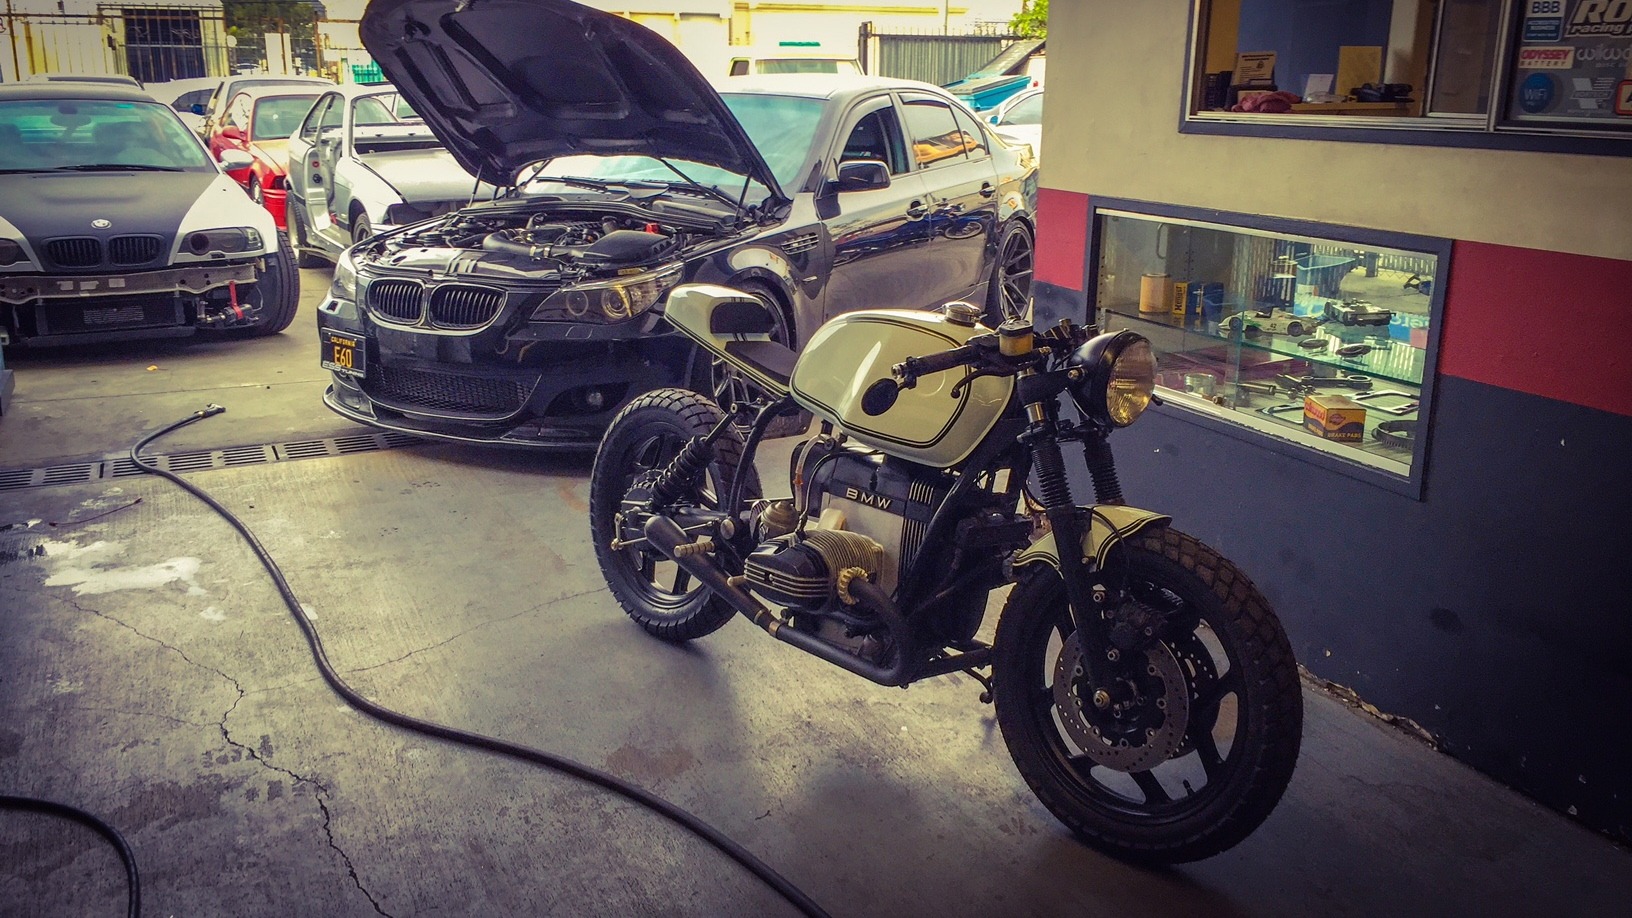
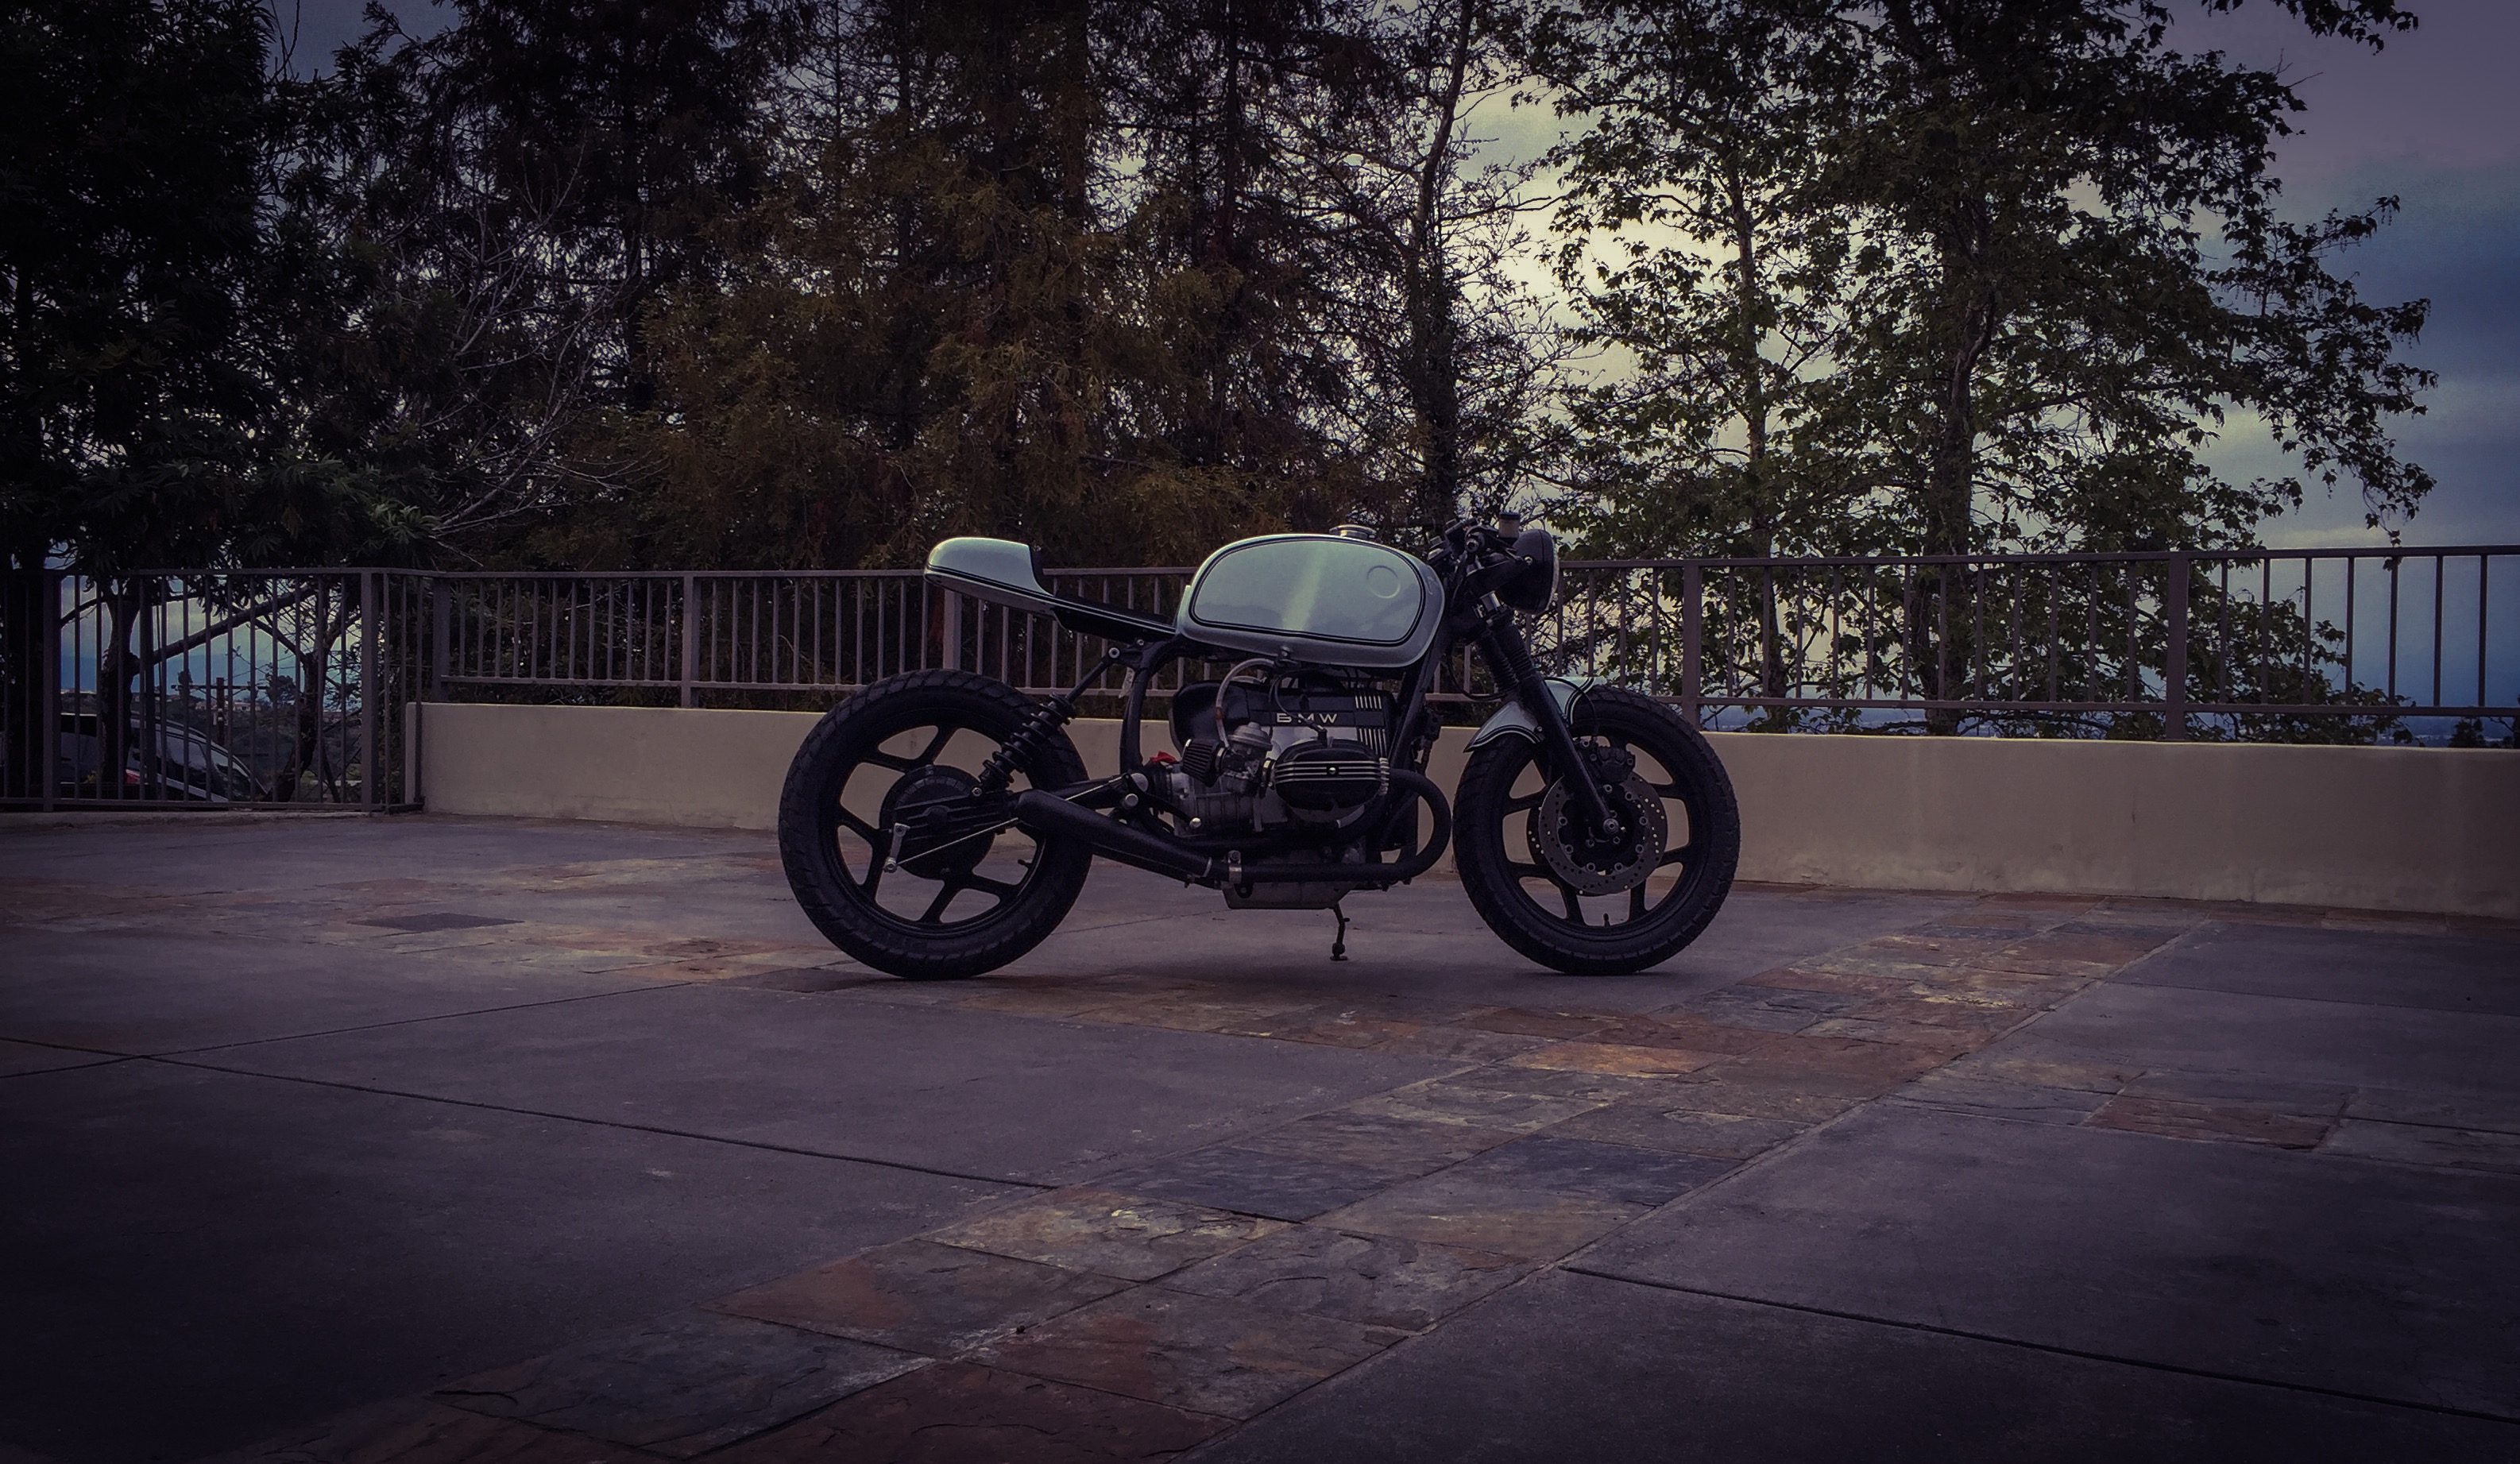
BMW R100RS Cafe Racer by Troydon
